Compiling the Canton

Once the four corners of the canton are assembled, they need to be stitched to the horizontal and vertical bars. This is a straightforward task, but worth double checking. I pinned and matched  the pieces to be sure that the horizontals would be the same length as the blue and white rectangles, and then checked the two sides against each other. The pieces aren’t always precisely even: the loose weave of the wool, the pull of the stitches, and the generous seam allowance can distort the pieces a bit as I work. 
Once the two sides were assembled, I needed to check again: did they match each other? Did they match the vertical red piece? And would they match the top half of the field? 

Reader, they did not. 

The two sides matched each other, but that was the best they were willing to do. 

This was not a great moment in flag-making history. 

What to do? Fortunately the answer is both period-correct and simple: Piece the vertical bar! As for the field, that was another matter.

Canton Quarters

Picture

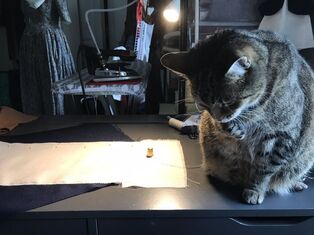
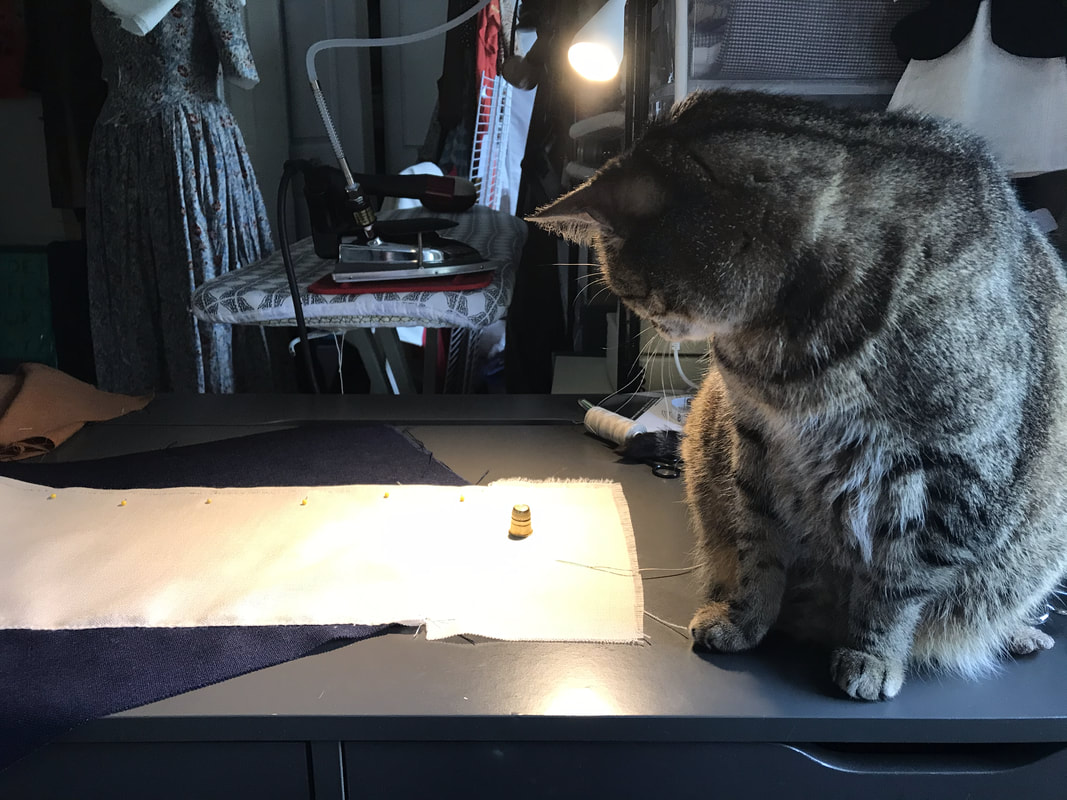
It’s a good thing I get a lot of help and supervision. And that my supervisor, Monty, knows clean paws are important in any undertaking. He has a window seat just to the right of my desk, and here he is preparing himself to lounge while providing close oversight of my work. We’ve spent many hours in this configuration: the sewing isn’t fast, but it isn’t really slow, either. It’s just…there

I don’t know if 18th century seamstresses and stitchers let their minds wander; you can’t wander too much, or you will make a mistake. But it is meditative work– at least until you reach a change in stage.


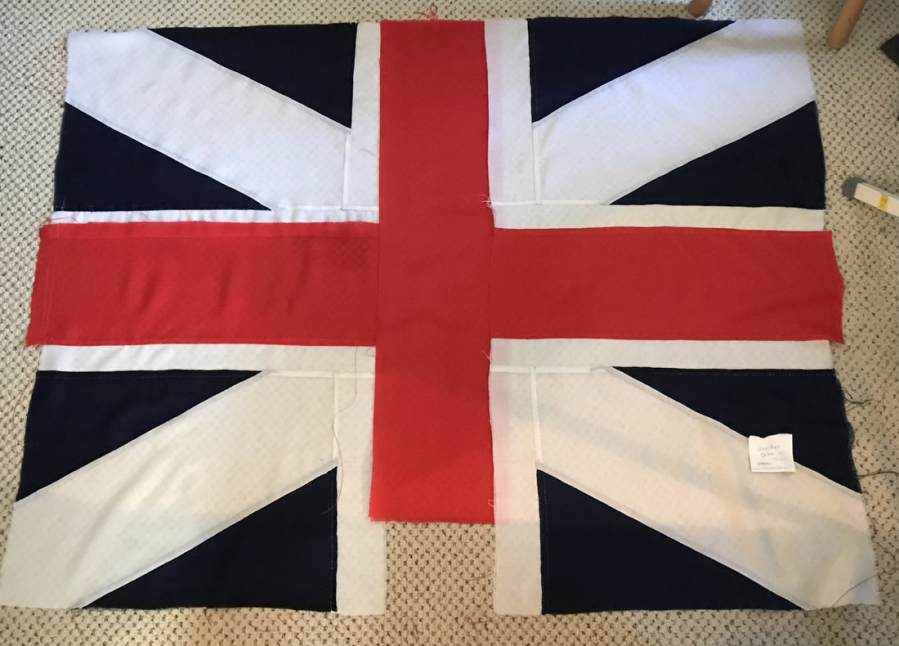
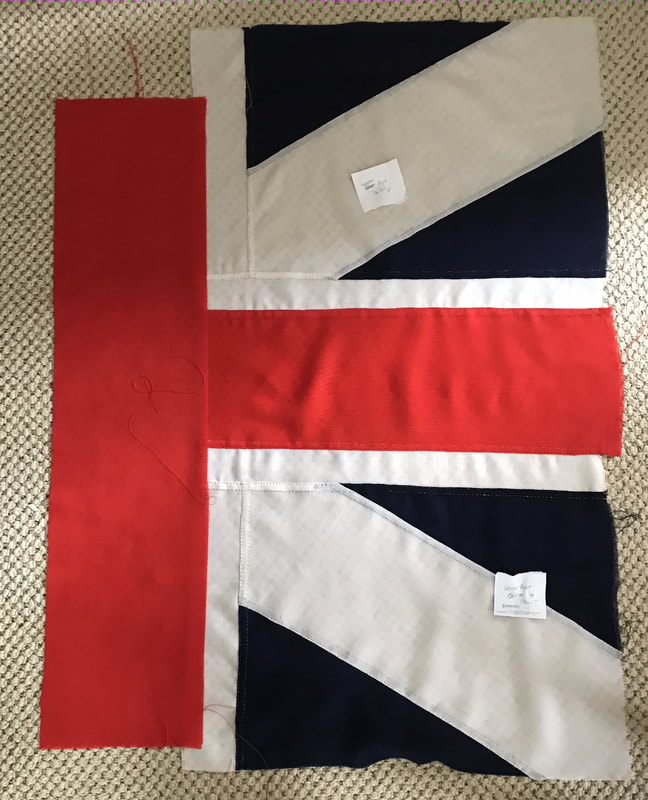
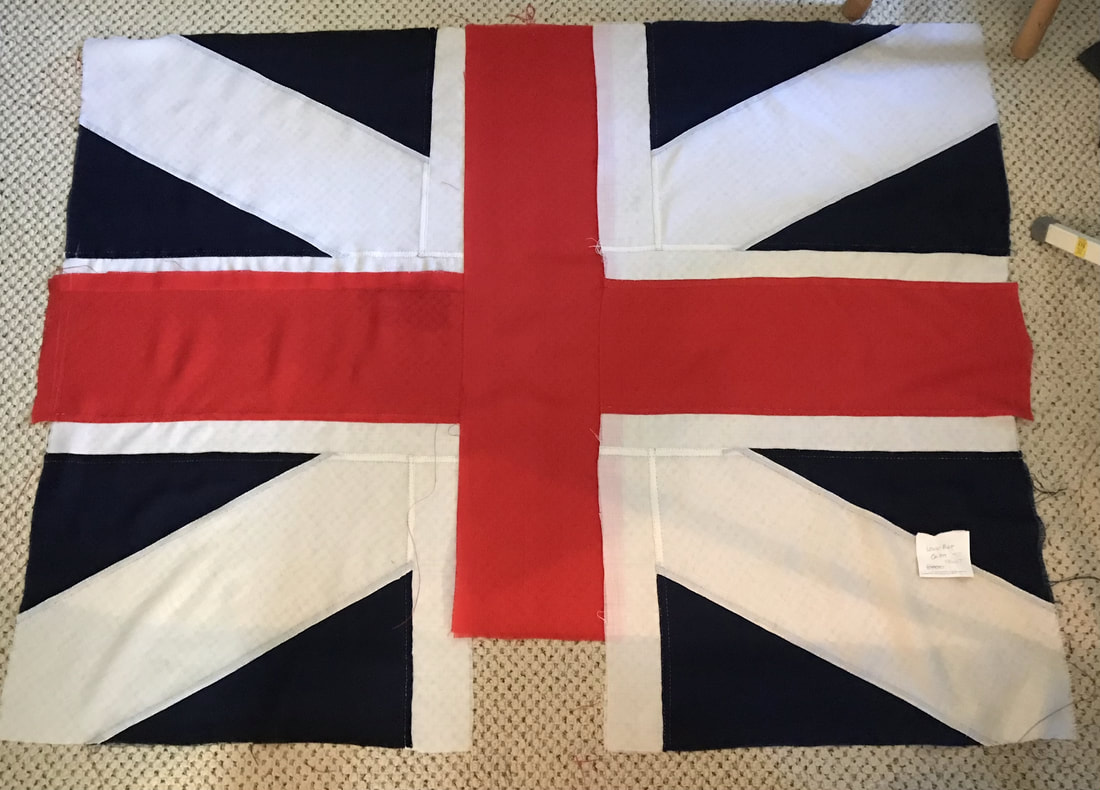
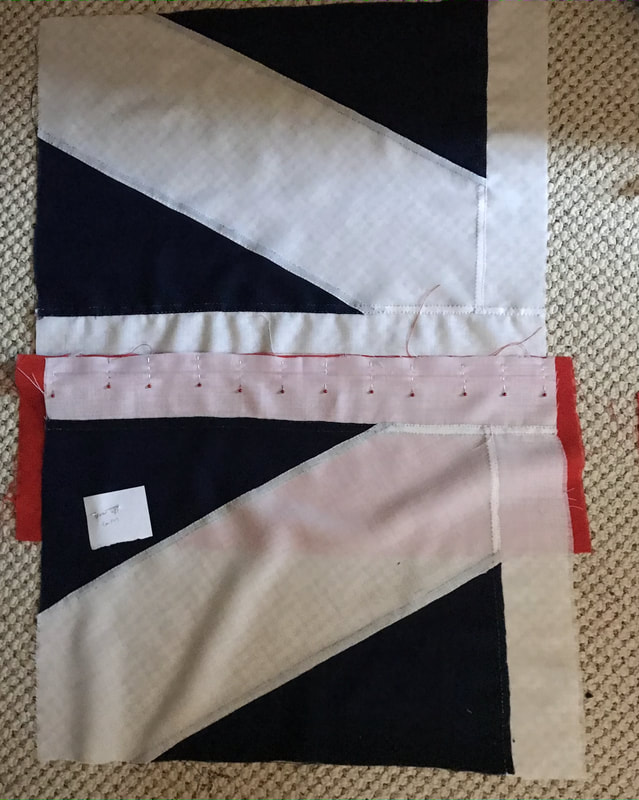
After the diagonal quarters are stitched and pressed– the blue triangles with white diagonals– the next step is to attach the white bars that outline these rectangles. This is when it really starts to look like a flag!
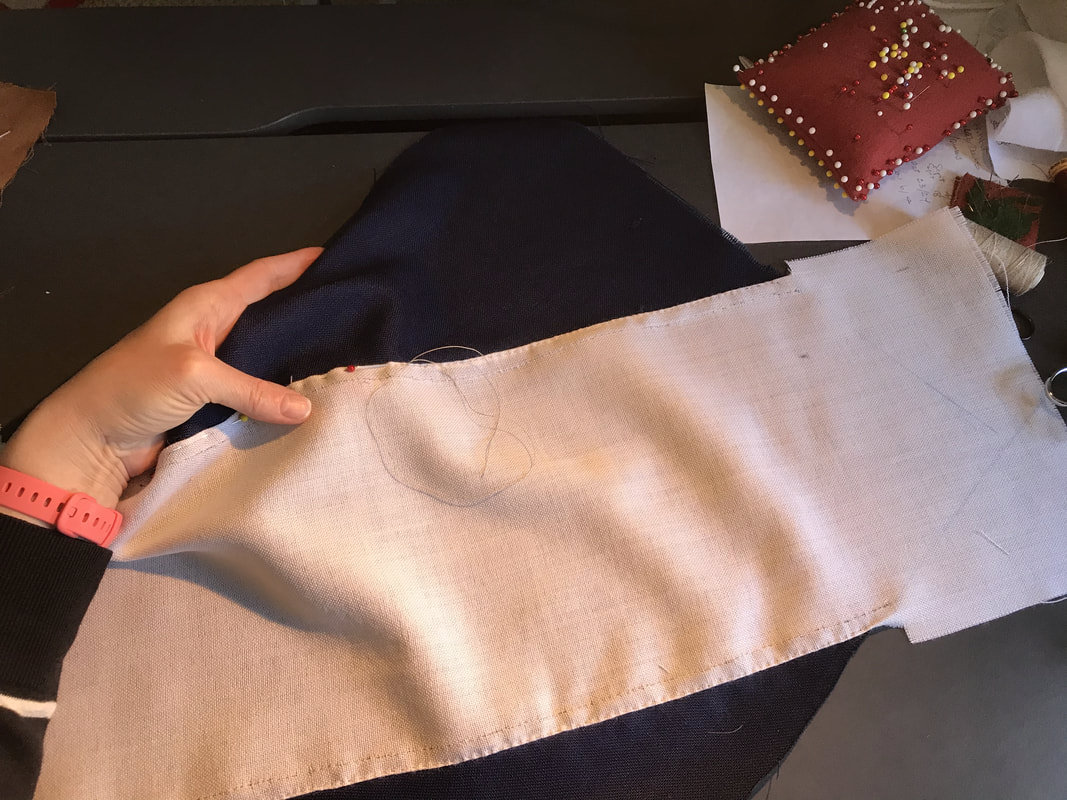
Once the bars are attached, they’re trimmed even with the blue and white block. Then it’s time to attach the red bars. With each step, and each new addition to the construction, I took the time to check how the components fit together. I also pressed each seam after it was sewn the first time, and again after it was felled. The loose weave of the bunting will pull as you sew, as the thicker linen thread tugs against the fuzzy wool fibers. I’ve found that since I sew right to left, it helps to tug the thread from left to right as I finish a run of stitches. 

The stitching itself is pretty simple: the entire flag is constructed using running stitches, and only running stitches. It’s a fast, simple stitch that does well enough to hold the fabric together, looks neat and even, and creates attractive patterns in the felled/Frenched seams.
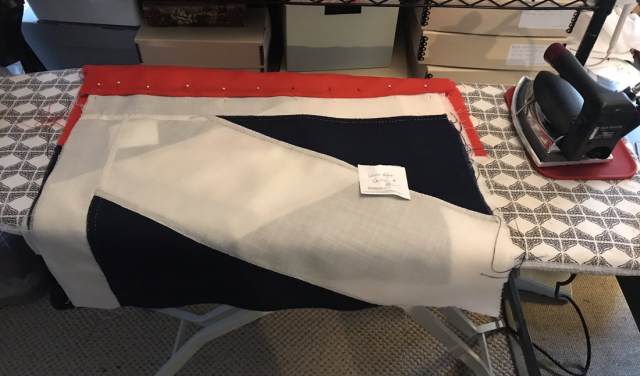
It’s really important to press as you go. That’s true for all sewing projects, but even more so for precision projects. While this flag is large enough to allow for some wiggle room, it needs to go together in order, and make a balanced, pleasing spectacle when it’s finished.
Even though I share the workroom with a collection of historic costumes and various accessories, I have the room for a Hot Steam gravity-fed iron. At 4.5 pounds, it’s a match for the bounciest, most obstreperous fabric. Bunting can be just that fabric. Each of these three colors– the white, the blue, and the red– have their own levels of springiness, with the white being both the fuzziest and the springiest. Pressing makes a big difference in terms of matching edges and smoothing the work. 

Section by Section

Picture

British flag, said to have been owned by Chief Tecumseh (Tecumtha/Tekamthi/Shooting Star/Tekoomse/The One Who Passes Across Intervening Space from One Point to Another), Shawnee, 1768-1813. National Museum of the American Indian, 23/730

Picture

I decided to start with the most manageable (smallest) part of this project first: the canton. Remember that this is a small union jack, and is itself comprised of four sections joined by horizontal and vertical bands. In the Tecumseh flag at the NMAI (above), the horizontal red bar is continuous. In this flag, it will be the vertical bar (see image at left). 

For all that I put the pieces into Illustrator and move them around, I still find hand drawing important to really understanding a piece and the process I need to make it. Thankfully, the Museum’s Gallery Interpretation Manager, who is overseeing this project, had a diagram and explanation to help me understand and construct the four blue-and-white sections of the canton. 


To start, I had to decide where to place the blue triangle on what will be the white diagonal, calculating for the seam allowance and the trimming required to square up the pieces. It wasn’t all that hard, considering the seam allowances and the generous cut that put the finished piece measurement down the center of the large white rectangle. (Also, three cheers for not being cut on the bias!)
From the initial layout to the finished stitching took about four days working around my day job schedule. There’s no good way for me to calculate how long this would have taken in the 18th century, or how long it’s really taking me. I’m not recording my hours, and I’m not sewing every day. The point of the exercise (aside from making an enormous flag) is the assembly process.

Unpacking the True Colours Flag Project Package

PictureWe are making No. 5 in this plate from British Flags, Their Early History, and Their Development at Sea… by William Perrin (Cambridge University Press, 1922)

The Museum of the American Revolution asked me to be part of their True Colours Flag Project and I readily agreed, happy to build on the research I’d done for the Flowers’ Artificers program a couple of years ago. I opted to do the British Ensign, since I’d looked at an original early 19th century version at the National Museum of the American Indian. Making this full-size, hand-sewn ensign for a museum is a challenge. From the careful marking of seam allowances to steam slightly puckered seams to getting the layout just right, this project keeps me thinking.

The ensign we’ll be stitching is figure 5 in the plate at left. The first question you might have is, why does this flag look the way it does? Why is there a Union Jack (that doesn’t look like a Union Jack) on a red field? Shouldn’t it be blue, like Tecumseh’s flag? Or just a Union Jack? Happily, the Museum supplied documentation. 

From William Falconer’s Universal Dictionary of the Marine (1769):
Ensign: “a large standard, or banner, hoisted on a long pole erected over the poop, and called the ensign-staff. The ensign is used to distinguish the ships of different nations from each other, as also to characterise the different squadrons of the navy. The British ensign in ships of war is known by a double cross, viz. that of St. George and St. Andrew, formed into an union, upon a field which is either red, white, or blue.”

In that definition, we have the double cross, St. George (the red vertical/horizontal cross) and St. Andrew (the white diagonal cross) that form the core components of the canton of the British ensign I’m making. The red field was seen as early as 1707, and the layered crosses were the standard from the union flag of 1606 and 1707.  This red-fielded British ensign flag was for use outside home waters, which did not include the North American colonies. (This attitude– that the American colonies were not “home,” and its inhabitants were not “British,” was part of what fueled the Revolution.)


PictureCarmine, Joseph, “Tableau de tous les pavillons qu l’on arbore sur les vaisseaux dand les quatre parties du monde” (1781). Prints, Drawings and Watercolors from the Anne S.K. Brown Military Collection. Brown Digital Repository. Brown University Library.

The image at left, from 1781, provides a good overview of the range of flags seen in the latter years of the American Revolution. The one I’m making is visible in the second row, fourth from the left (enlarge the image on the Brown site).

​Satisfied that I had enough of an understanding to start making, I unpacked the box.