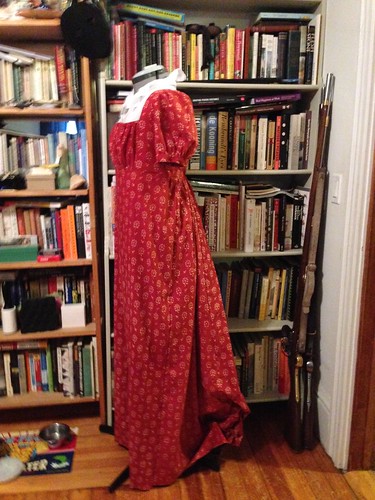
This was an easy gown to build up from a shoulder and back piece, once I did the math to scale it up to my size, and with the generous help of Sew 18th Century, who gave me the sleeve pattern I started from. This isn’t a drawstring sleeve, so the gown is not an exact copy of the GCV&M gown. I’m OK with that, since–as far as I can tell– it fits. It may be a little large, but that’s what an apron or sash is for. No, I don’t know when I’ll get the apron made.
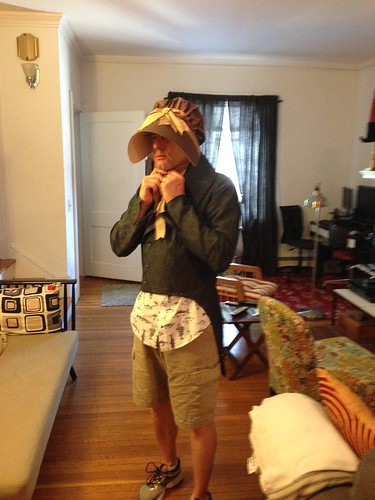
Mr S saves time by modeling *both* coat and new bonnet
There should also be a coat, and many bonnets.
Mr S’s coat seems to be working, and is now faced on the right side, leaving the left, the sleeves, and just a few buttons. He was excited about helping with button manufactory until he realized that the largest tool required was patience. But what are facings and buttons and buttons holes, among friends?
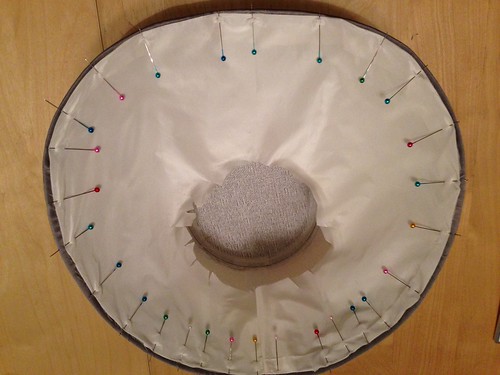
Bonnet Number I Forget
Another bonnet is in the works- can you ever have too many? I think not. It is in the prickly phase, while I work this evening on taking apart a waistcoat that must be altered for the Young Mister for this weekend at Stony Point. Bouncing between 1779 New York and 1812 Salem, when one is also considering 1765 and preparing for 1800 can make telling time a little challenging!
So who else was wondering what Mr Cooke meant by Lapsley and Queen? Wonder no longer, frustrated toile-makers and cuff-detail mavens, it is available on the vast interwebs of knowledge.
Go! Download the PDF and immerse yourself in an 1809 American tailors’ manual published in Philadelphia, with Eight Appropriate Engravings. We may note that there was excited squeaking when I located this, altering my nearest companions to A FIND, and letting them know that yes, I am back, and probably will continue to squeak on and off for some time to come.
From the introduction:
“…there is no situation more awkward than that of a TAYLOR who has cut and mutilated his own or his employer’s Cloth which will frequently be the case when a man has nothing to depend upon but the poor resource of chance or hope, that his clothes will fit.”
The Taylors’ Instructor
I can tell from the text on Coats that my subjects will have to be further apprehended and measured, even against their will, but the results will undoubtedly be better than before.
Happy Reading, Historical Sewing Enthusiasts, and a big thank you and hat tip to Henry Cooke for the reference.
Whatever will those ‘gentlemen’ wear? Coats and waistcoats, and thank goodness I finished the Young Mr’s shirt and his farm trousers still fit. He has promised to be a very annoying runaway apprentice, and I have promised to chase him from the miilliners’ shop with a broom, but before any of that can happen, ‘gentlemen’ will need new waistcoats and coats.
I got out Fitting and Proper, and took a look at that coatee pattern. It’s a little earlier than I want, so I also looked at The Cut of Men’s Clothes. In truth, I did not draft up a pattern from scratch. I had a commercially available pattern that I’d purchased when it first came out, one that purported to be historically correct, researched, and came from a reputable company.
Toile number 3. One more fitting to go…
Well…so I guess the issue with the pattern is that the gentlemen in my household are not of the typically boxy build one may see streaming past tourist sites in Boston, or even lumbering across a field in historical uniforms. My gentlemen are built for the Light Infantry, so when I finished the first muslin (or toile) of the coat and fitted it to Mr S, I removed inches–yes, inches–of material along the side and center back.
I suspected this would be necessary when I first traced the pattern pieces, but went ahead because you really have to mark up a toile on the body in question to get the fit correct. Maybe it’s just this many toiles because I’m inexperienced.
Center back pattern, version 3
In any case, the armscye and upper shoulder seam were re-drafted, the drape and sweep of the tails, the width of both side and center tails, the side seam of the body, and both seams on the center back piece, which originally had a flat center back seam (I ask you!), a shorter shoulder seam, and a different side seam.
I’ve left the tail length short and after toile number 4, will mark the final tail length for both gentlemen (luckily we are at a sweet spot where this fits Mr S well and the Young Mr passably, so that with minor adjustments for the lad, a second coat could be made at some time).
I still don’t believe the tail pleats entirely, but lack the time this week to draw them from an original. They still seem too wide, though I have taken an inch or more off every tail edge.
The last thing to really wrangle, after bringing the under arm seam back up, is the sleeve; the upper arm is too long, reflecting the fact that the basis for this sleeve is my Spencer sleeve, which traces its origin to Mr Cooke’s linen suit coat pattern. Both Mr S and the Young Mr have shorter humeri and femora, which put the elbow crook on their forearms which looked rather silly and uncomfortable.
In the end, the pattern I had proved useful only in saving me from the math of enlarging a pattern from a book– it got me full-scale immediately, so that I could proceed to fitting–but this project will, when it finished, reflect multiple fittings and four pattern drafts.
If there is a moral to this story, it is this: Almost nothing will fit straight out of the book or the envelope, so leave plenty of time for catching your subject and fitting muslins.
Another moral may be, “Buy muslin in bulk,” which I did thanks to a clearance sale. I’ve already used 2 yards off the bolt I bought Saturday afternoon.
Like Sew 18th Century, I’ve been enjoying preparing for the August 2nd event in Salem.
I’ve not ventured too much into Regency bonnets, or into straw, but I did flirt with a 1794 bonnet. Now I’ve got hats on the brain, and the time to fully indulge my whimsy (though it runs out Sunday).
From the fashion plates, one would almost say, Anything Goes. Of course it doesn’t, really, but you can get a sense of the exuberance of bonnet trimmings in the illustrations, and the lavish use of ribbons, bows, feathers and flowers.
Not all straw bonnets were lined– in fact, they often weren’t– but the lining protects the straw and the wearer’s face, and finishes this off in a way I like. Pleating in my condition was, ah, challenging, but I figure it was good for my brain to have the exercise. The lining in the brim is white taffeta, but I used white linen in the main crown or tip portion of the bonnet. Instead of bagging the lining, or trying to fit it, I mimicked what Mr B does in the hats he’s made for us. The gathered linen closes with a drawstring and required slightly less effort to fit into the hat.
The velvet ribbons came from Lunarain Designs on Etsy, the ties are taffeta ribbon from Taylor’s Etsy shop, and the straw bonnet form came from Regency Austentation. While the finish work takes time and concentration, I do enjoy both making up and trimming bonnets, and look forward to several more.


You must be logged in to post a comment.