Put a Lid on It!

Yes, I have a bonnet problem.

I don’t know how I find all the sites and blogs I find, but I came across another interesting one today while waiting for data to load: An American Seamstress, finishing a waistcoat and struggling with a bonnet.

Have I fought with bonnets! I love bonnets, and I come by this honestly: my grandmother had a shoes thing and a hat thing, and the hat thing came with “hat face,” a particularly foxy-grandma face she make when trying on hats. So while I thought I ought to write about tent research, or the cool ad I found for a shop in Newport selling dry goods and haberdashery, now I think the heck with all that. Bonnets!

Here’s what I’ve learned, and what I’ve used. (for all images, click for a larger version)

Buckram. What they sell at Jo-Ann’s is not what you want. It is too thin to be much use unless you glue it to chip board (today’s equivalent of paste board). For more on chip board, see Kannik’s Korner on bonnets. I buy mine at Utrecht because  they’re in town. Dick Blick has it, buy the single ply.

Better buckram. I ordered a kit from Timely Tresses just to get my hands on a proven pattern and real millinery supplies. They’re hard to find in real life, and ordering online when you can’t touch stuff is hard. I did find some very sturdy buckram locally at Ryco, a mill store selling quilting fabrics, and lots of other stuff.

Millinery wire. Accept no substitutes in wire. Just trust me. I have successfully used cane originally purchased for stays. I had left overs, it curves, it worked when stitched to buckram.

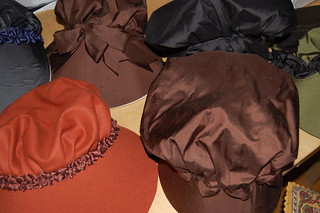
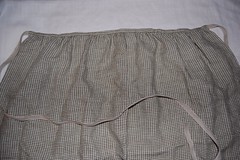
Silk. The difference between taffeta and dupioni is visible and tangible (dupioni left, taffeta right). Use taffeta. I don’t always, and I still like my dupioni bonnet but most of why it works is its size and the fact that my impression is middling-trending-lower. (And saucy. I sometimes think a raised eyebrow and a loud handkerchief can make up for a lot, especially crooked petticoat hems.) But the runaway ads include stuff (wool) and linen bonnets, so read them closely for ideas.

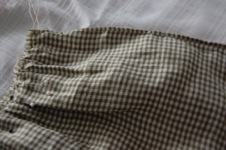
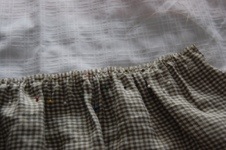
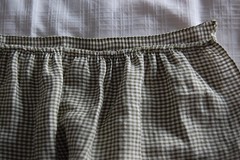
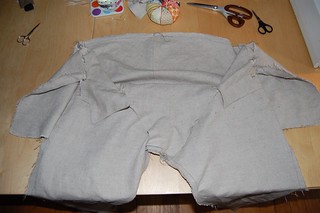
Make a muslin first: we all know, it applies here, too. For cauls, bigger is usually better for the 18th century. For some of the bonnets, I use the lighter weight buckram to sew an insert between the caul and the lining to keep the crown more erect and poufy. At the end of the day, you might deflate, but why should your fabulous bonnet?

Trim it up. I often use strips of self fabric folded over and looped to make “bows,” because that’s how the Williamsburg bonnet looks to me. I’ve also used ribbon, so this: use silk. Less silk is better than more poly, really really, it will handle and feel and look better, and so will you. I use Burnley & Trowbridge  and Wm Booth Draper silk ribbons, and bought some from a sutler who sold herbs and hand-dyed silk ribbon.

My next bonnet will be a black silk lined with red with the red-hand dyed silk ribbon trim, based on a runaway ad. Will it be done by OSV? Probably not, but once you have it down, a nice hand-sewn bonnet is about a day’s work.

Fine Sewing

20120720-211927.jpgI made the time today to finish something I’d started back in June at Dress U. I was fortunate enough to be in Sharon Burnston’s Fine Sewing class, and got started on an apron. Even before I started reenacting and sewing 18th century clothes for myself, I admired Sharon Burnston’s work and the fantastic Fitting and Proper, which I ordered for the library at work several years ago. Ms. Burnston is the living definition of a stitch counter or thread counter in the very best way, and here’s why: she counts threads, and that counts.

20120720-212029.jpgOne of the key points I learned was the relationship between the threads and the stitches– essentially 2 x 2 for this project. Using a traditional New England fabric makes it easy–with a linen check, you can just about “cut on dotted line” and know you’re set.

We started by hemming each side of the apron for a couple of inches, just to get started. Stitch two over, in little crosses. Then, at the top of the rectangle, we gathered. The gathers were the illuminating part: Stroke gathers. Using the check as a guide, we ran even gathering stitches twice along the top.

20120720-212120.jpg I used the every-other check pattern, so the gathers were small. Ms. Burnston suggested that the best way to think of stroke gathering was as proto-smocking, and to make an evenly spaced running stitch with cotton quilting thread. The top row of gathers will be buried in the waistband, the bottom row gets pulled. Just make sure the replicate the top row exactly!

When you pull the threads, the fabric makes lovely even gathers. Pulling them down with a needle or pin–stroking them–makes them lie down even more evenly and nicely.

Then its on to the waistband and finishing with linen tape ties.

So, at last, finished object, green and white check. Along the Connecticut River valley, the predominate check was blue and white, but I look at this and think, maybe that’s what they mean by “bad color” in the runway ads– a kind of end-of-vat green.

ETA: Thread! I forgot the thread part. Fine stitches are achieved by using a fine needle and thread–obvious, right? Size 12 needles, if they suit your hands, and a fine linen thread. When I got home, I used 80/2 white linen thread. It worked really well, with infrequent breaks. Use plenty of beeswax, and the thread will break far less frequently–if at all–especially if you use shorter lengths. Since you need to run the gathering thread the entire width of the linen, cotton or even cotton/poly is best used for the gathers. My hands are really big, but even so I use fine quilting needles from England and manage pretty small stitches. I’ve used John James and Richard Hemming & Sons, but both had to be ordered online. Dritz applique needles can be found at Jo-Ann, if you’re in a hurry, or, like me, discover all your favorite needles are bent, blunt, or stuck in a crack in the floorboards…

Hot Mess

Hand sewn, except for basting for fitting

Overalls: the devil’s clothing item, even more evil than the worst multi-part replica sleeve  (that’s right sleeves, I mean you!). First there are the fiddly fall bits. Then there is the question of overall inseam length, then the shape of the leg must match the contours of the wearer, and lest we forget, the evil tongue. All of this is followed by 15-20 buttonholes.

Why did Mr. S not join a kilted regiment? Pleats and hems, easy-peasy. Overalls, not so much. The current overall score is Overalls 1, KittyCalash, 0, Draw, 1. The current pair have conquered me, but I may yet prevail but turning them into breeches with a swift amputation of the lower extremity. The first pair I made were finally overcome last fall with a new tongue piece, but they are too baggy to be correct. We’ll call that a draw.

Many moving parts

Fitting the beasts is awful, because so much sewing has to be done up at the waist, but somehow I will have to come up with a muslin and drape the legs to the subject. Once that is done, I can make a more permanent pattern that accounts for shorter than average femurs, larger than average calves, long shins, high arches, and small feet. (Most of the 2nd Helping Regiment guys have very small feet. The Young Mr is the exception, with his 12s. Obviously, his shoes will be the first to be eaten on a march to Quebec: more leather, better broth.)

Then there is the question of a tent. Locally, a very fine hemp linen “other ranks” tent has been made, with ash tent pegs and hewn tent poles. The Young Mr and I made up a scale model last night (sans bell) to test the dimensions we worked out using math, Once school is out, all math must be real-world tested. From this, I began calculating yardage requirements, based on 57″ wide hemp linen available from a few sources. At $17/yard, it looks like $187 for a tent without a floor or mudflaps or a bell. 11 yards! That is a lot of fabric, and a lot of sewing.

Tiny little tent!

Perhaps tonight we’ll try out a slightly smaller version, with a bell. If we start this fall, we might have a tent done for next season…if the guys would only learn to sew!

Making It

One of the most satisfying things about reenacting is that you get to make things. Not just can make things, but must.

Do you want a gown to wear to an event? Gotta make one.

Want the gown to fit properly? Better make stays.

Everyone in our Regiment makes things, and not just for reenacting: there’s a toy sculptor, a machinist, a gunsmith, a diorama and replica maker, a photographer among the ranks.

There are two things I most enjoy about reenacting: one is making the clothing. As a refugee from art school (I escaped with a Master’s degree and no teaching prospects), I need to make things. If I wasn’t sewing, I’d be painting, and Robert Gamblin paints and good quality canvas aren’t cheap.

The other thing I enjoy is cooking, and being able to cook for a crowd, with limitations. When I plan for a party or family celebration, anything goes. Thai, Indian, English, Swedish, anything. For reenacting, the food needs to be both period- and class- appropriate as well as seasonally appropriate. And sometimes the best results come from limiting yourself.

One of the favorite recipes I’ve made for the Second Helping Regiment is a Gingerbread Cake recorded by a local family in a 1928 family cookbook. The family has been in Rhode Island since 1637, and were ardent patriots in the American Revolution. I have no qualms about using their 1928 recipe, since that is only the year in which it was written down—we don’t know how long they’d been making this.

Ingredients

¼ cup butter
1 cup sugar
1 tsp baking soda
1 cup boiling water
[last two ingredients: pour over butter and stir]
To the above mixture add ¾ cup molasses

Sift into the liquid mixture:
1 ½ cup flour
½ tsp ginger
1 tsp cinnamon
pinch of salt

Drop in one unbeaten egg. Beat whole with eggbeater and bake in slow over for about half an hour.

I use an 8 x 11.5 x 2 inch glass pan and bake at 350 for a little more than 30 minutes; my oven is always a little slow, being a cheap landlord-installed electric affair.