Le retour au Baltimore, 1824-2024

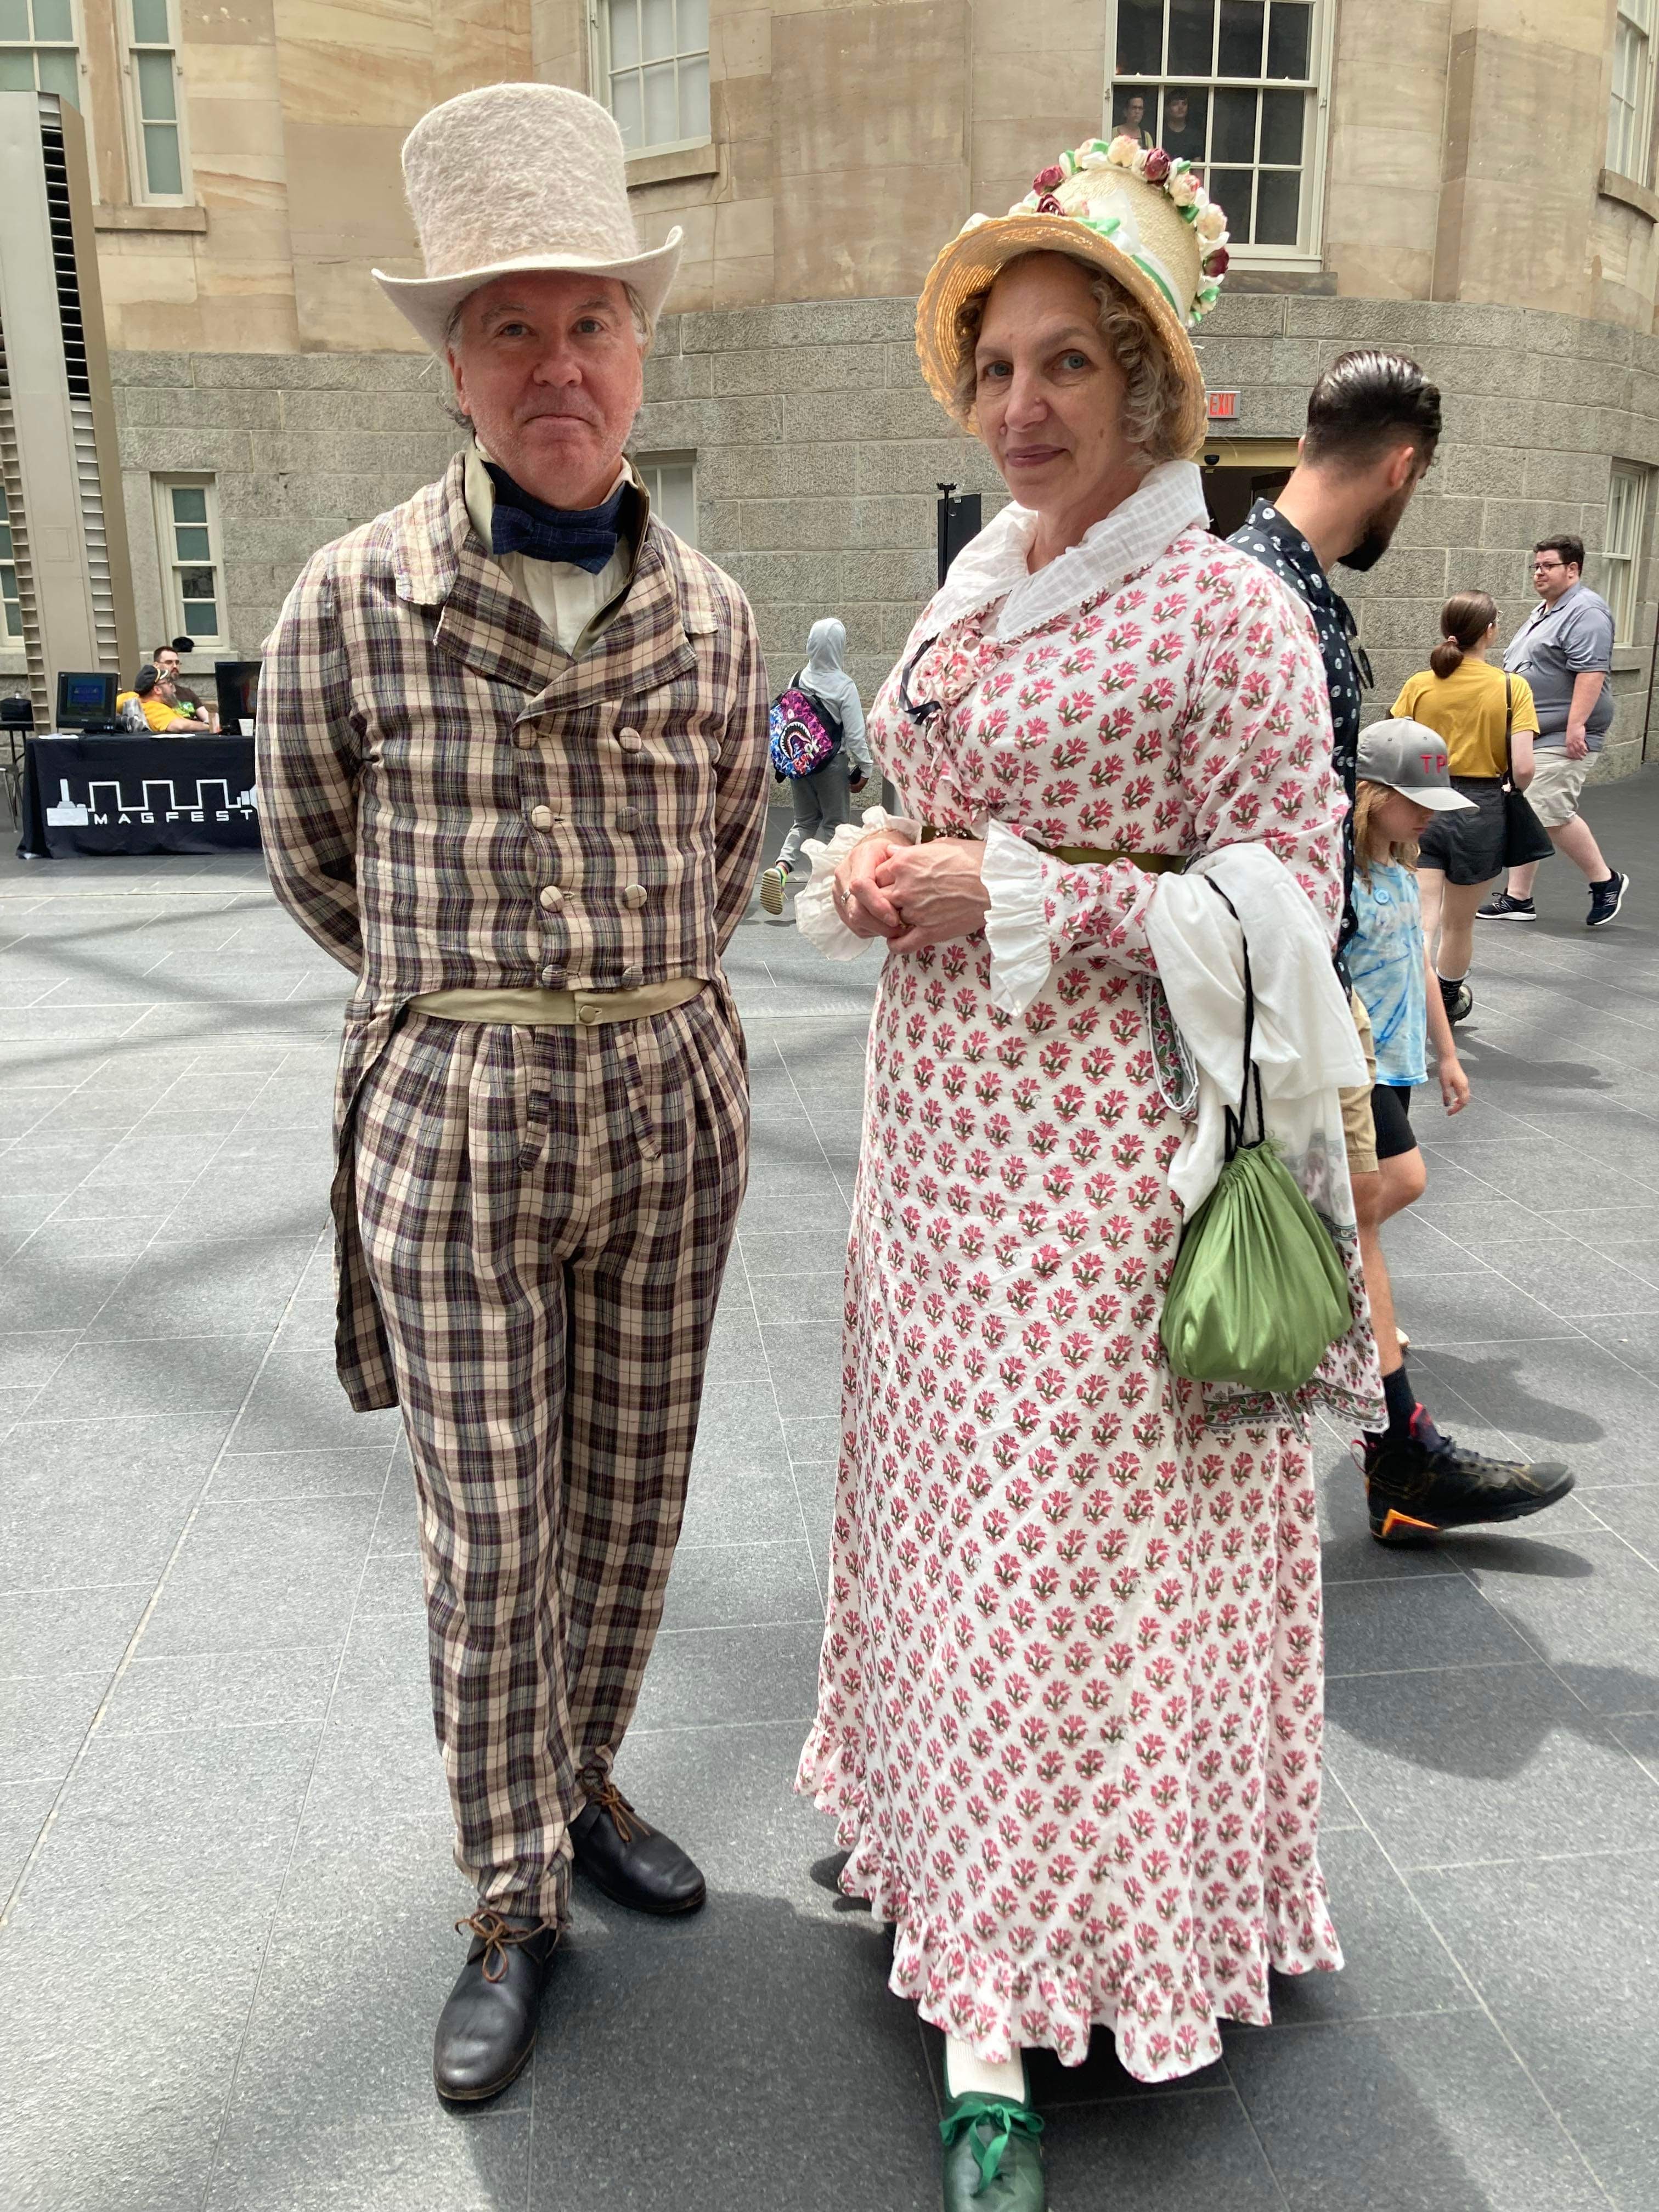
The Marquis came back (or his analog did, at least) last October 7, and we were there.

two men in 1820s clothing stand in front of Baltimore harbor. They are wearing tall hats and long coats. The man on the left stands astride a red velocipede.
Hell’s Dandies at Fort McHenry

Way back in January 2024, Mr. K and I were asked by the Museum of the American Revolution if we would be interested in joining them (and their tents) at Fort McHenry to celebrate the Lafayette Centennial in Baltimore at Fort McHenry. Of course, I said yes, figuring that 10 months or so was ample time to prepare. 

a blue denim coat with a very worn black velvet collar
The coat, posted on social media in February 2021

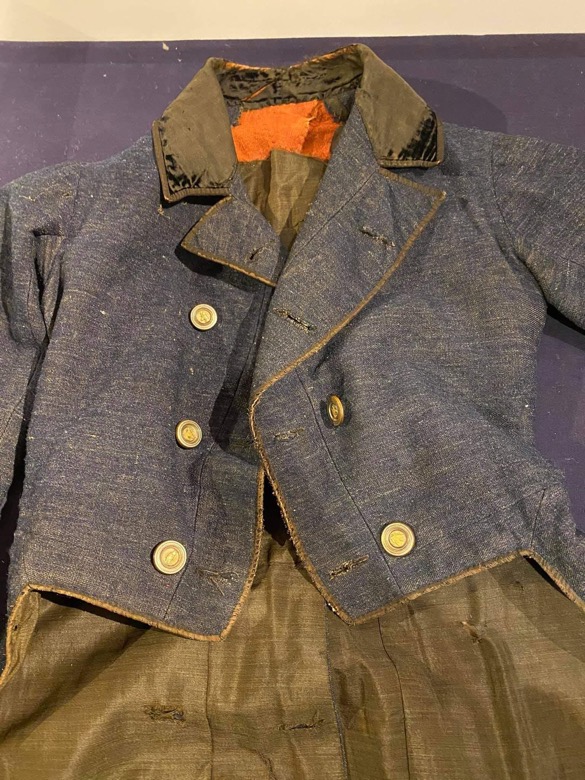
Reader, I began a dress in a workshop in May. I made another dress to wear and finished it the evening before the event. Why am I like this? (ADHD, I think.) Mr. K needed a new coat, so I patterned one for him to stitch from an older Burley & Trowbridge homespun. In 2021, someone (Genesee Country Village & Museum, maybe?) posted a fabulous image of a coat and waistcoat, which was the primary inspiration, along with coats including a blue broadcloth number at the DAR seen in the An Agreeable Tyrant exhibit. (Sadly, not in the online gallery.)

a purple cotton bodice back on a female mannequin, with a frothy chemisette with a pointy collar underneath
In progress: bodice back with piping in place

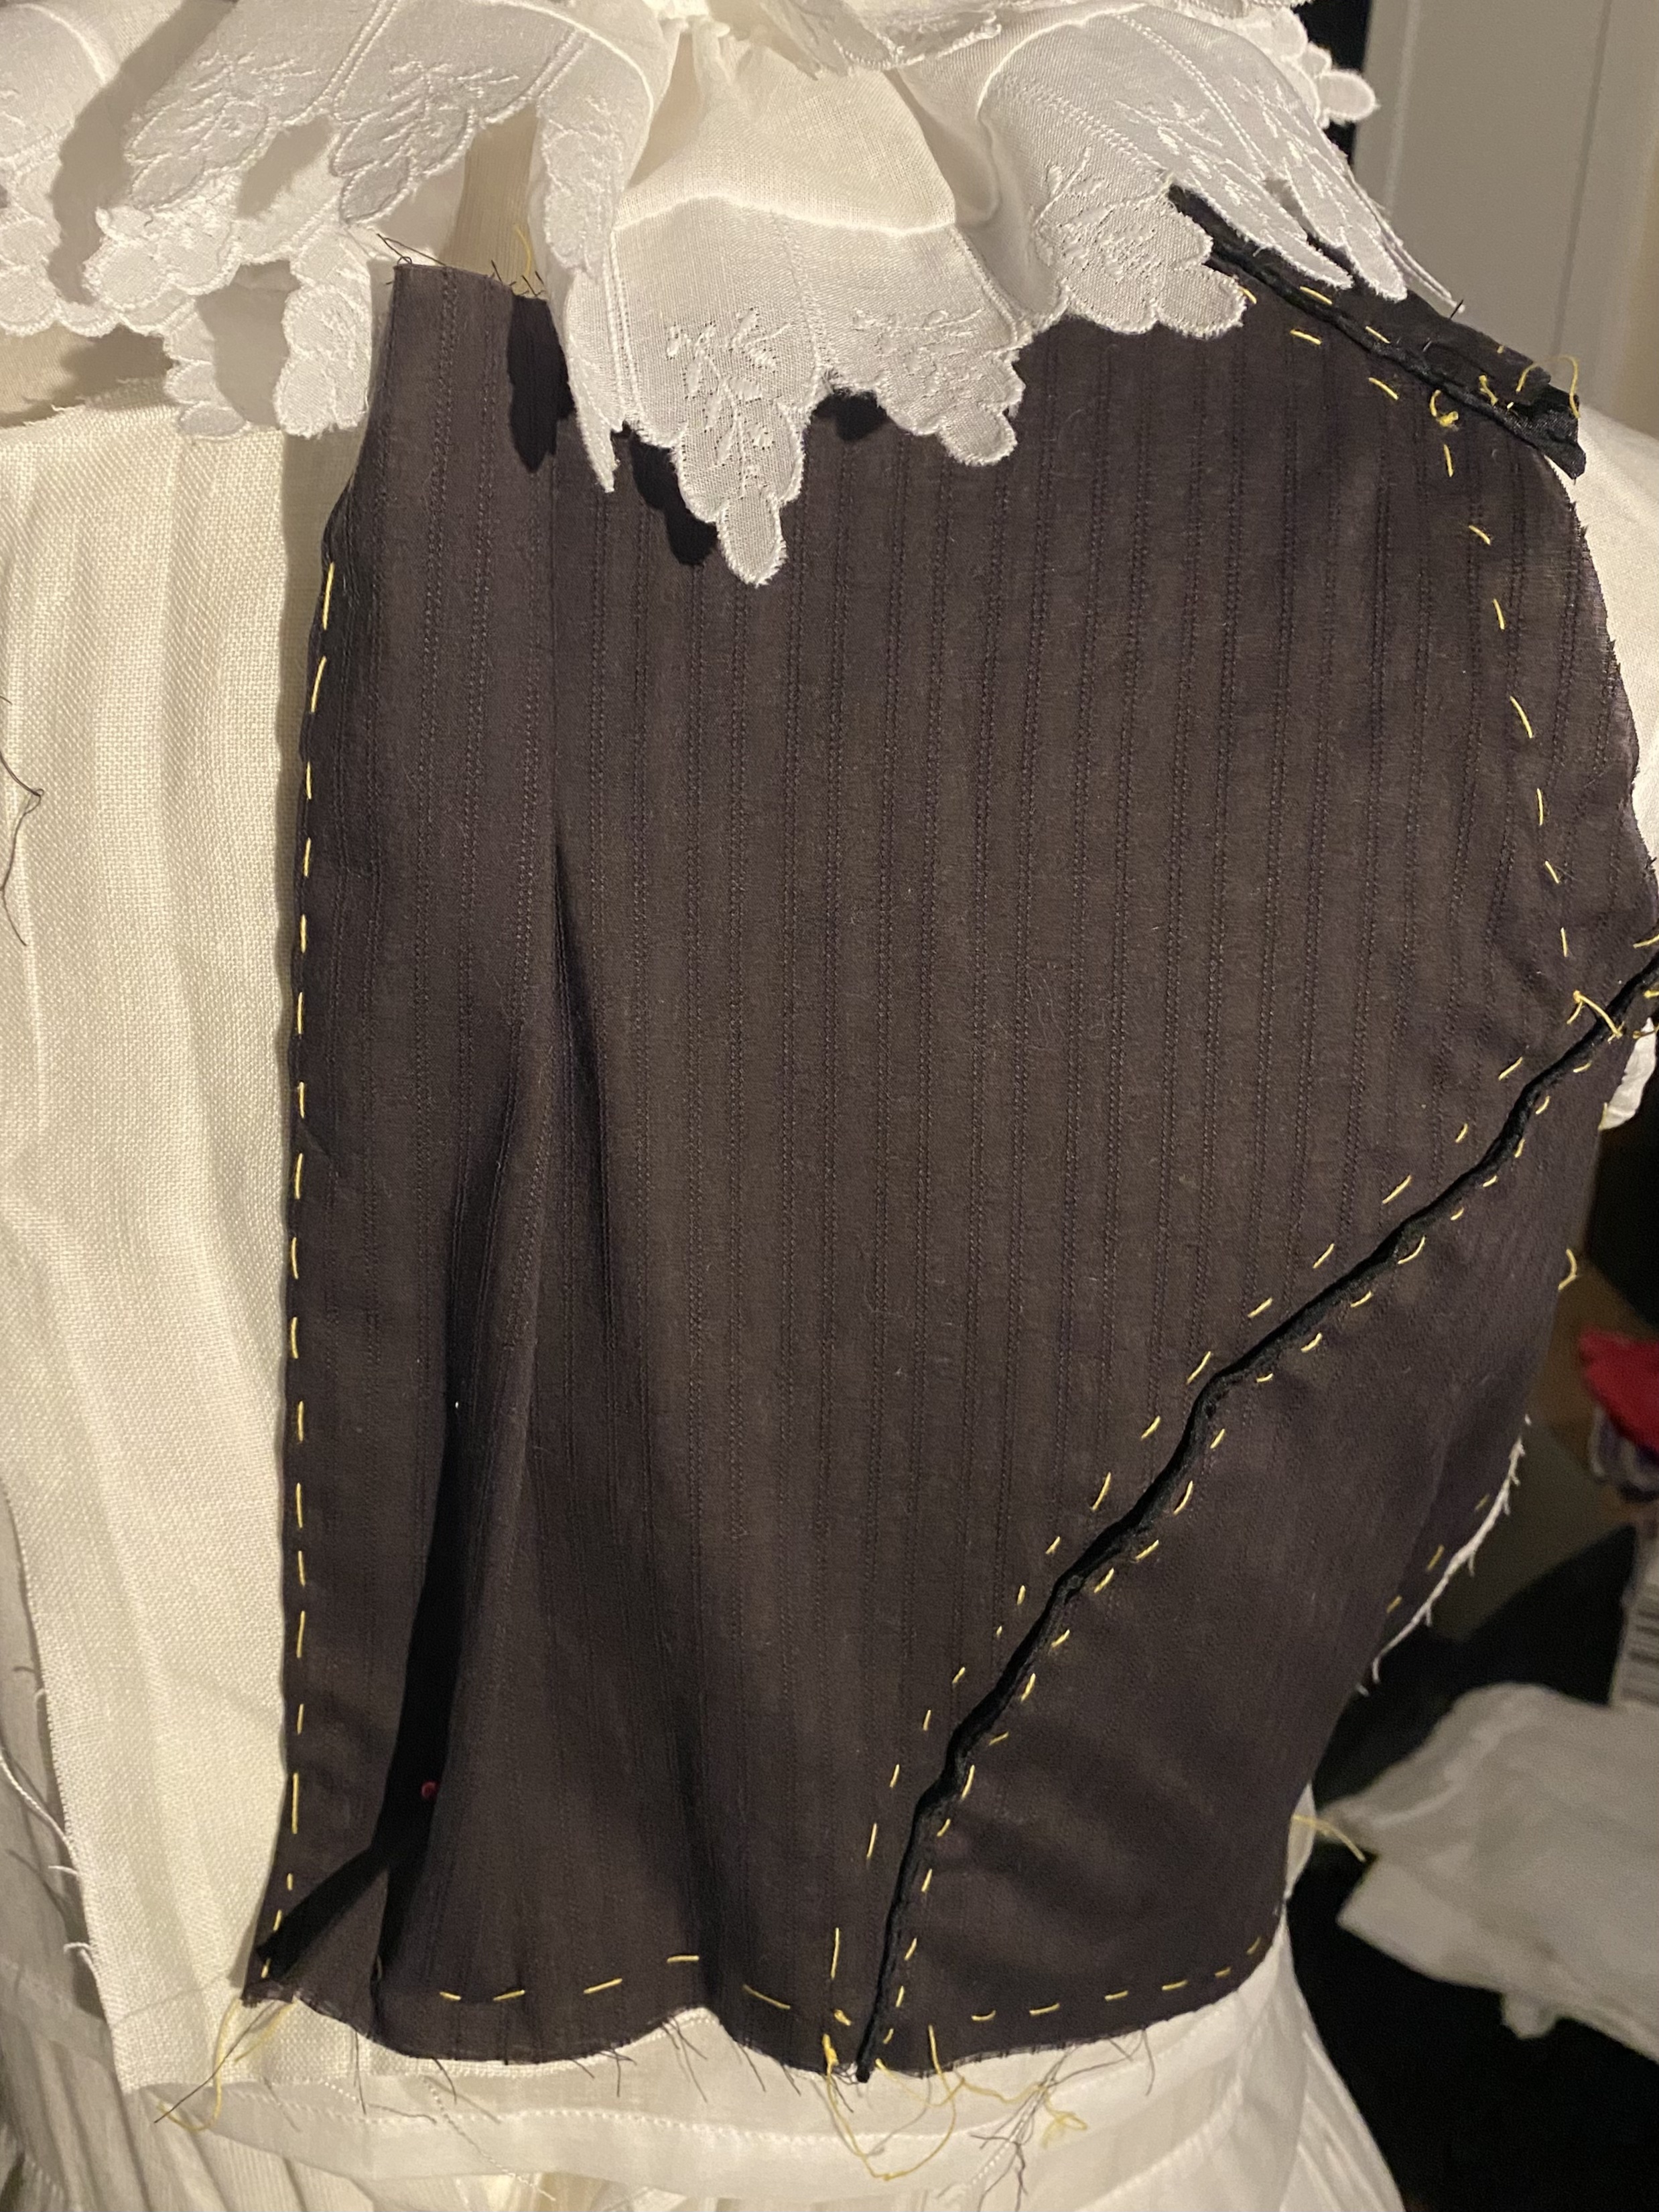
An Agreeable Tyrant also provided the inspiration for the dress I wore. I had almost too little sheer purple cotton fabric with a woven stripe, purchased at Lorraine Mill in Pawtucket a very long time ago. I meant to make an early 1800s gown, and had even started on the bodice around 2018 when life began to go very sideways and I stopped. I loved the fabric, though, and the deep color. 

I started on Sunday, September 22, and finished on Sunday, October 6. I have a full-time job and am in graduate school, so I’m not entirely sure how I managed to do schoolwork, work-work, and gown-work but I’m pretty certain the One Weird Trick was to do no housework. It’s embarrassing when the cat’s fluffy tail picks up thread and lint, but it is a reliable measure of how much vacuuming is needed. 

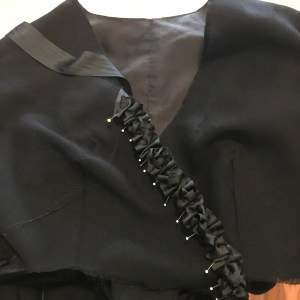
The bodice closes in back with a drawstring, which is much the easiest method for me– I did not have time to fuss with the fittings buttons require. The front panel is a gathered rectangle with a band at the top, piped on both the top and bottom edges. A waistband joins the bodice and skirt. The sleeves and skirt were based on shapes I drafted in the Burnley & Trowbridge workshop (I swear I’ll finish that dress). The sleeve has a piped petal cap, which was a pain to make but very gothic, to go with the points that decorate the bodice neck edge, and of which I have no images. Since I had the space at B&T to draft the skirts full-size, they actually work now– astonishing– and make a satisfying conical shape. I’ve struggled with skirts since 2014, and it’s nice to have that solved after a decade! 

gold colored geometric shapes on a white background show the layout of skirt pieces for a historical garment
1820s gown skirt layout

I’ve started using Illustrator to figure out layouts when I am short on fabric. In this case, I only had a little more than 3 yards of fabric, but managed to get what I needed out of what I had. Sure, bigger sleeves would’ve been nice, but I managed long sleeves and that seems like an accomplishment.

a man on a red velocipede followed by a boy on a foot bike
Riding School at Fort McHenry

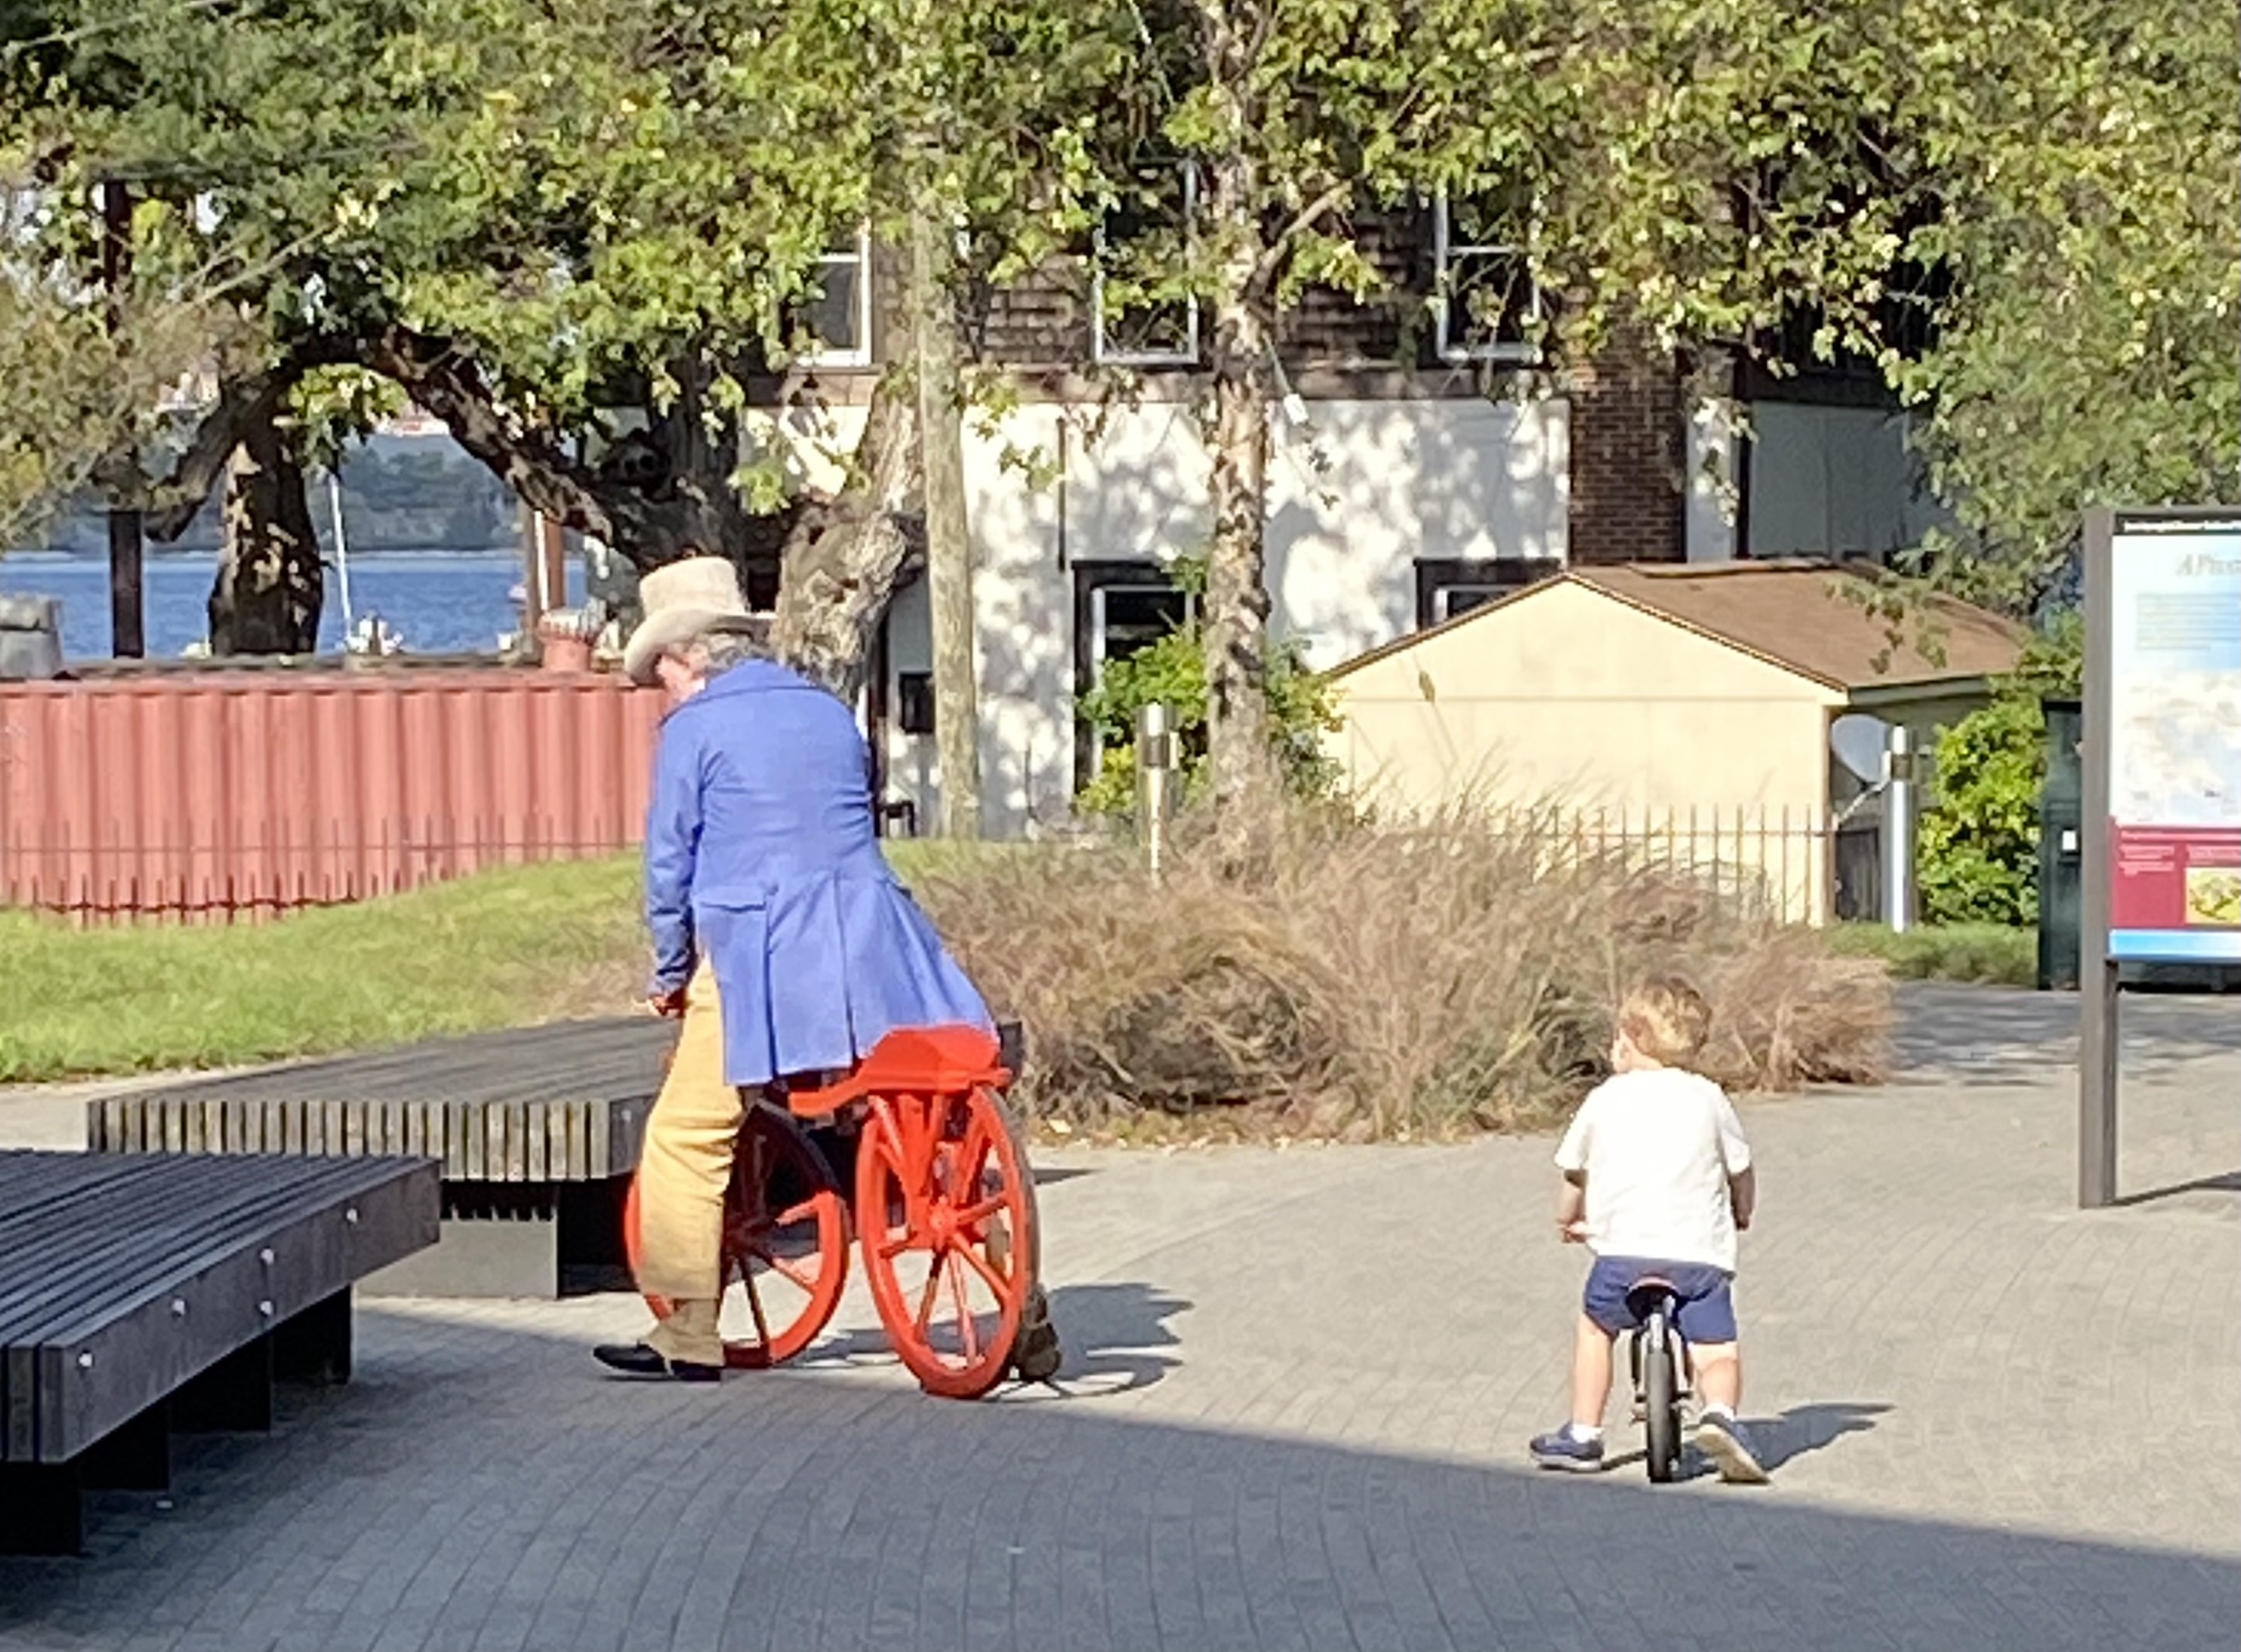
Mr K. was able to debut his very apt and very dangerous velocipede, another project a decade in the making. We picked it up in February in Williamsburg. It is a handsome and impractical beast, tough to ride, but fun all the same. Charles Willson Peale and his sons had the first velocipede in the States, in Baltimore, so the Fort McHenry “1824” was truly appropriate. We entertained spectators, saw Mr. McC (who also took a turn about the site), and spent the day as very decorative appendages to the Museum’s tents. All in all, a day well spent. 

In the Pink

The costumed event schedule has been remarkably thin for obvious reasons, and for me since 2019 when I worked every weekend and thus lost the habit of traveling. In an attempt to change that, I joined a Facebook group for local-regional costumer meet-ups, mostly held at local museums. I talked Mr. K  into going with me to one in July at the National Portrait Gallery in Chinatown and then talked myself into making a new gown.

I built the outfit around two things: wanting to match Mr. K’s era and wanting to wear a straw hat I trimmed in late 2021 but probably purchased years earlier. Initially, that bonnet was going to be part of a historical wedding outfit but in the end, I settled for just a chance to wear it.

This 1814 fashion plate has long appealed to me: I like the expression on the model’s face, and I like the color scheme: Just Preppy Enough. Enter the Surplice Front Gown in block-printed Indian cotton. I used a pattern I worked up in early 2020; happily, it still fits so I did not have to make any modifications.

From there, it was simple enough to stitch pretty quickly and even work out trim. Not enough time to tier the ruffles at the hem, but enough to satisfy my desire to look like a strawberry smoothie. Worn with Robert Land Regency slippers in green leather, a shawl from Burnley & Trowbridge, and a chemisette and reticule made by me.

The straw hat was made by Anna Worden, and trimmed by me with vintage fabric roses and ribbon probably found on Etsy and at May Arts Ribbon. Portrait Gallery photos by Mike and Gloria of In the Long Run Designs.

A Dress for Red Hook

Portrait of a Couple in the Country, Josef Reinhard, 1809

We recently returned from an event months in making, as all the best ones are, with many people making new clothes and venturing into a new era: the early Federal period. Initially, I expected to portray a widow, but ended up portraying a milliner suing for damages resulting from a breach of promise of marriage. This afforded Drunk Tailor an opportunity to be caddish and impatient, and gave me the chance to be aggrieved, which I do enjoy.

Because I initially thought I was portraying a widow, I checked through my stash for appropriate fabrics, and, finding only yardage already designated for future projects (coming in March! yay!), I ordered black gauze from Renaissance Fabrics. The local fabric store failed me, and somehow I got fixated on transparency and weight: I wanted a particular drape that a heavier stuff could not provide.

I looked at fashion plates of mourning wear but came across an 1809 painting by Swiss painter Josef Reinhard and fell in love. Still, here I was on the train tracks to mourning attire when I was portraying a forsaken milliner. Fortunately, the event organizers provided documentation from local newspapers, and a plausible case could be made for being in mourning for my recently deceased father– adding another layer of poignancy to my abandonment and financial precarity.

The gown I made is my third run at an early 19th-century surplice front.  The pattern I scaled up from An Agreeable Tyrant was a reasonable place to start, though my shape has changed somewhat in the nearly three years since I first started on that. In the end, I found that the shape of the lining or base of the canezou was a better starting point. Using that back and the general shape and grainline of the front, I re-draped the front bodice pieces to my current size, adjusting the line over the bust and adding an underbust dart, based on darts seen in period Spencers.

It took about three muslins before I had a bodice that fitted well; then it was on to the sleeve. Thankfully, that only took two muslins to rework the curve of the sleeve head and the shape of the underarm, and adjust the grainline to correct the drape of the arm.

I like the contrast between the white chemisette and the black gown

The surplice or cross-front gown appears in many images; it’s a comfortable form, and uses relatively little fabric to achieve the effect. It would also be a good form for nursing mothers, and while that was not a consideration for me, I do like the way the neckline can show off a chemisette.

I wore this over a pink wool petticoat and the white bodiced petticoat/gown that I wore under the canezou; I’d prefer a black petticoat but the one I is made for 1790s gowns and required shortening. In the future, I’ll make a black or grey silk taffeta to wear under this gown. But first I’ll need new linen petticoats since two have disappeared.

The hem edge, as always for me, was little uneven despite measuring carefully multiple times, but a ruffle solved that and added weight to the hem, helping the skirts hang and move better. The trim is based on a drawing in the Nantucket Historical Association collection and uses a quantity of black silk ribbon (which I can buy wholesale thank goodness!).

I’m generally pleased with this pattern and the finish of the gown. The lessons I’ve taken from this experience are about packing lists (and not putting the box of bonnet behind the door where it is invisible) and accessories. Once you have a pattern that really works for you– a well-fitted bodice or waistcoat, coat, and trousers– what you need to round out your look are accessories. Those are the pieces that can expand your wardrobe, dress it up or down, and generate multiple looks from just a few pieces. If that sounds like capsule wardrobes or fashion magazine advice, well, just because you saw it in Mademoiselle or Glamour doesn’t mean it isn’t useful advice.

Bonnet Remodel


I had a bonnet I made in 2014 (I think) that had been languishing in a box for years. I liked it– the soft tip was unusual, and the vintage ribbon and pink paper roses from the V&A went well with the dull grey– but I didn’t wear it. Sunday morning, I woke up resolved to remake the bonnet into something I will wear.

An upcoming weekend event in Dutchess County has me trawling through the fashion plates again, along with research helpfully sent along by the event organizers. A particular plate has stuck with me for some time, and finally I had the skill set necessary to tackle the thing. It takes making and looking and failing and remaking to figure out these things.

Step one was to take apart the bonnet-as-was. Satisfying work, really, not as unnerving as I feared it might be. And then? Paper patterns to figure out the sizes of the ridge and crest pieces.

I’d already committed myself to the silver-grey taffeta– slightly slubby, so second-chop, I’d already made muff cover, and had just enough left for a bonnet. The silver-grey seemed well-suited to a helmet-inspired style, and came close to the deep grey of the gros de Naples of the plate.

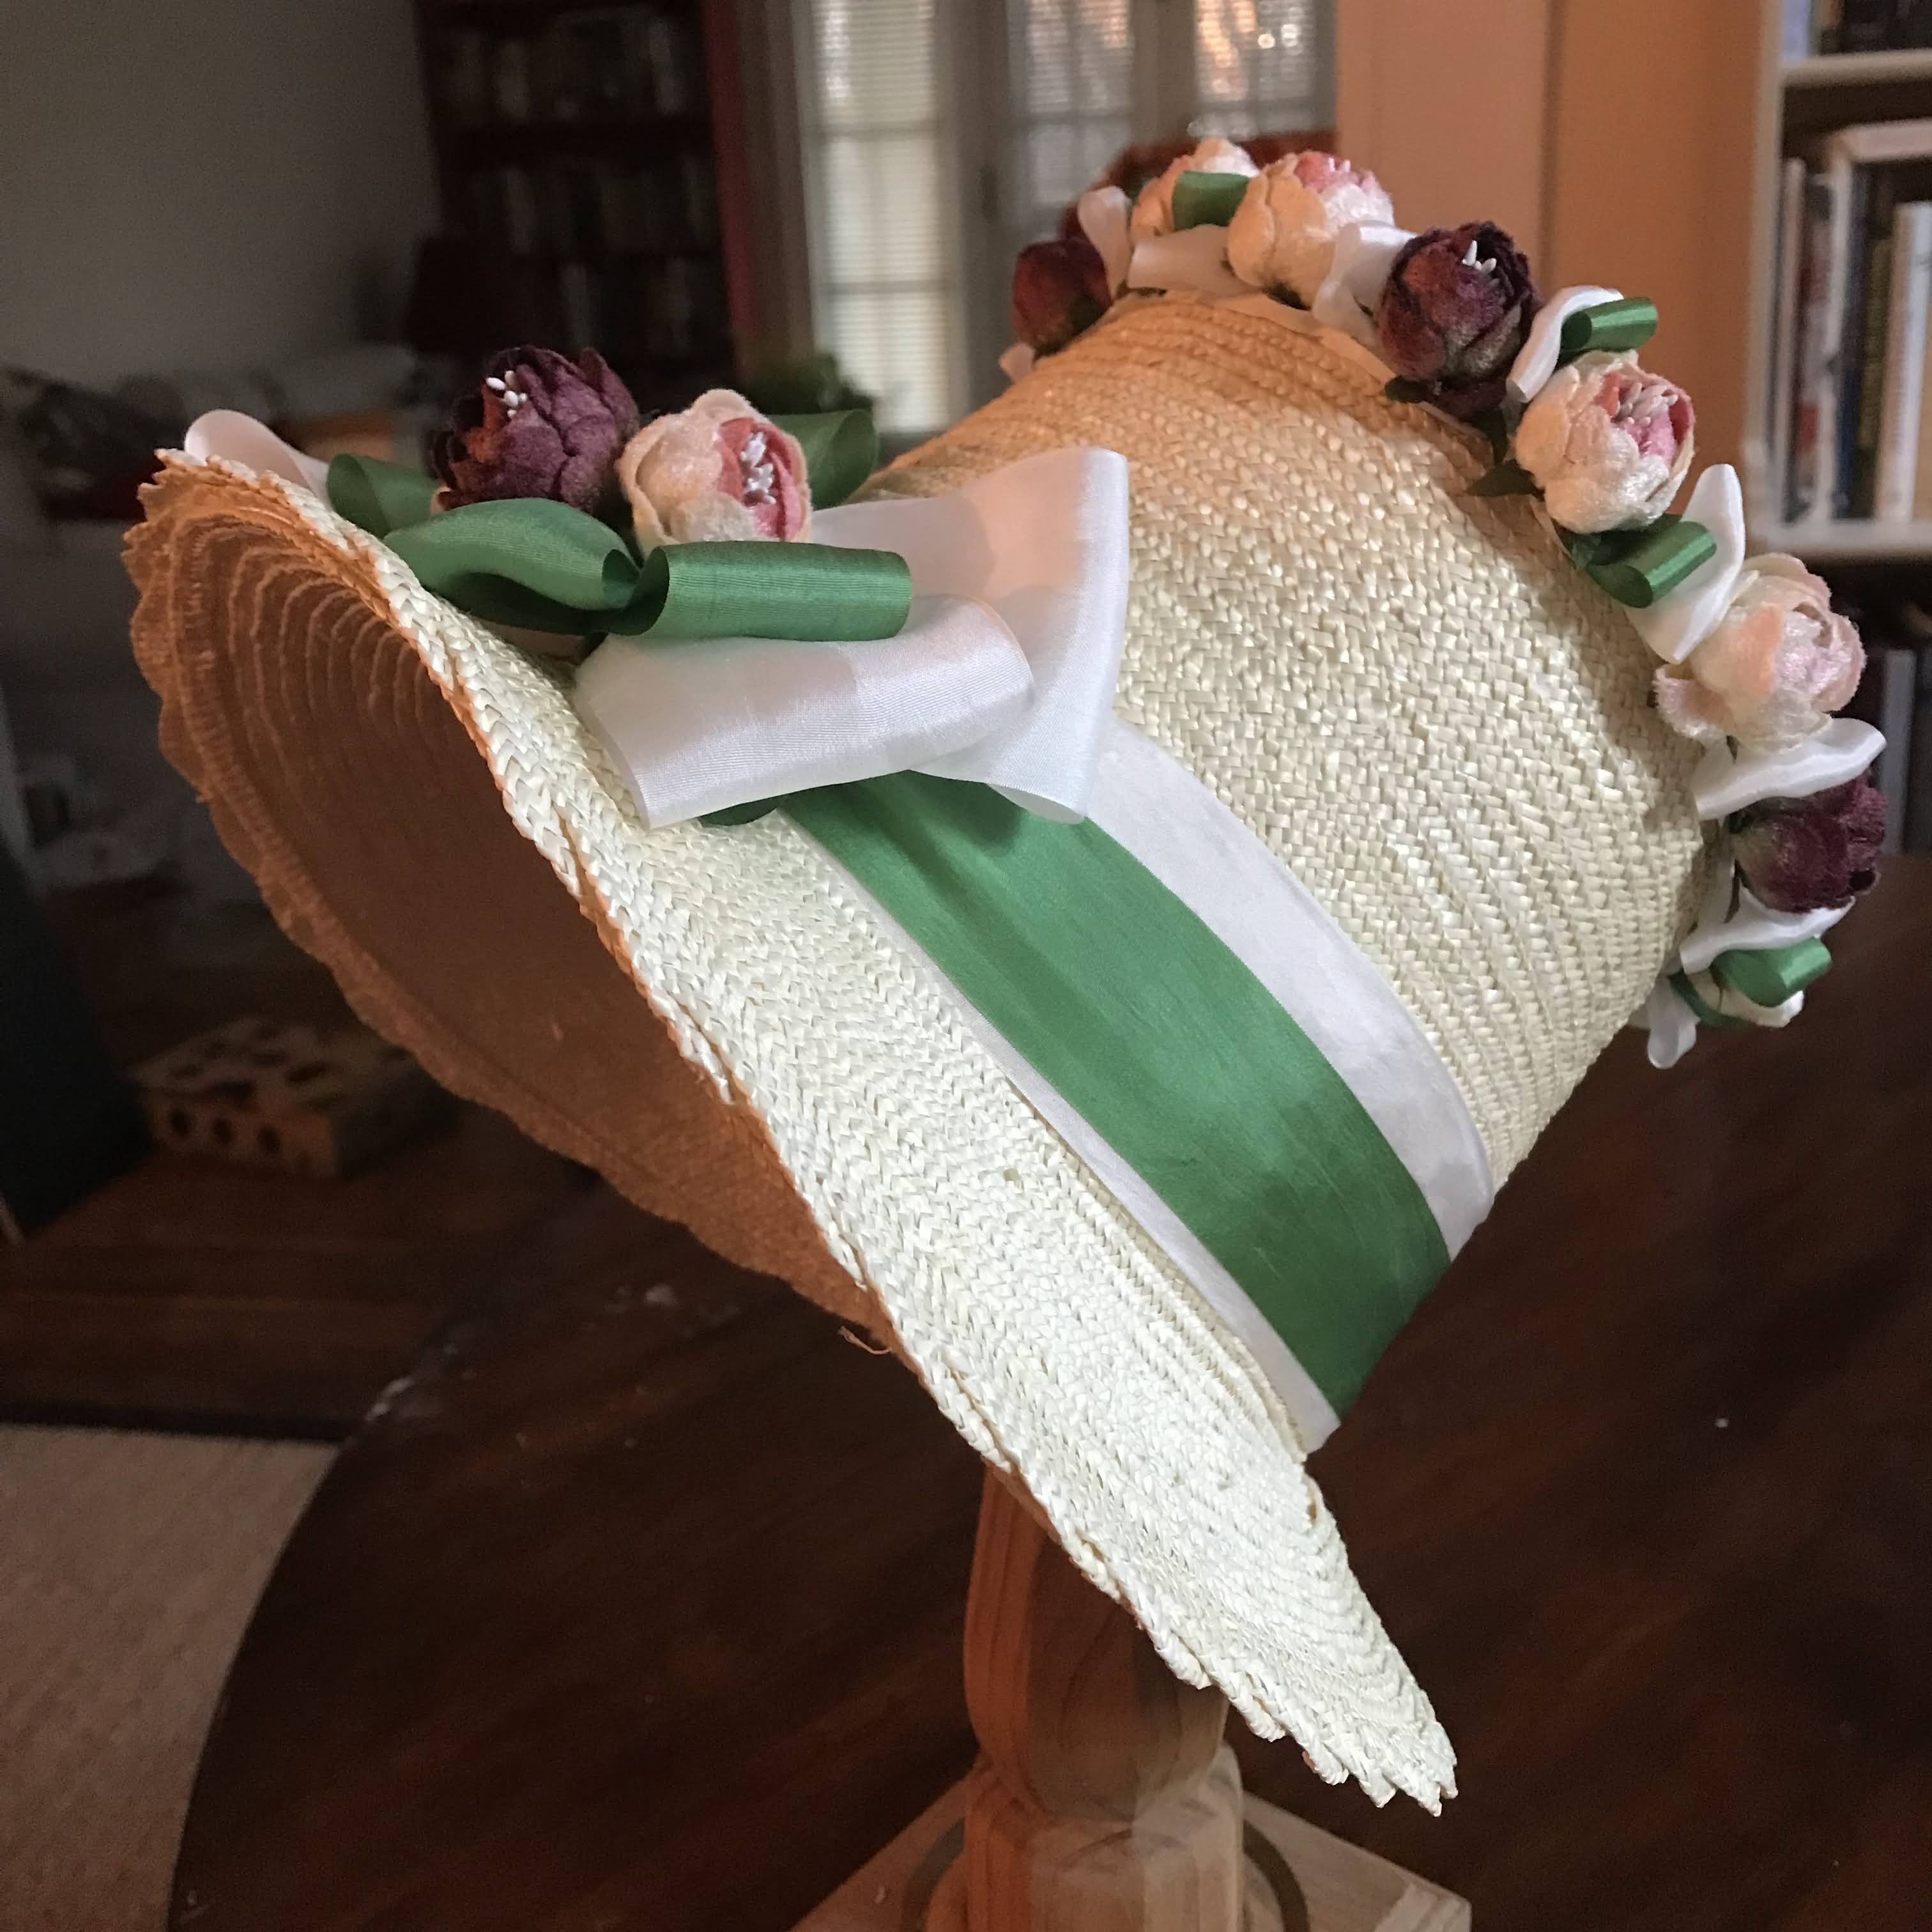
For mull, I used organic cotton quilt batting. It’s a little thick, but I pull my stitches tight and don’t want the buckram or pasteboard to show too much. The old brim piece served as a pattern for new, though I did have to use a different color for the brim lining.

The ridge was cut from homemade buckram (gum arabic on coarse linen from Burnley and Trowbridge). I used heavy cotton organdy to interline the crest. I know there is a way to get the ruffle more even, but my brain hasn’t produced it yet. Cartridge pleats and starch come to mind, along with goffering irons, as places to start. For now, this represents a Hudson River Valley milliner’s interpretation of the latest fashions.

The crown is taken from the 1770s bonnet I made, to take advantage of the way that crown slopes from a brim shaped like this one. If I were to make another one of these, I might switch up the order of assembly, and I might make the ridge piece of interfaced taffeta instead of taffeta-covered wired buckram.

The finished bonnet reused the same ties as the original bonnet, with a similar Petersham or grosgrain ribbon band. With my 2014 pelisse and a new muff, the only new accessory I’d like to make (or can remember wanting to make) is another, slightly larger, reticule to complete the ensemble.