December: when the year ends and begins again, a time when historically, for many Scandinavians at least, there was no spinning or winding, lest the world stop turning. No one wants to be stuck in mid-winter forever. This is the time when most of us look back, wondering what we accomplished this year, what it means, and begin to think about what we want for next year.
For me, this year has brought changes: three jobs, and my own business. I’m fortunate that I never stopped working. But I also never stopped working, and that keeps catching up with me. The days are grey and wet, and now that I work (part-time, for a few months more) in the district, I see winter creeping into the city as well as the suburbs, with all the signs of the changing seasons.
It’s not just sunsets, increasingly bare tree limbs, wool coats, or holiday lights as I walk to the train station, it’s what I smell. Some nights on Capitol Hill, it’s steak. Some nights at Huntington, it’s pizza. But even on the mornings when I collect the office mail from the post office, the terrazzo floored lobby with its glazed bronze doors smells like the office building lobbies of downtown Chicago in the 1970s and ‘80s. What was that smell: floor cleaner and metal polish, paper, and the seeping damp of melting frost? As difficult to describe as it is easy to remember, where I work now smells like where I grew up.
5200-5244 S. Greenwood Ave., Chicago
The landscape is similar, too, rowhouses on one walk to work, and office buildings on another, and, as I walk past the station proper, pigeons and homeless people. That, in particular, reminds me of Chicago, and a boy I knew from Eastern Europe.
He drove a cab with his father, but with me, he walked the scabby downtown streets eating croissants bitter with chocolate that turned sweet in our mouths as we kissed down the stairs from the cheapest seats at the Auditorium, sweets we carried in our pockets to share at intermission when we crept down to better seats not sold for that matinee performance.
I met him at a punk club, but he alone of all my friends loved ballet with me, he alone knew the ballerinas, the ballets, the composers.
He was tall and unforgiving.
“Your parks!” he said, “Dead pigeons and dog shot! People sleep in that!” and I had no answer, for he was right. He could say nearly the same about my walk to work today.
I think about this as the decorations go up, rituals are re-enacted, and we look forward and back at once. We’re our own private historical societies, editing our collections, interpreting our lives in ornaments, family photos, dinner menus, and table settings. Everything is different for me this year, even when I set the table with the same plates I’ve used for 25 years. And I have no idea what it will mean.
Next time, a look back at this year with an eye to next year’s aspirations.
You’ve washed, mended, ironed, darned, and sorted.
Now what? Now, my friend, the hard truths: the assessments and upgrades.
The hard stuff. Winter is a good time to frankly assess what you have, what you need, and what you already have needs. Could that sleeve be re-set? Stroke gathers re-done on an apron waistband? When you’re finally not planning and packing every few weeks, you have the time to really think about what you have and what you want.
There are two primary areas to assess, fit and appropriateness.
Still needs work….
and the bonnet’s too big.
Fit:
How well do your clothes fit you? Are your skirts long enough? Short enough? Are your breeches tight enough? Cut correctly? Waistcoats long enough? Getting dressed and taking a good look at your clothes can be enlightening. I find that photographs help me figure out issues with fit. As Drunk Tailor and I work, we take photos (especially of backs) so that whoever is being fitted can see what the fitter sees. This has proven more useful than attempting to turn around to see one’s own back like a cat chasing its tail. I’ve also used mirrors and selfies to achieve similar results, but even a non-sewing friend can take a picture of your back.
Now I can see what works
and what to work on.
Period-correct clothes fit differently than modern off-the-rack clothes (you know this), so looking at period images will help you figure out what you need to change. Typically, I find that sleeves are too loose, backs too wide, or bodices too long. Making the changes you need to make can be intimidating, but even 20th-century guides can help you get where you need to go. (The Bishop Method book is super useful if you want to sew vintage clothes, or just get better at sewing clothes in general.) More online sources for 18th-century techniques include the Early Modern Dress & Textiles Research Network , and Burnley and Trowbridge’s videos.
Appropriateness:
Purveying ideas and goods as a milliner is a lot like being a curator.
New York and Maryland
Do you have the right gear for your impression? Are the fabrics correct? Do you have the accessories you need? You know I’m not going to tell you what you need: that’s for you to figure out, but there are some good methods for figuring how what to wear and carry. (Soldiers have it easier: the sergeant tells them, and there are manuals.) For the rest of us in the 18th century, runaway ads are helpful and can be a good source of inspiration for ensembles.
2015
2016
For other centuries, fashion plates and portraits can provide guidance and inspiration, and eventually, there are even pattern books and sewing guides. Small upgrades can make a big difference: in the course of a year, I improved my shoes, upgraded the scarf, and made both a cap a new and better bonnet. It took two more years, but eventually, I really upgraded everything. Sometimes it takes a while to get things right, and that’s okay.
It takes research, and there are some pitfalls (like confirmation bias) but Drunk Tailor lays out some avenues to pursue. What you choose depends on who you are, so that’s always the place to start: who are you, where do you live, and what do you do? With those questions in mind, you can embark on making the changes to perfect your impressions.
Here we are, on the cusp of winter: the season is (mostly) over for living history events, the days are short, and what is there to do but pine until the season starts again? Chores, gentle reader: chores.
Before you pack your kit away for the season, or even if you never do, there are some tasks you can undertake to make it better. You don’t need a major overhaul to improve your experience, just some simple maintenance. (These tips are applicable in pretty much every time period.)
Nasty, right? This is why you wash your apron!
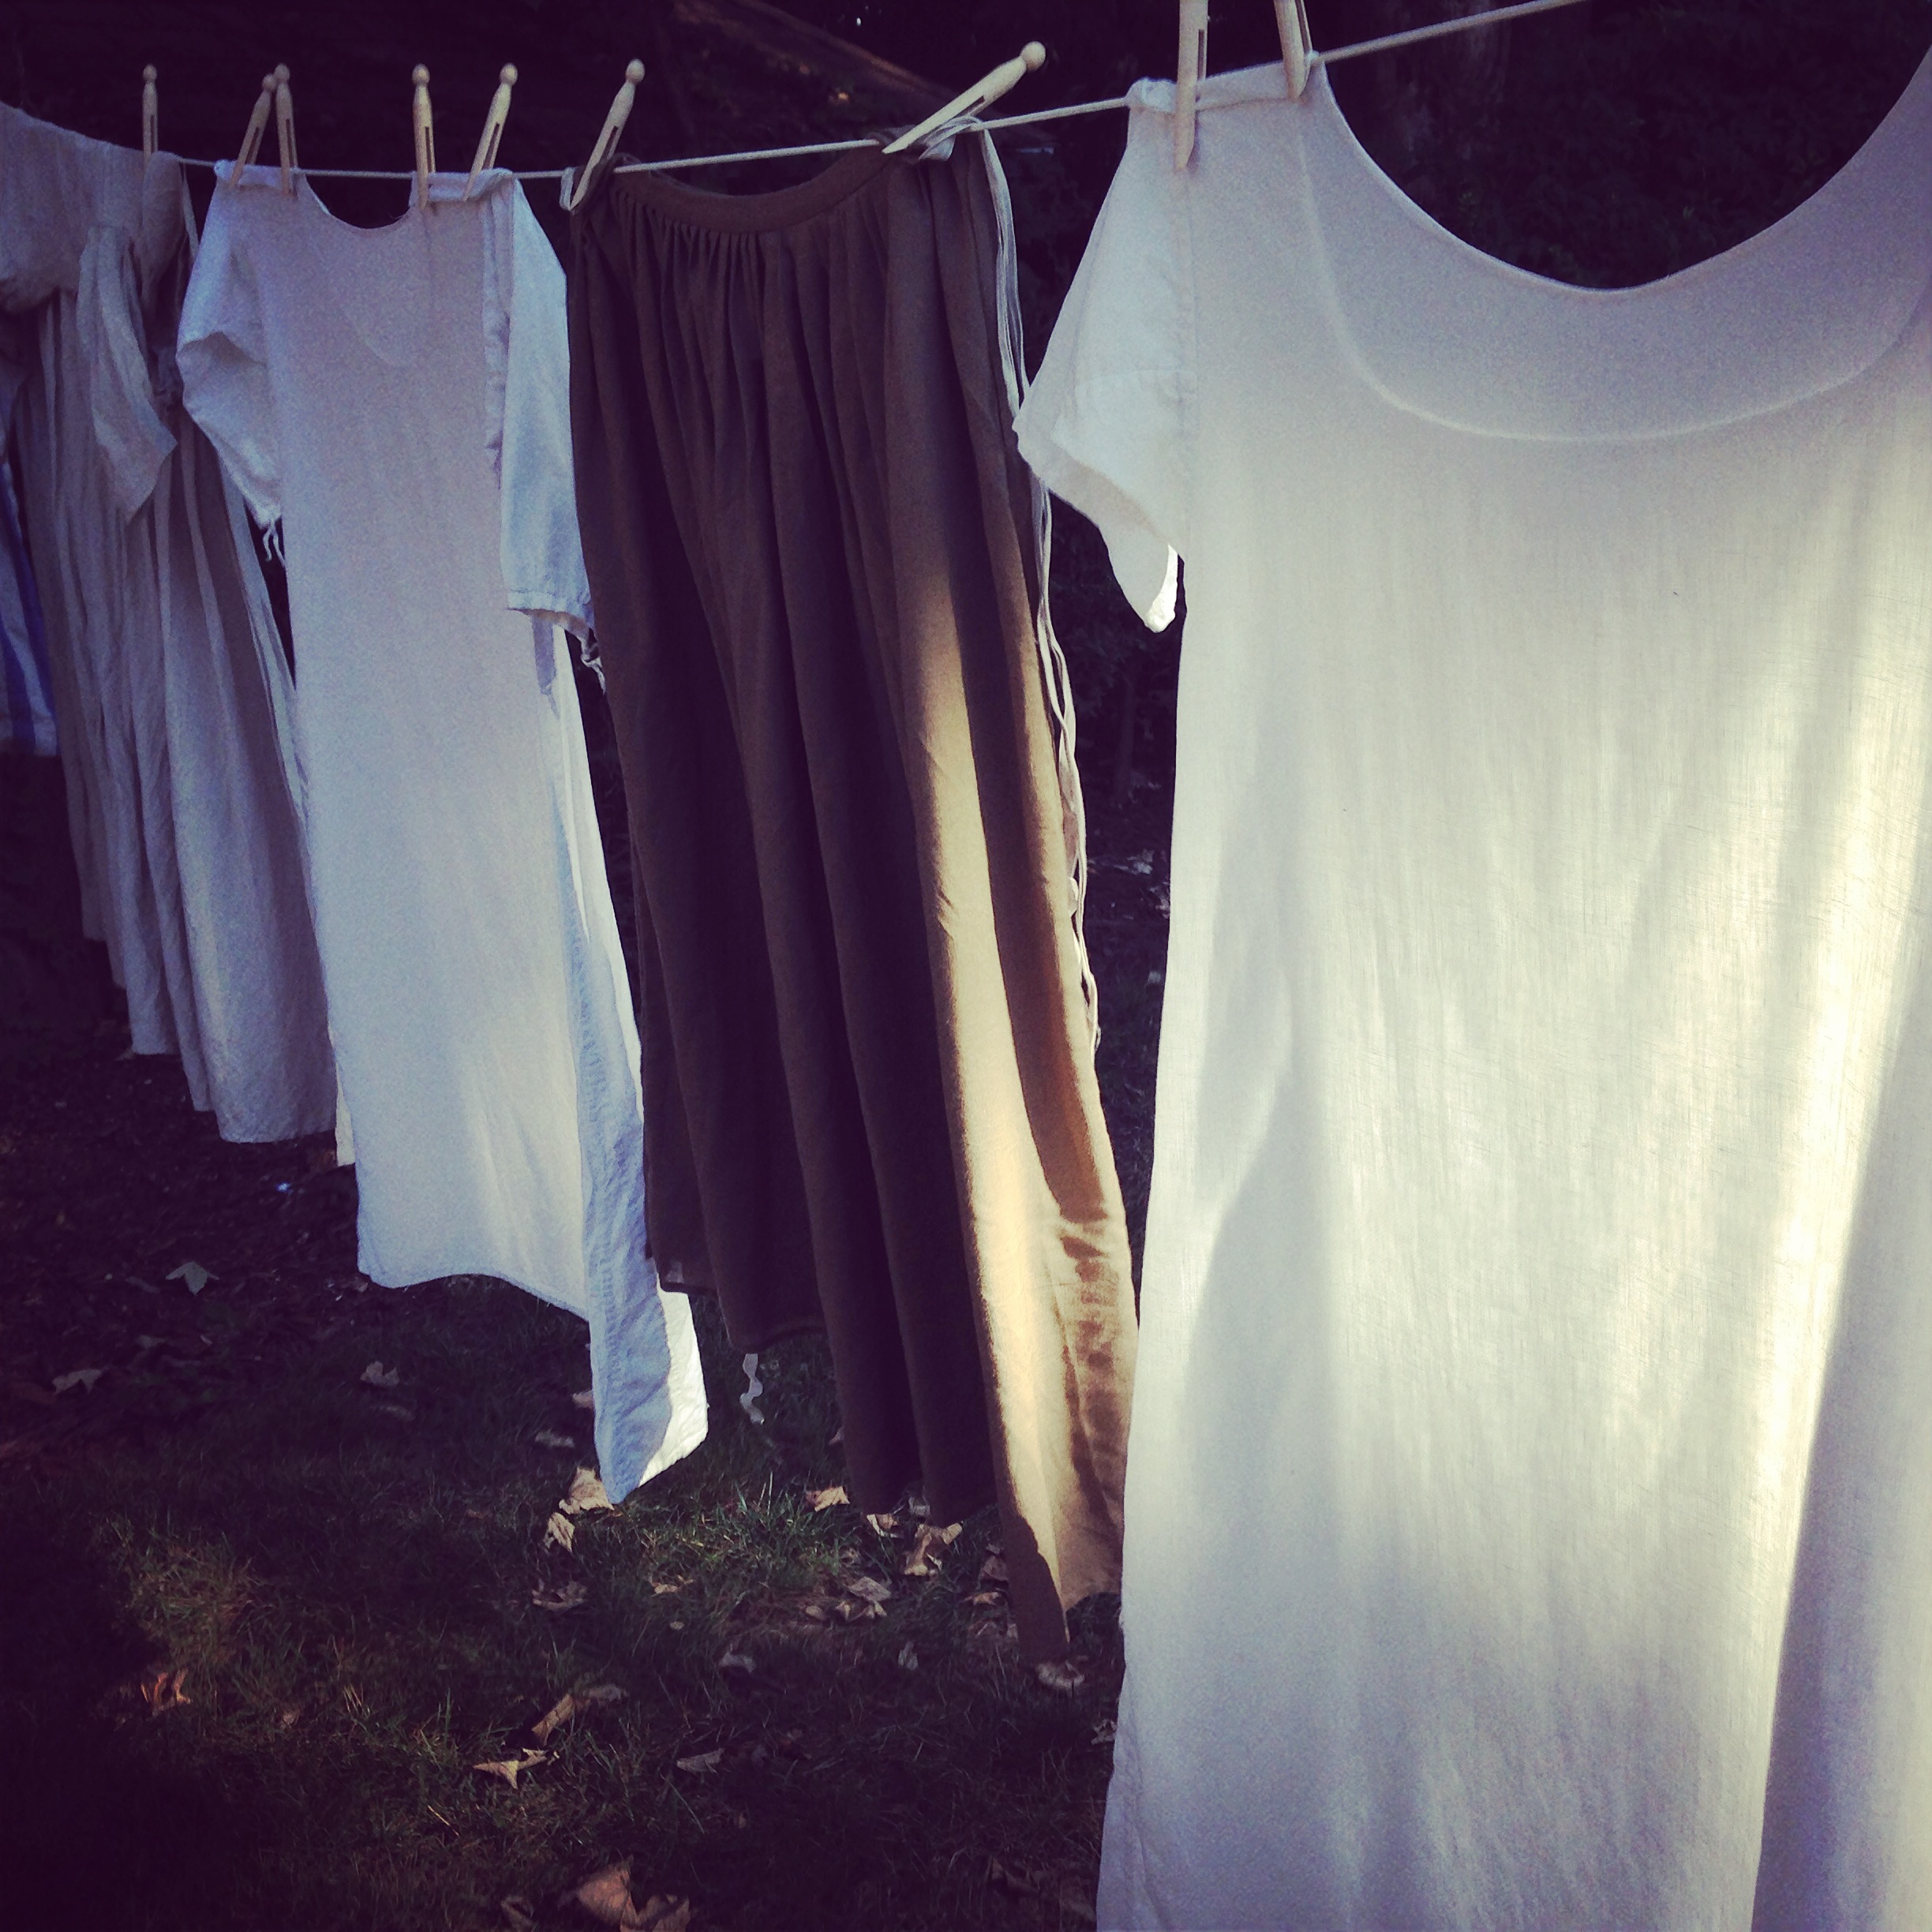
Wash your body linen. Please. Shirts, shifts, neck handkerchiefs, rollers: wash them. And your caps! They washed them, and so can you. I prefer to wash before I mend, but I hand wash my linens. We have a large kitchen sink that I can plug, so I fill it with hot water and wash my aprons, shifts, and stockings with lye soap. (I like that it does not smell like modern detergents; Drunk Tailor bought a lot of it for making white ball so we might as well use it.) Whenever possible, I hang my clothes to dry outside, preferably on a sunny day. You may also choose to spread your things out on the grass (if you have it); this helps whiten linens. We lack grass, or a clothesline, in our yard so it’s hangers in the trees or on the shower curtain rod for me. There’s no shame in that– it’s just not as picturesque. If you want to know more about laundry, Madam Johnson obliges.
Wash your stockings. Your feet will thank you. These are another handwash item; if you have wool stockings (I recommend Sally Pointer if you can get in the order window), handwashing is essential. Again, I use the kitchen sink, lukewarm water, and lye soap. Madam Johnson does not recommend using soap on worsted stockings, and she has a point: too much soap, heat, and agitation will felt your stockings. To dry, put down a towel, and reshape the stockings in the center of the towel. You may need to make sure the back seam is centered, and the feet correctly shaped. Fold in the edges of the towel and roll it. This will safely squeeze out the water. Dry flat (again, I like to put mine outdoors, but the guest bed will do in a pinch, or anyplace I can keep cat-free).
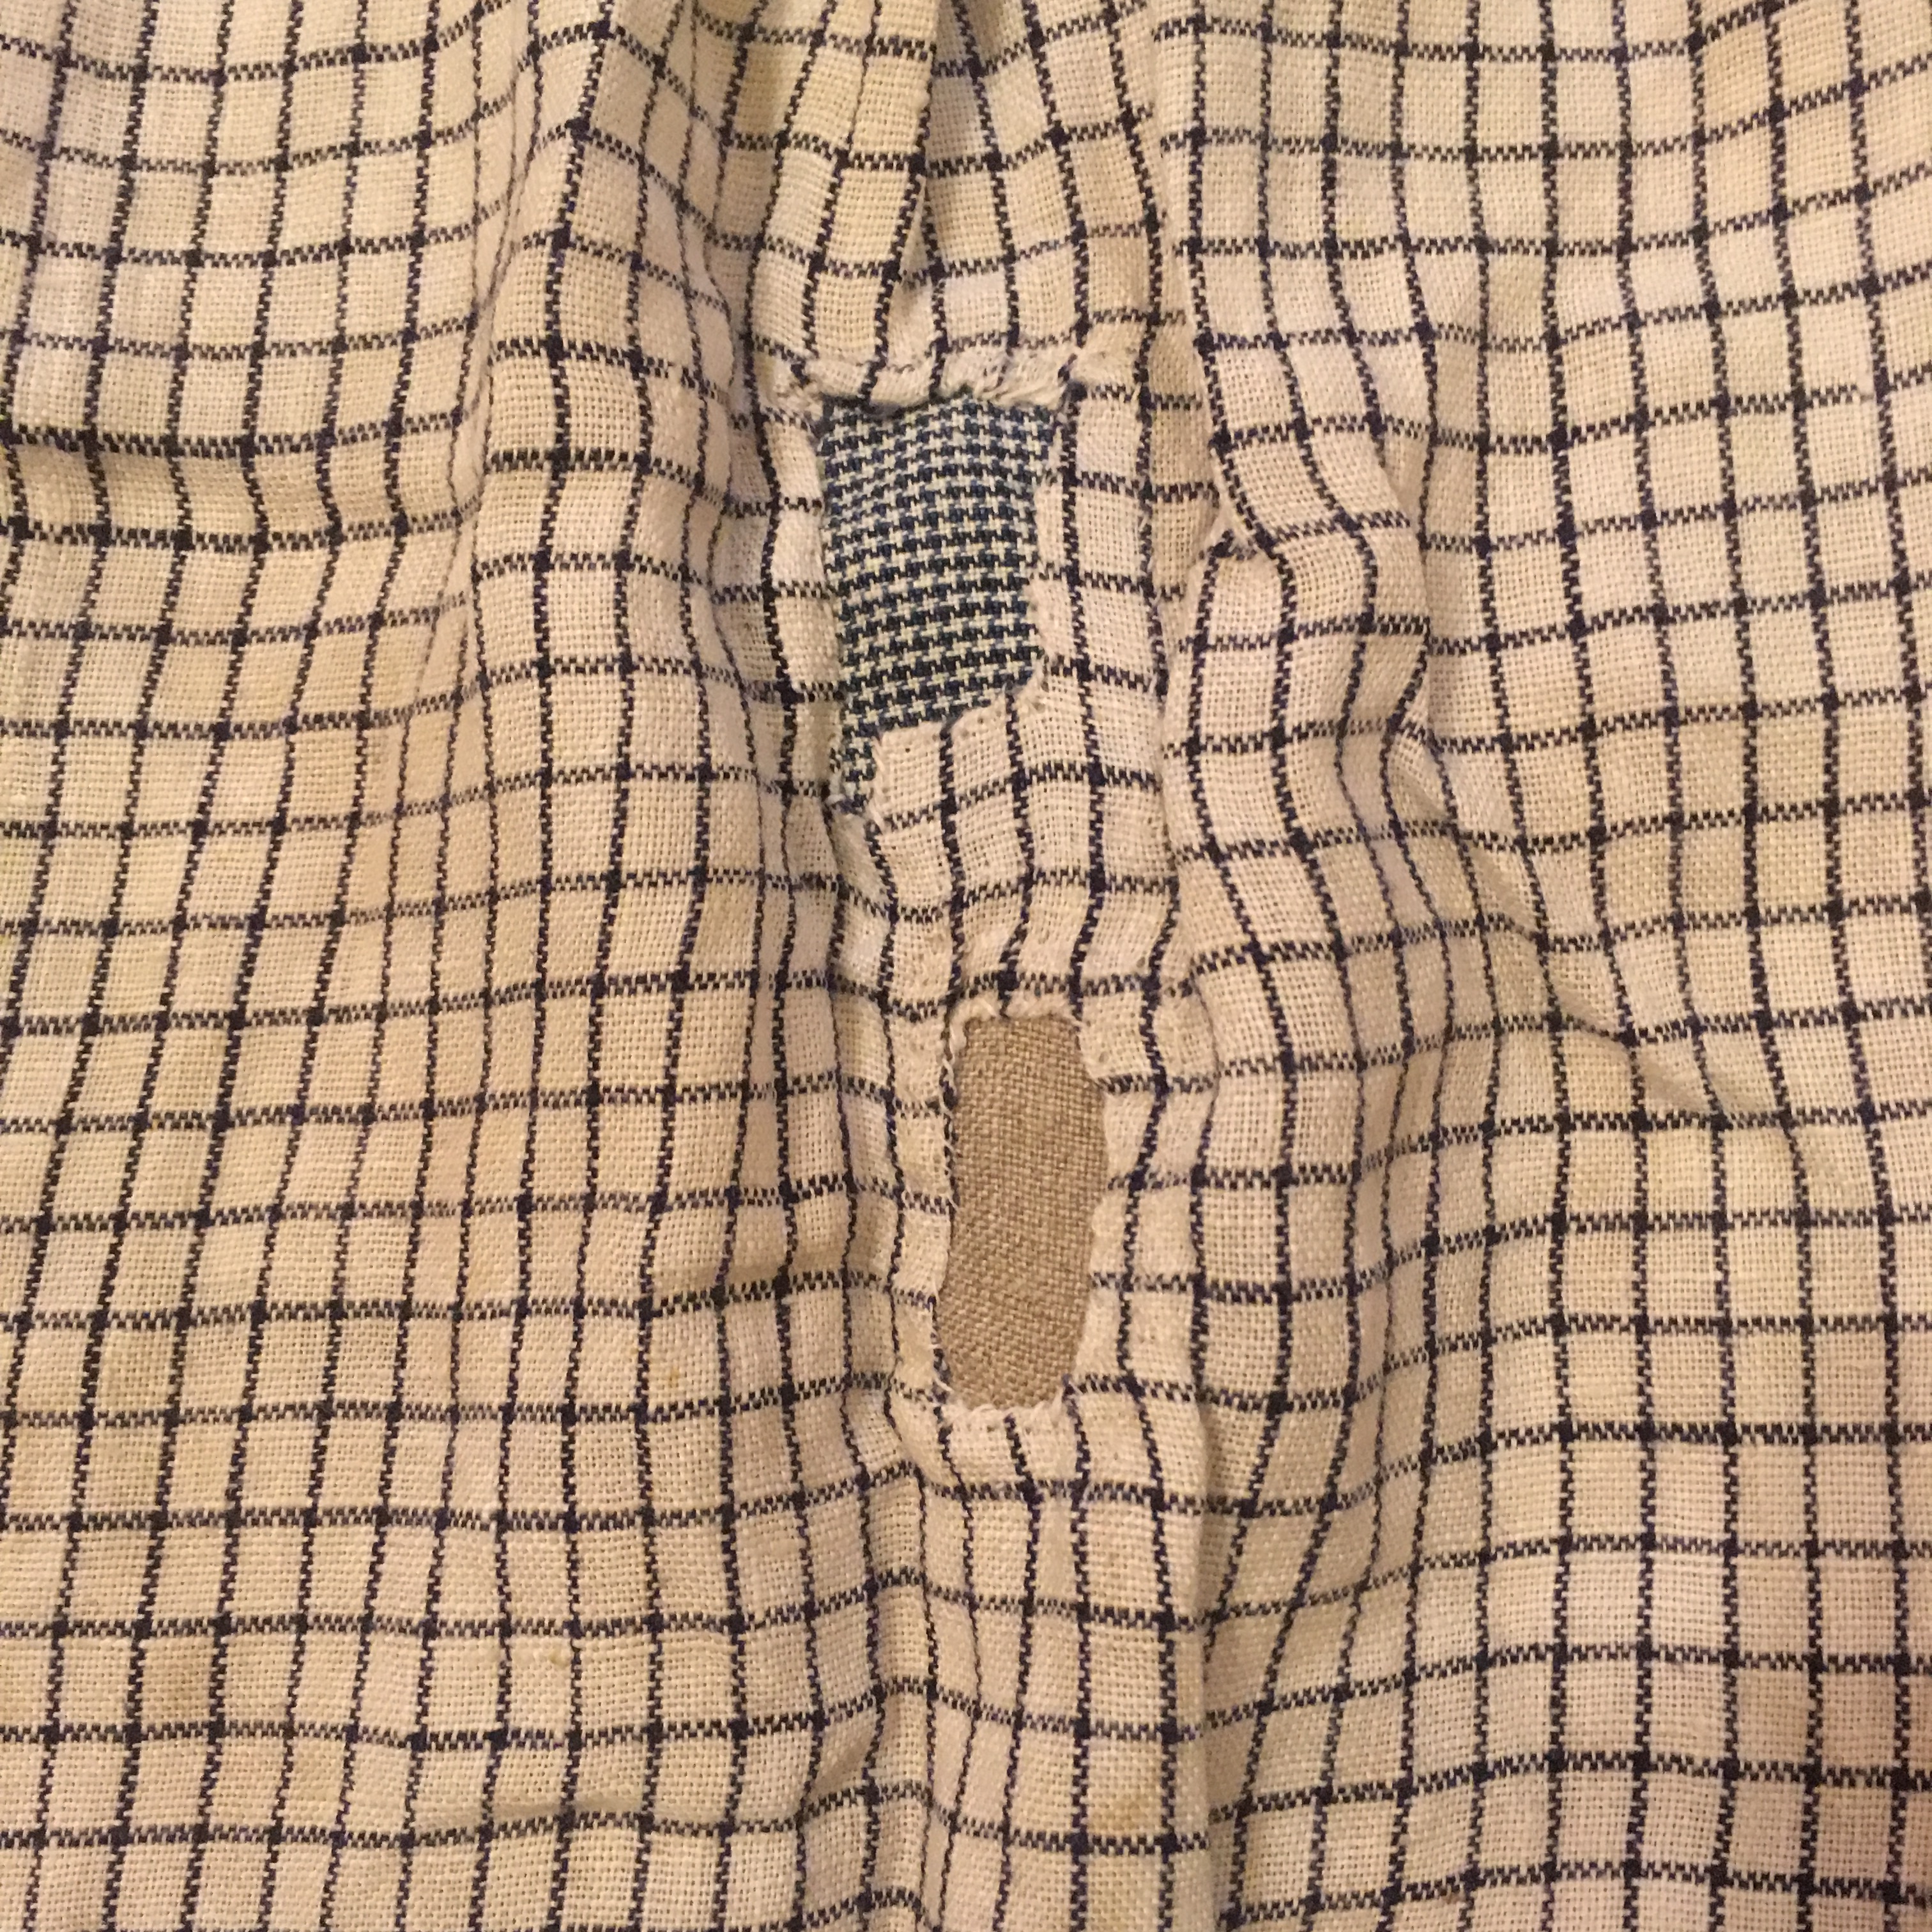
Patches that match are preferable.
Mend your linens. Underarms, collars, cuffs: they all get worn. Aprons get burned. Once you’ve gone over the garment to note the areas that need work, you can assemble your mending supplies: needle, thread, beeswax, and linen as close to the original as possible. Patch the holes neatly from the underside, making a small turned hem from the front. (This is not unlike needle-turned applique, but there are tutorials and guides. Turn or replace collars and cuffs. This is work I need to do on one of my shifts, along with restitching a neckline hem. It has taken several years to reach this point, but no matter the age of your clothes, it’s worth checking seams and hems and making repairs now.
Mend your stockings. These are often too expensive not to mend, plus, it’s period correct. There are tutorials for this, but the tools are simple: wool in weight similar to your stocking, a yarn needle, a darning egg, and patience. (Just use smaller yarn than shown here!) If you haven’t got a darning egg (and they’re pretty affordable, so…) a smooth, oval object will do (kitchen timer, small stone, a lime if you don’t poke it).
Living history laundry
Brush your outer garments. I have only laundered one of my gowns, and that was because it got very ashy and greasy. For the rest of my clothes, I brush off the dirt before I hang them up or pack them away. Greatcoats, regimentals, frock coats, breeches. Gowns, petticoats: all of them can benefit from a brushing. (This applies to your modern wool clothes, too.) There are a range of options, from brushes made in Sweden by the visually impaired to classic English options and German brushes for everything. Brush your hats, too! They get dirty, too. For all of these, if your garment is napped, brush with the nap, not against it.
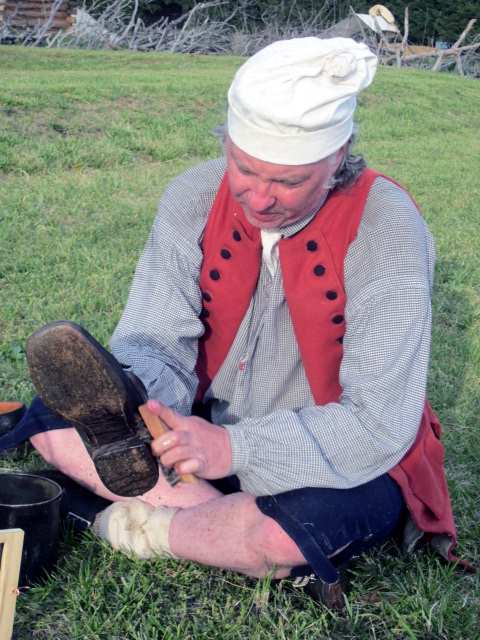
Drunk Tailor cleaning shoes
Clean, grease, and reshape your shoes. You may covet one of these shoe brush kits, or you may have some standard brushes already– they were available even at the grocery store in my long-past childhood. Redecker brushes– and there is a brush for everything shoe-related on these seven pages— take a little finding but last. First, brush off the mud and dirt. Then, wipe the shoes down with a damp washcloth or towel. Let them air dry. Never put your leather shoes directly on a heat source! Then treat the leather. (Tutorial here.) You may want to use black ball, or a colorless polish, depending on your shoes. Drunk Tailor has made it, though not blogged about it, but you can start here if you really want to dive into this. When I’m done, I put shoe trees in my shoes, or stuff them with acid-free tissue paper so they keep their shape.
I still have a copy (or two) somewhere in storage.
In which we experience a return to the costuming portion of this blog
When I was six, I had the coloring book paper dolls of Queen Elizabeth I and Henry VIII and His Wives. I probably requested (demanded) these after watching the BBC series The Six Wives of Henry VIII on Masterpiece Theatre. I recall being curling up in a chair under a quilt with my favorite stuffed dog as the drama played out on the television my grandmother had given us. Perhaps I had a fever: some of what I recall is a little hallucinatory, but I was thoroughly entranced. I have waited a long time to construct my own Tudor/Elizabethan wardrobe.
The annual Fort Dobbs Military TImeline event has recently featured a soldier of the second Roanoke expedition in his armor and helmet. In 2017, I thought hard about joining this enterprise and even bought wool for the effort–in fact, I got as far as cutting out a smock–but life intervened, and I taught workshops instead. This year, I had my chance: a free weekend, and just enough time (five weeks) to pull it all together. Reader: this is madness.
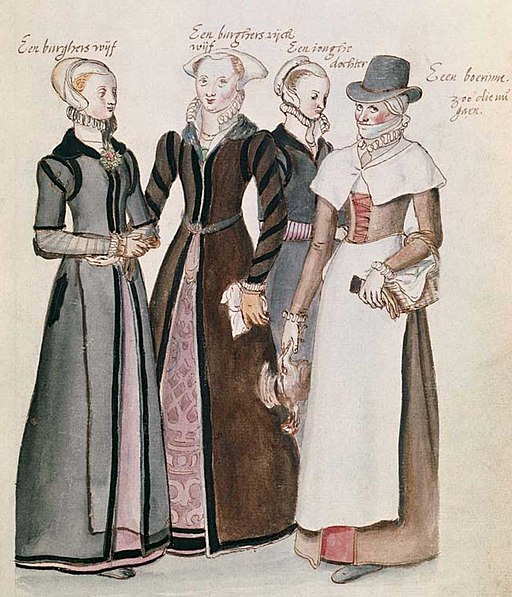
One source of inspiration: Color sketch of three London gentlewomen and a countrywoman come to market, from the manuscript Corte Beschryuinghe van Engheland, Schotland, ende Irland, c.1574. British Library
I flirted with long Tudor dresses. I flirted with a doublet. I knew that no matter what, I was building this on the foundation of a smock and kirtle (bodied petticoat) worn with stockings and shoes. Thanks to the Couture Courtesan and the Tudor Tailor, I knew bodies were not required for the class level and time period I was representing. (The fleshy cargo may have other needs, containment-wise). I knew I needed a partlet and ruff, and a coif, and I wanted a hat. All of this seemed achievable in five weeks. Mind you, in this same period, I also: started a business, started a short-term contract forensic collections management project, attended a workshop, draped and fitted clients, and dealt with a couple chronic health issues. It’s not a surprise, then, that I fell a little short of my goals.
Forthwith, the parts:
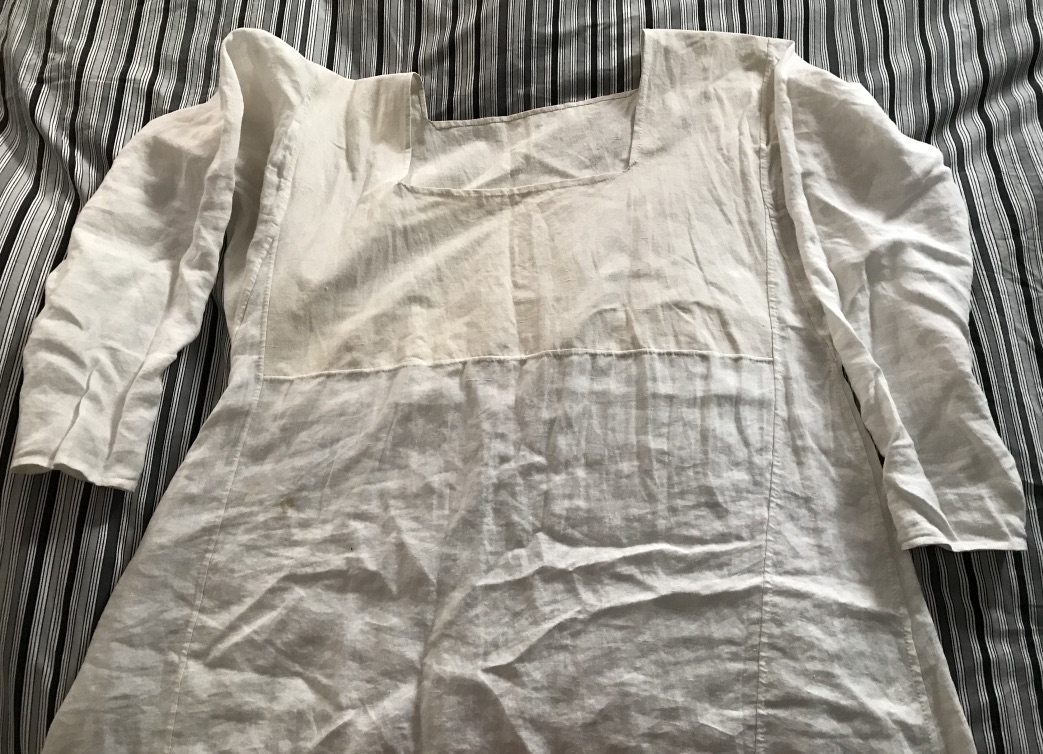
Smock
Two kinds of linen, and quite a different shape from an 18th century shift (though related)
I used the Elizabethan smock generator and, in 2017, pulled threads to get most of the shapes I needed. The very top of the smock is made of vintage linen that was lingering in Drunk Tailor’s stash, and I no longer recall where the body and sleeve linen came from. The instructions were just general enough that I was glad to have made several shifts and shirts already. It held up well, though Smock 2.0, should it occur, will likely be the one in the Tudor Tailor, just for varieties’ sake (and I now work with someone who does blackwork, so, you know, I could upgrade.)
Kirtle
Love the color, needs work
though I’m happy with the pocket slits
The kirtle needs some additional engineering to accommodate my corporeal presence in a way I like and that holds a more correct shape. I used buckram, pad stitching, and boning on the front but not only is the fit just enough off, I think that front-lacing is the way to madness for me. Off the fronts will come at some point in 2020, to be replaced with a new system. I’m very happy with the salmon-pink wool I found at Osgood’s in 2017, and luckily bought enough to be able to re-engineer the bodice in the same fabric.
The comforts of the colony and home, combined.
I was reasonably pleased working with the Tudor Tailor pattern, but despite previously fitting bodices and stays, there are things I would do differently. For one, I’d mock up the bodice in pasteboard instead of muslin to get a better sense of how the buckram and boning might behave. For another, I’d solicit much more assistance from another human to ensure my “handedness” didn’t alter fit, as I think it may have. More time and tweaks will definitely help.
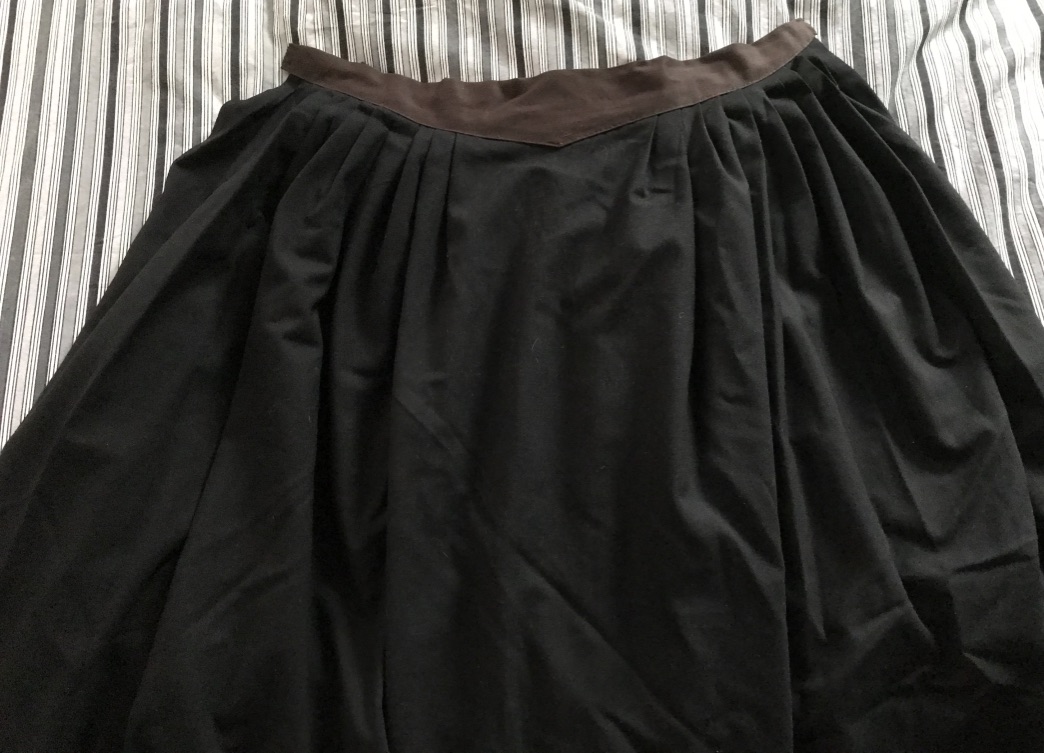
Petticoat
This is almost “don’t ask” territory. I borrowed the notion of making and wearing a separate petticoat from the late Elizabethan woman’s doublet entry in The Tudor Tailor. I had this notion of a doublet and petticoat in black that I couldn’t quite shake, but I did not manage the doublet. The petticoat is made of plain weave black wool from the remnant table at Fabric Place Basement and probably set me back all of $12.
Basic. Gets the job done.
Drunk Tailor and I kicked the notion of authenticity versus warmth back and forth quite a bit until I convinced him that he did not want to hear me complaining of cold in Statesville. The waistband is shaped, but because these skirts are longer than my 18th-century petticoats, my yardage calculations were slightly off, and the front waistband is plain weave brown wool. You’ll never see it, so it really doesn’t matter.
And yes: it was a two-petticoat weekend.
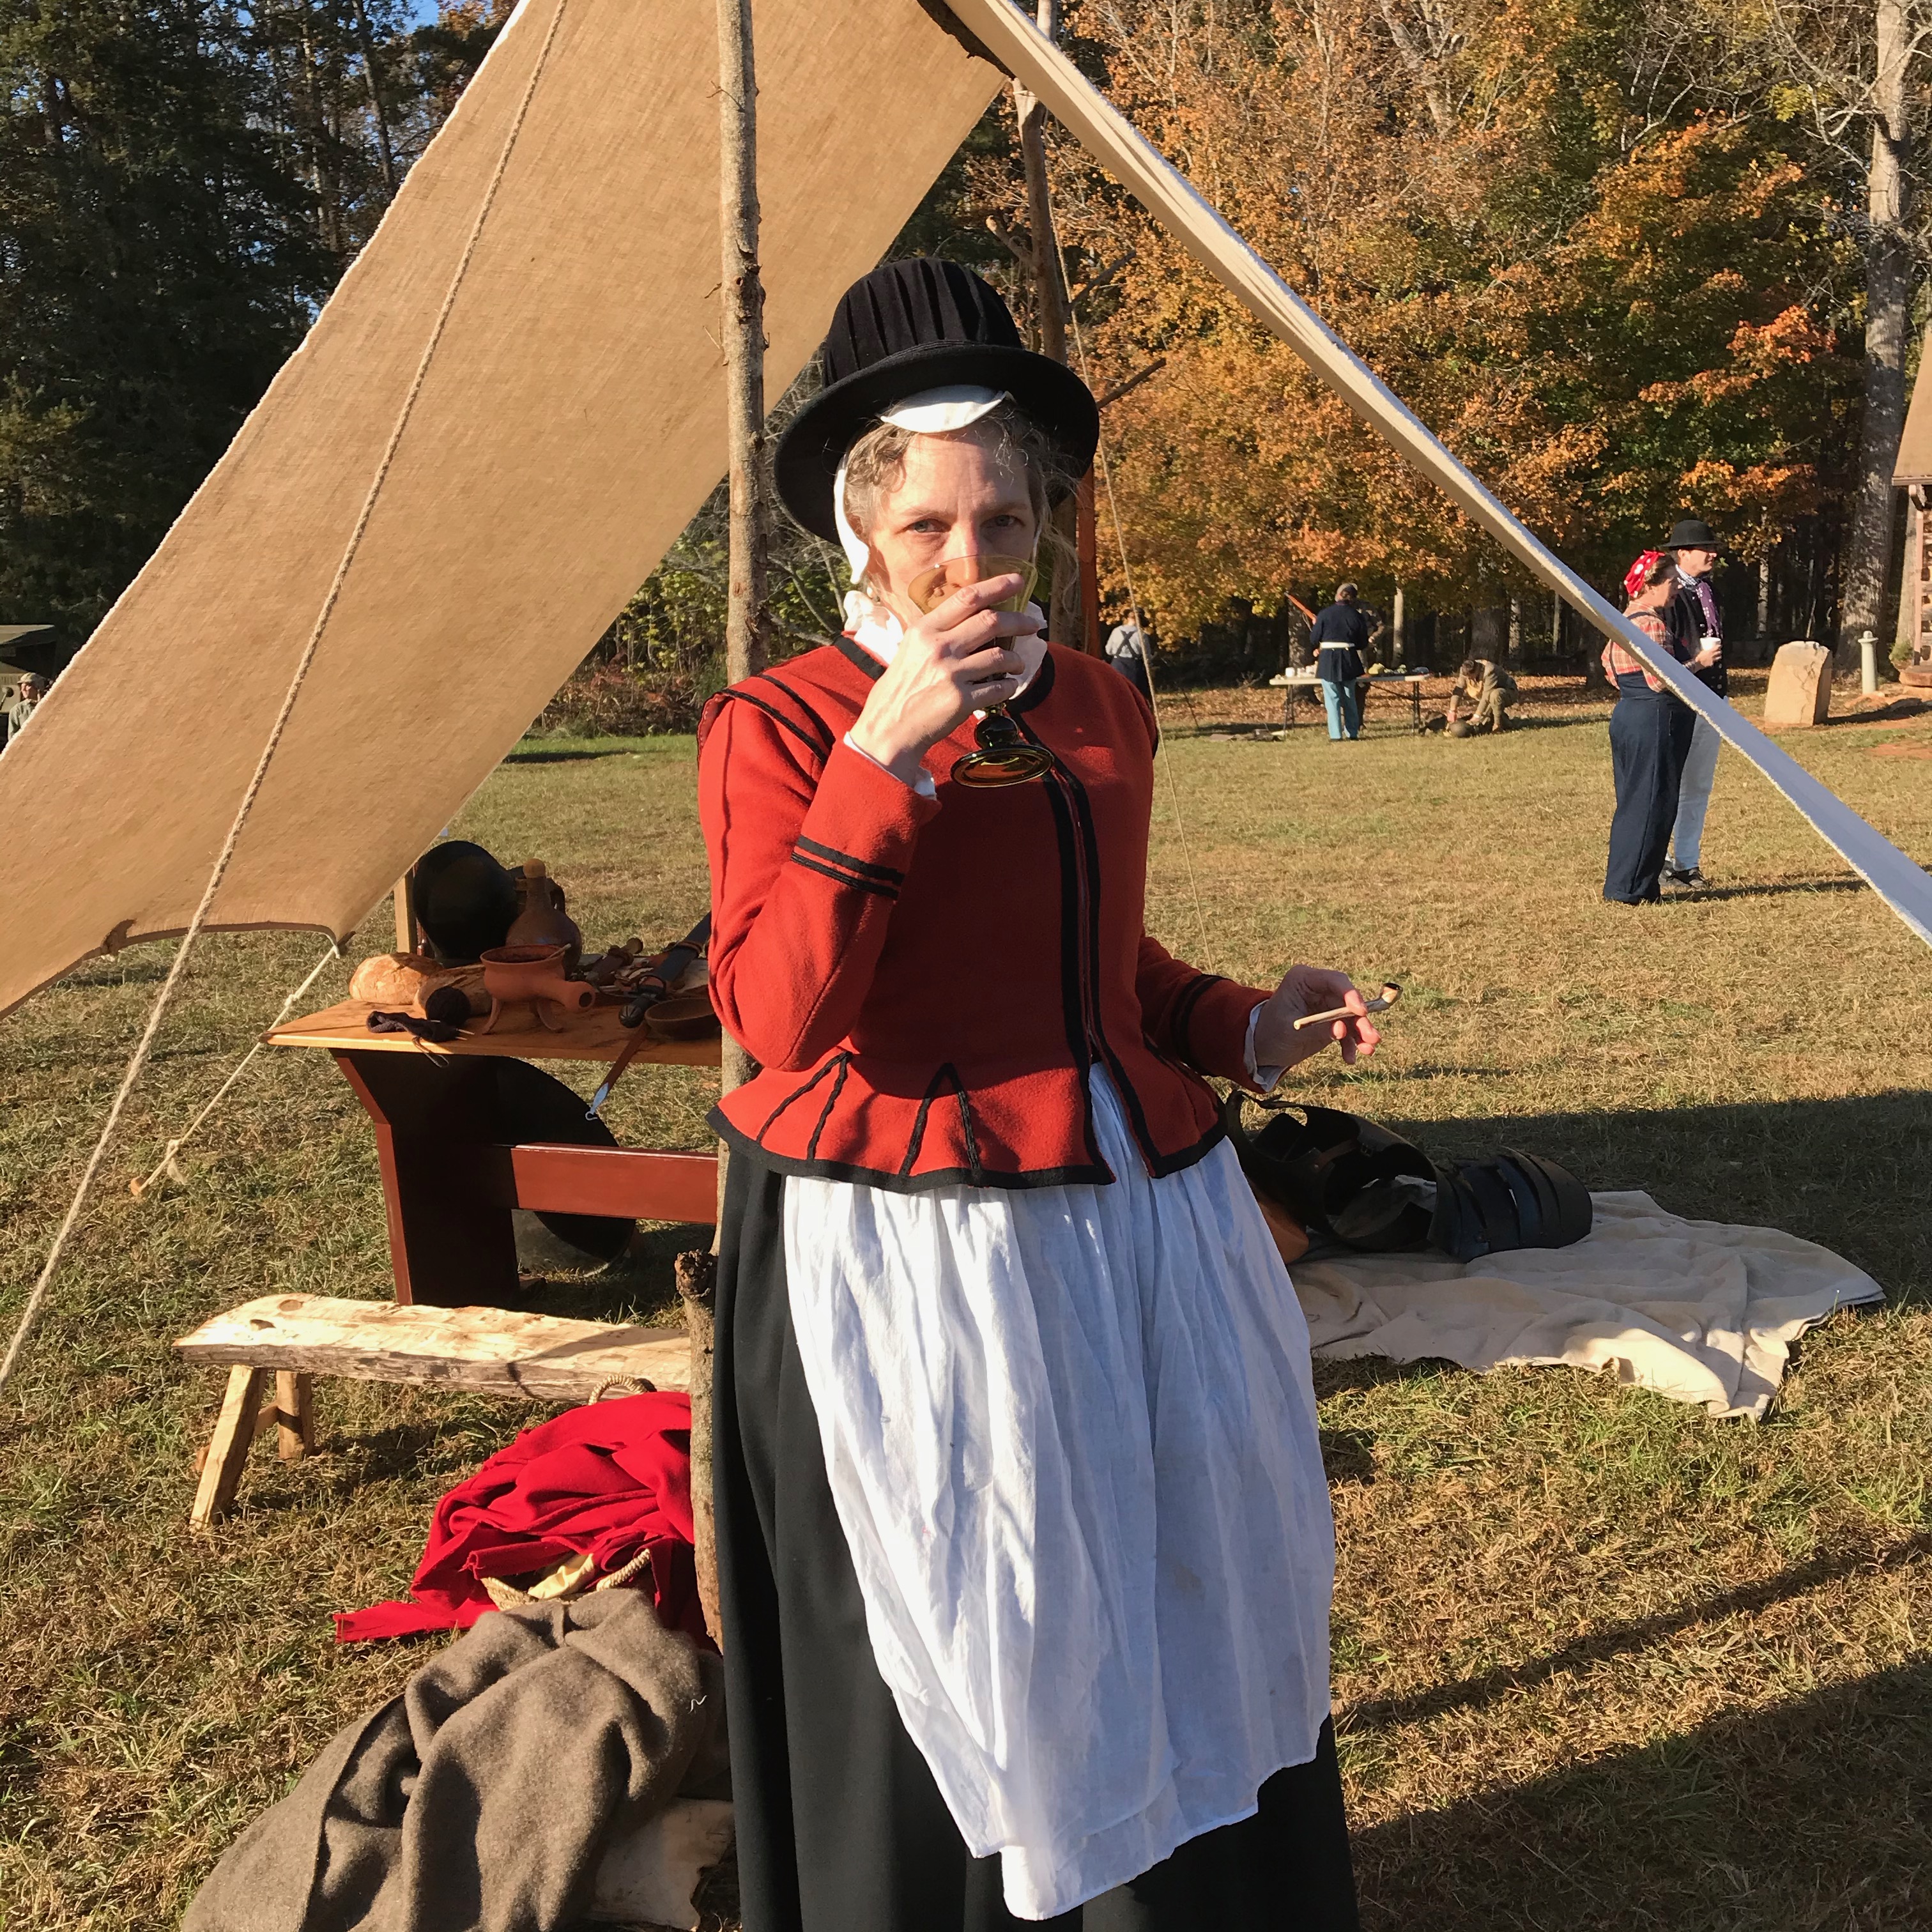
Waistcoat
Monty approved quality
Scraps leftover
Dat wool tho…. I bought a yard each of the olive and madder plush wool from Burnley and Trowbridge after falling in love with both color and hand. I started with the madder, knowing it would contrast well with black wool tape.
Front
and side back
Cutting out was a challenge, but after looking at period manuals and spending some time with pieces and fabric, I managed a layout that got me all the pieces without piecing, and small bits of cabbage leftover: judiciously laid out, you can use $30/yard wool for your projects. The results justify the investment of money and time.
Tape!
sleeve linings to come.
I had to tweak the fit on the muslin twice, and I think it would benefit from another round of fitting, as the back is a little looser than I care for. The front fits well enough, though the gap was smaller on the first day before the kirtle had stretched. The struggle is real when you are containing a curvaceous figure. Boning is likely the answer (or at least it is when your mind is tuned to 18th-century aesthetics and means).
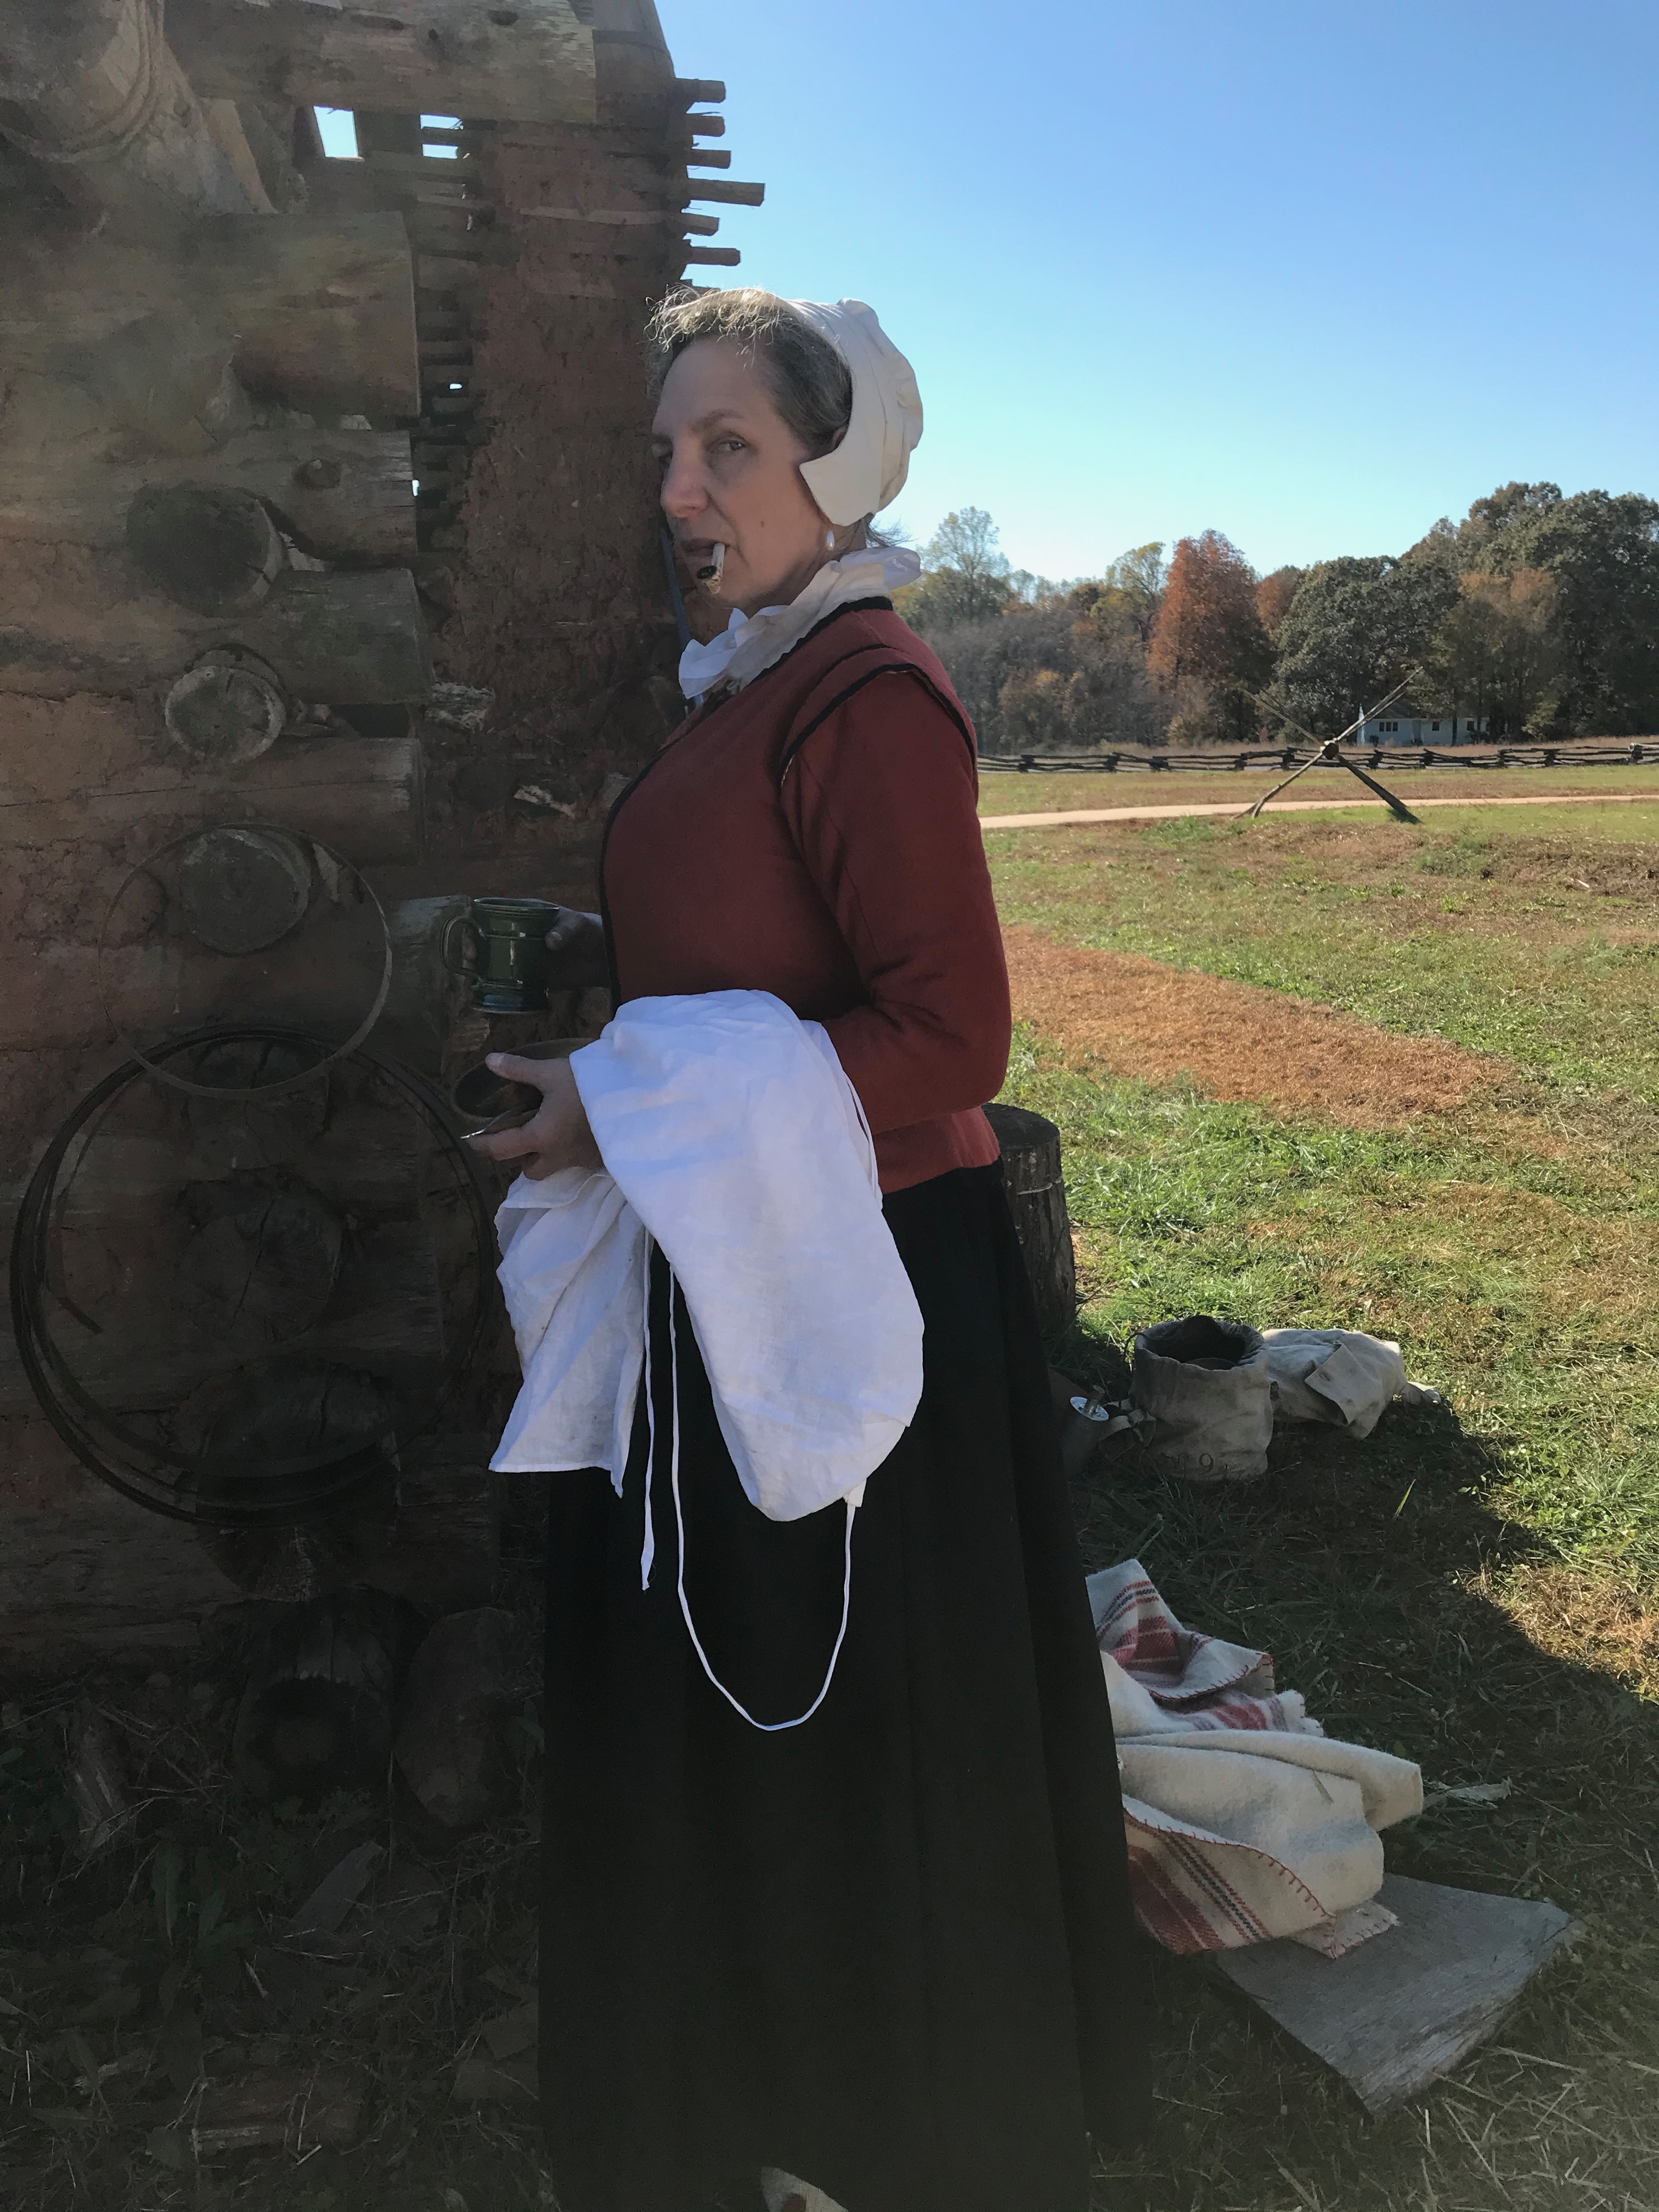
At the 18th century winter cabin, with the ersatz ruff and repurposed apron. Needs must.
That Crazy Coif
Scaled up from the Tudor Tailor, I know this pattern needs to be scaled down for my tiny skull. Will I make another? I might try another shape instead, this being exceedingly fiddly. By Sunday, I was pinning the two pieces to each other and the whole to my hair (which is how I keep 18th century caps in place).
Accessories
The absolutely swoony hat is by M. Brenckle, Hatter. I don’t know that I have fully figured out how to wear it with my questionable coif and hair, but it is without a doubt the jauntiest-yet-sober item I’ve ever worn on my head. That will help inspire me to re-do the coif and figure out what to do with my hair.
This view of the theoretical jacket reminds me of Lautrec.
Standing in for a ruff and partlet is a 19th-century chemisette made ages ago by Mimic of Modes. Desperate times call for desperate measures: Drunk Tailor tried to order me one but the Etsy seller went to ground, and his own project needed finishing so he couldn’t take on a ruff. With thorough instructions readily available and vintage linen to hand, a ruff seems like an achievable item, in time. (Yes, he finally got a new version of the document-based Carolina jacket finished!)
A Very Short List of Sources and Inspiration
Arnold, Janet. 1984. Patterns of fashion.
Arnold, Janet. 2014. Patterns of fashion 3, 3. Patterns of Fashion.
Mikhaila, Ninya, and Jane Malcolm-Davies. 2015. The Tudor tailor: reconstructing 16th-century dress. Hollywood, Calif: Costume and Fashion Press.

 December: when the year ends and begins again, a time when historically, for many Scandinavians at least, there was no spinning or winding, lest the world stop turning. No one wants to be stuck in mid-winter forever. This is the time when most of us look back, wondering what we accomplished this year, what it means, and begin to think about what we want for next year.


You must be logged in to post a comment.