A Polonaise for Ann Pearson

Which came first, the milliner or the polonaise?

Technically, the polonaise. I was supposed to be part of a Burnley & Trowbridge master class way back in … March 2020. Not that year, Satan. Fortunately, it did happen, in August 2022!. I was so glad to be part of the pilot master class for this gown, and back sewing in a class, even as I was intimidated by the form. (I am a maker continually in want of confidence, except for the times when I overextend myself.)

After an introductory lecture, we had a trip to view extant garments at Colonial Williamsburg, which is truly a delight. (I can’t collect 18th-century pieces; only a few early 19th-century things occasionally dip into my price range.) 

There’s nothing quite like looking at an original. You can see sloppy stitches and fine sewing, mistakes and alterations, stains, mends, and bright original colors in hidden seam allowances. Every garment tells a story, even without provenance, and sometimes those stumbling stitches give me the confidence to just keep sewing. 

Background and References

To understand the history and style of the polonaise, Kendra van Cleave and Brooke Wellborn’s article, “Very Much the Taste and Various are the Makes” (Dress, 39:1, 1-24) is the place to start. Kendra published an accessible summary here, if you can’t access the article. The main thing to know is that the gowns are made much like men’s coats (two back pieces, with pleats; bodice fronts that fall away from the body like a man’s coat, and that meet the back with side seams and pleats) and while the skirts are looped up, looped up skirts do not make a polonaise!

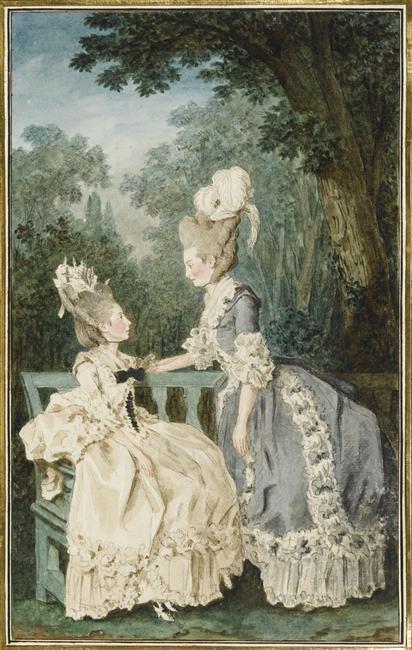
The other thing to know is that these appear earlier than we sometimes think. In the 1771 Louis Carrogis watercolor, both Mmes les Comtesses de Fitz-James et du Nolestin wear polonaise gowns (right). In the English world, the May 1775 Lady’s Magazine describes “nightgowns in the French jacket fashion, flying back, and tying behind with large bunches of ribbons.” (Ladies Dress for May,” 235. (1775). Despise these early references, we know the polonaise is not taking New England by storm, but it does appear in Philadelphia by 1778. This put the form within my interpretive range, so I felt more comfortable tackling the gown: I knew I would have a place to wear it. (What I will do with the redingote underway or the polonaise à coqueluchon I crave remains to be seen; at least the polonaise hoodie is a plausible stretch for Philadelphia.)

To the Making

You get where you need to go however you can

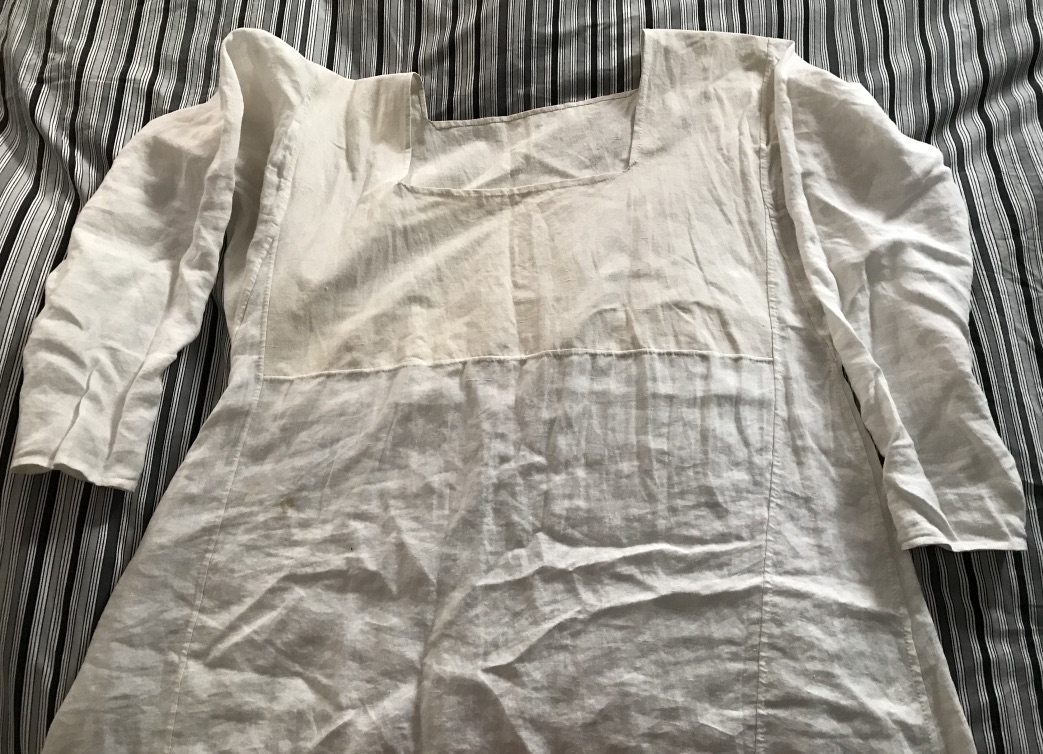
Starting with basic shapes from the last B&T pre-pandemic workshop, updated to reflect the rollercoaster of pandemic weight and tweaked yet again, I cut the backs and stitched the center back seam. The front bodice shape is cut wider, and in one piece with the skirts, as it will be pleated to fit the body. The fullness of the skirts ends up pleated at the side and back seams much the way a man’s coat skirts are pleated, only more generously. So the body of the gown is cut from four main pieces (two fronts, two backs) along with the sleeves and sleeve straps. That’s it. In some ways, this is a simpler form than the English gown, though the fitting feels trickier because it’s not happening in vertical back pleats that many of us default to. It is a gown best made to you by someone else (hence the workshop) or by you on a well-fitted mannequin. 

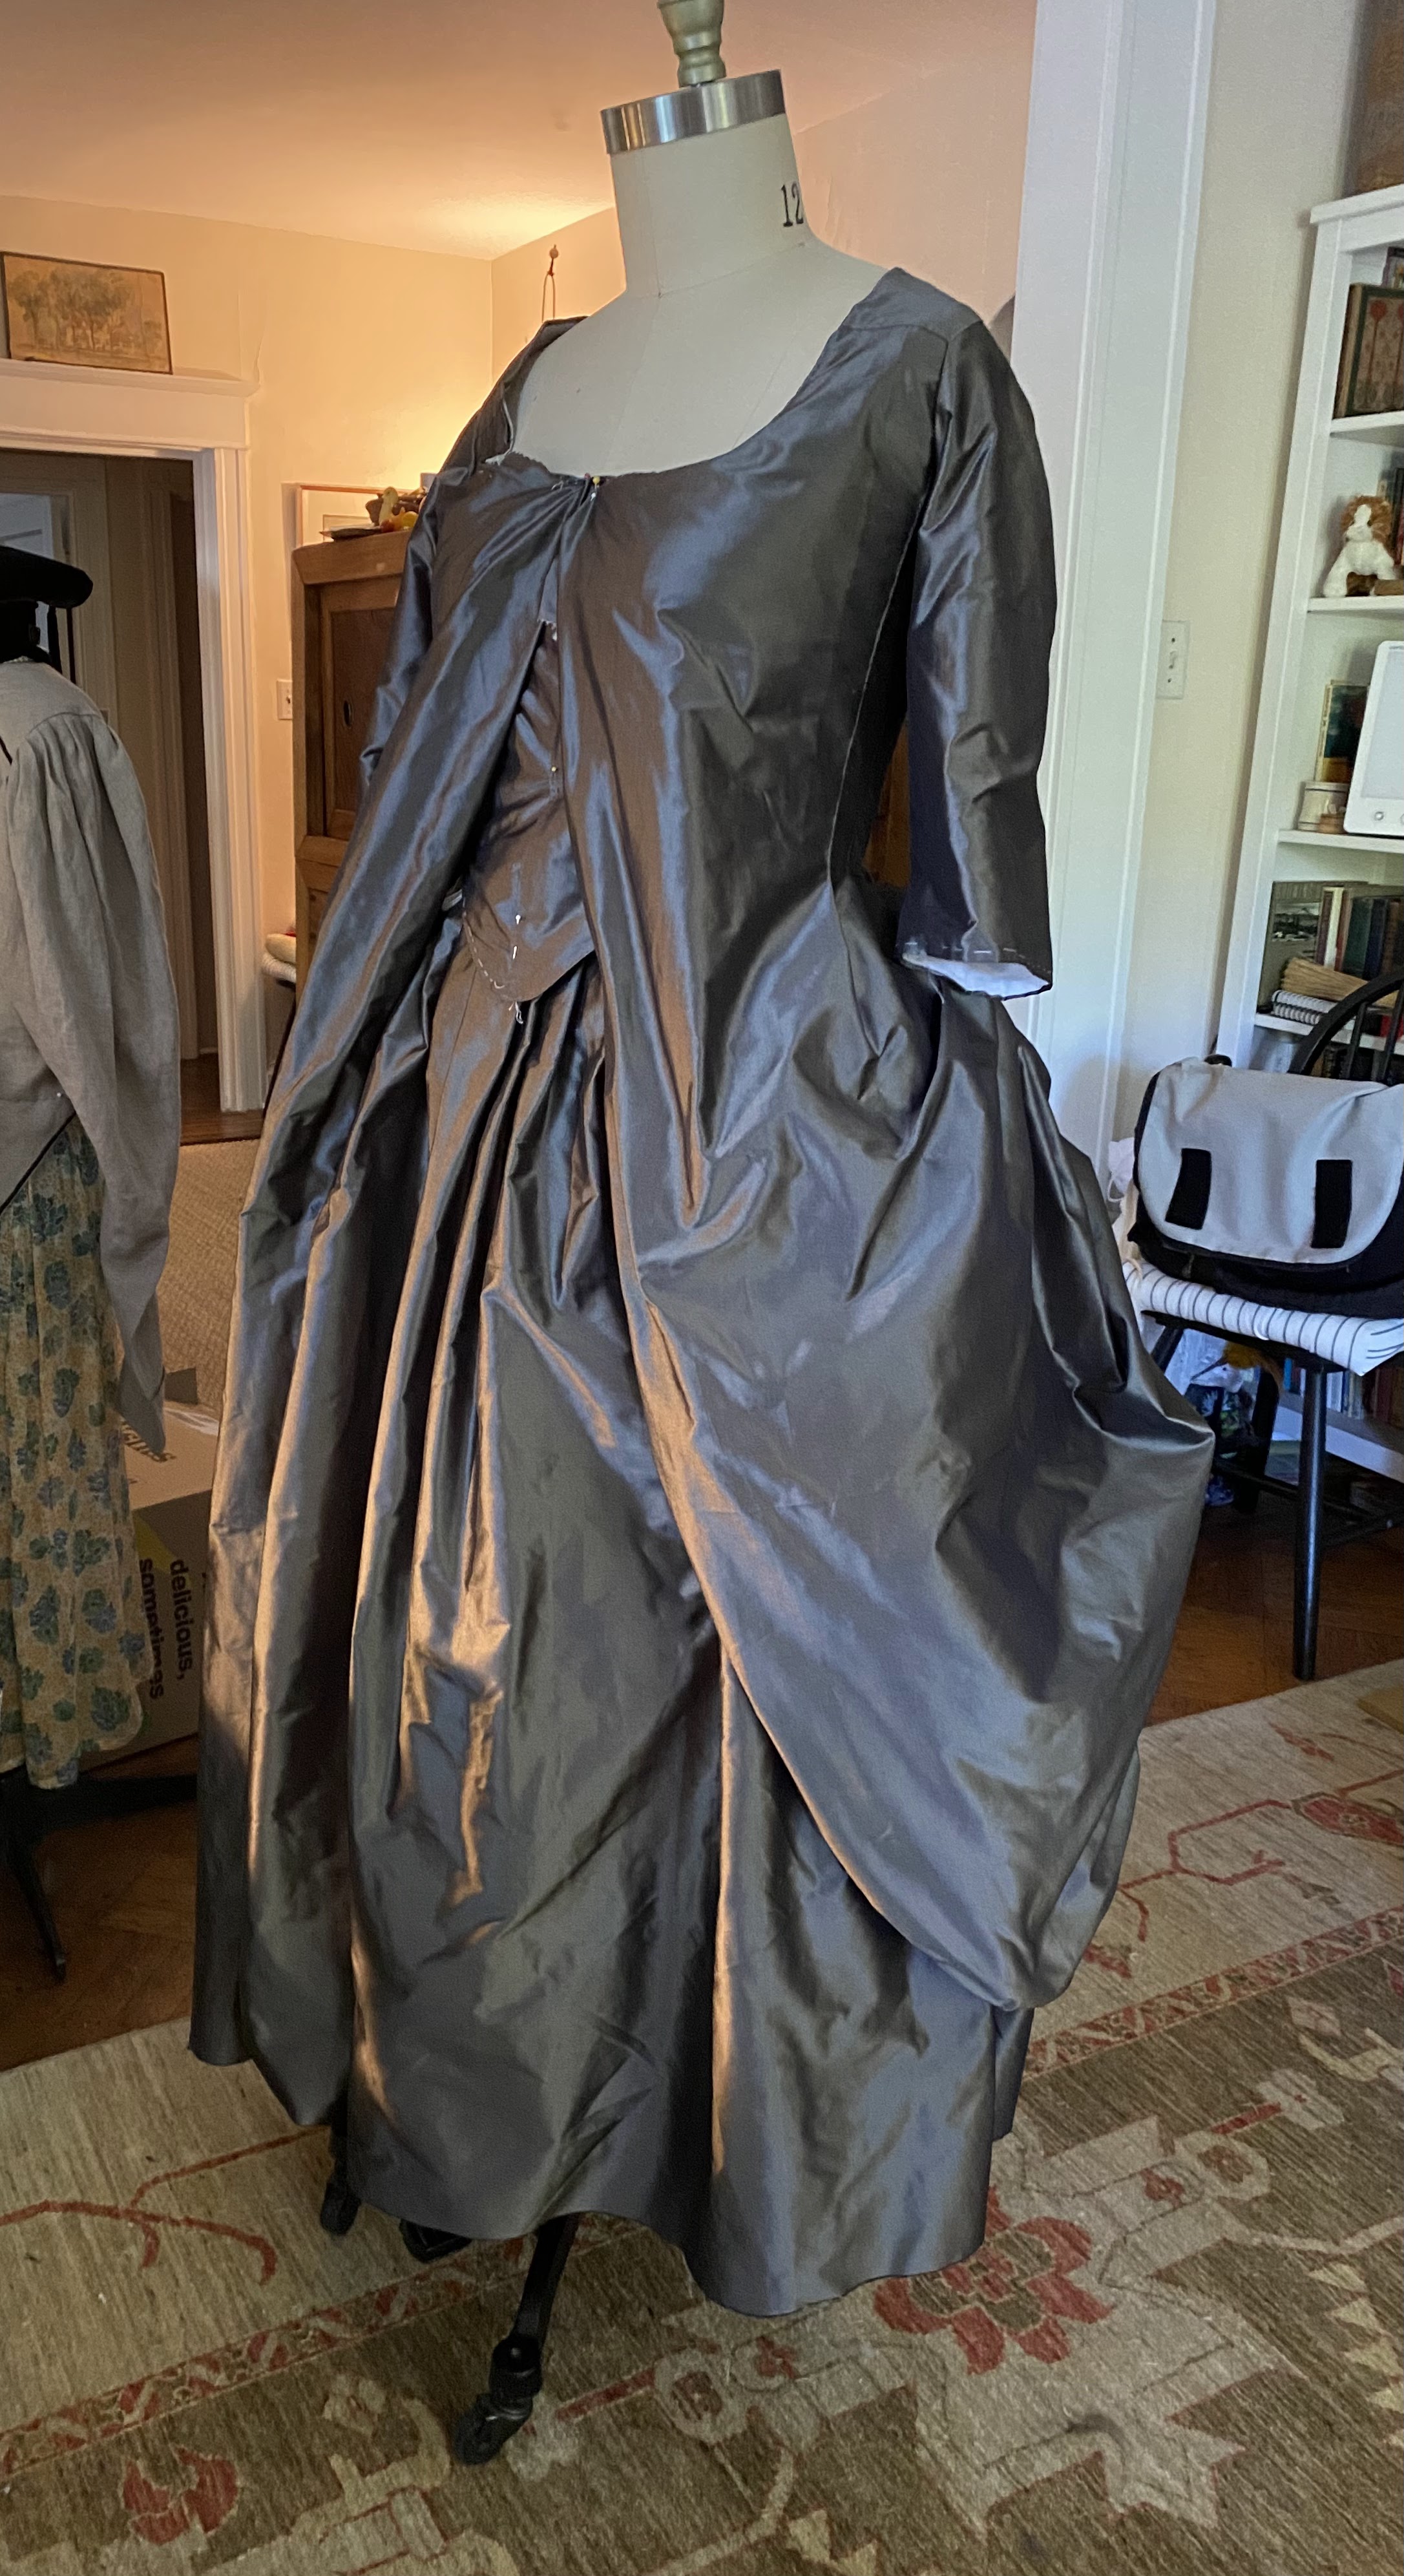
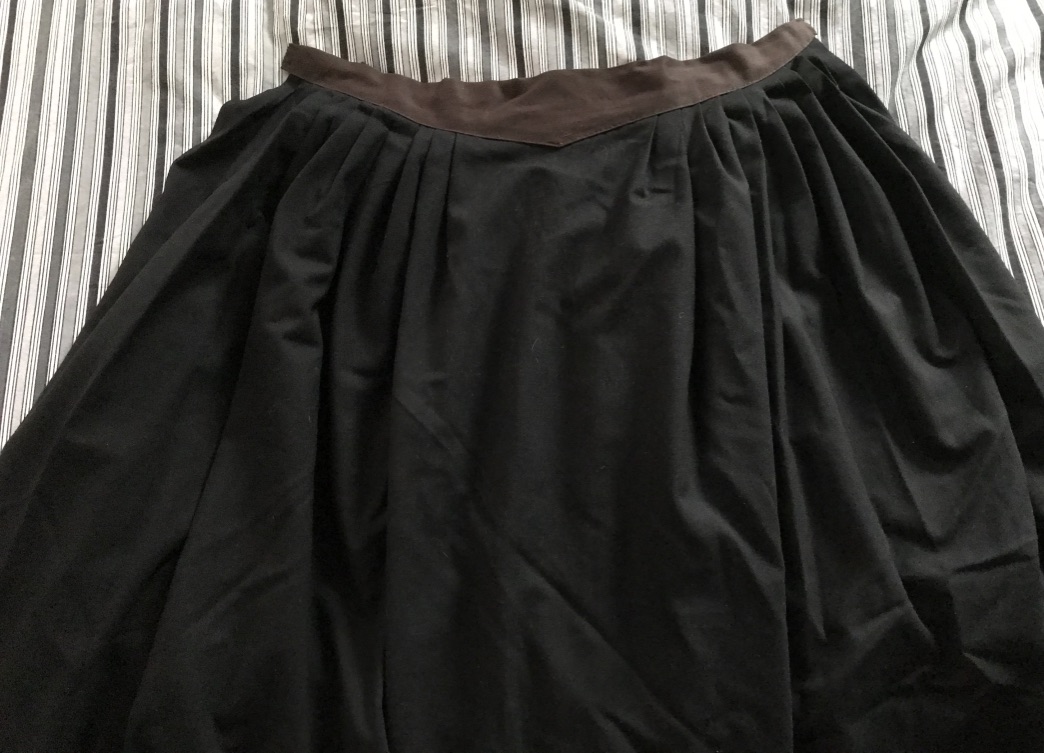
I chose a dark grey silk taffeta from Silk Baron, purchased in November 2019 just after I registered for the class. By the time I was actually  packing for class,  I’d started a new job, moved to a new city, and helped Drunk Tailor move to a new place. I had no idea where I’d put 8 yards of silk— purchased before prices really jumped. Reader: when we moved BK, I’d stashed it under my bed, handy for the class. I did not rediscover this cleverness until all other locations had been searched and a mild panic had set in. 

Beginning

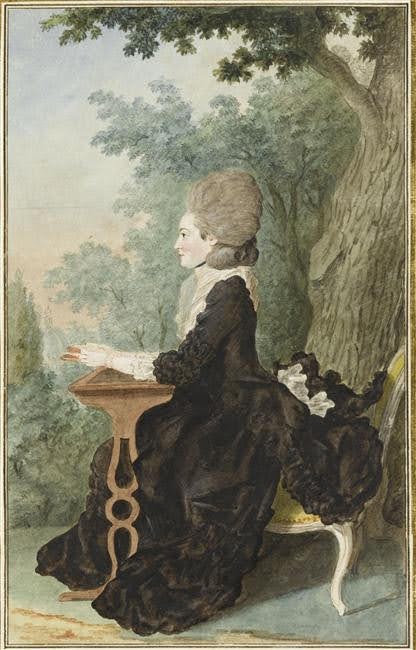
The inspiration was a watercolor drawing by Louis Carrogis of a woman in a black or dark grey gown. Back in 2019, I think I was thinking of a polonaise for a widow, but I don’t recall. In any case, there it was: dark grey silk. Off we went. 

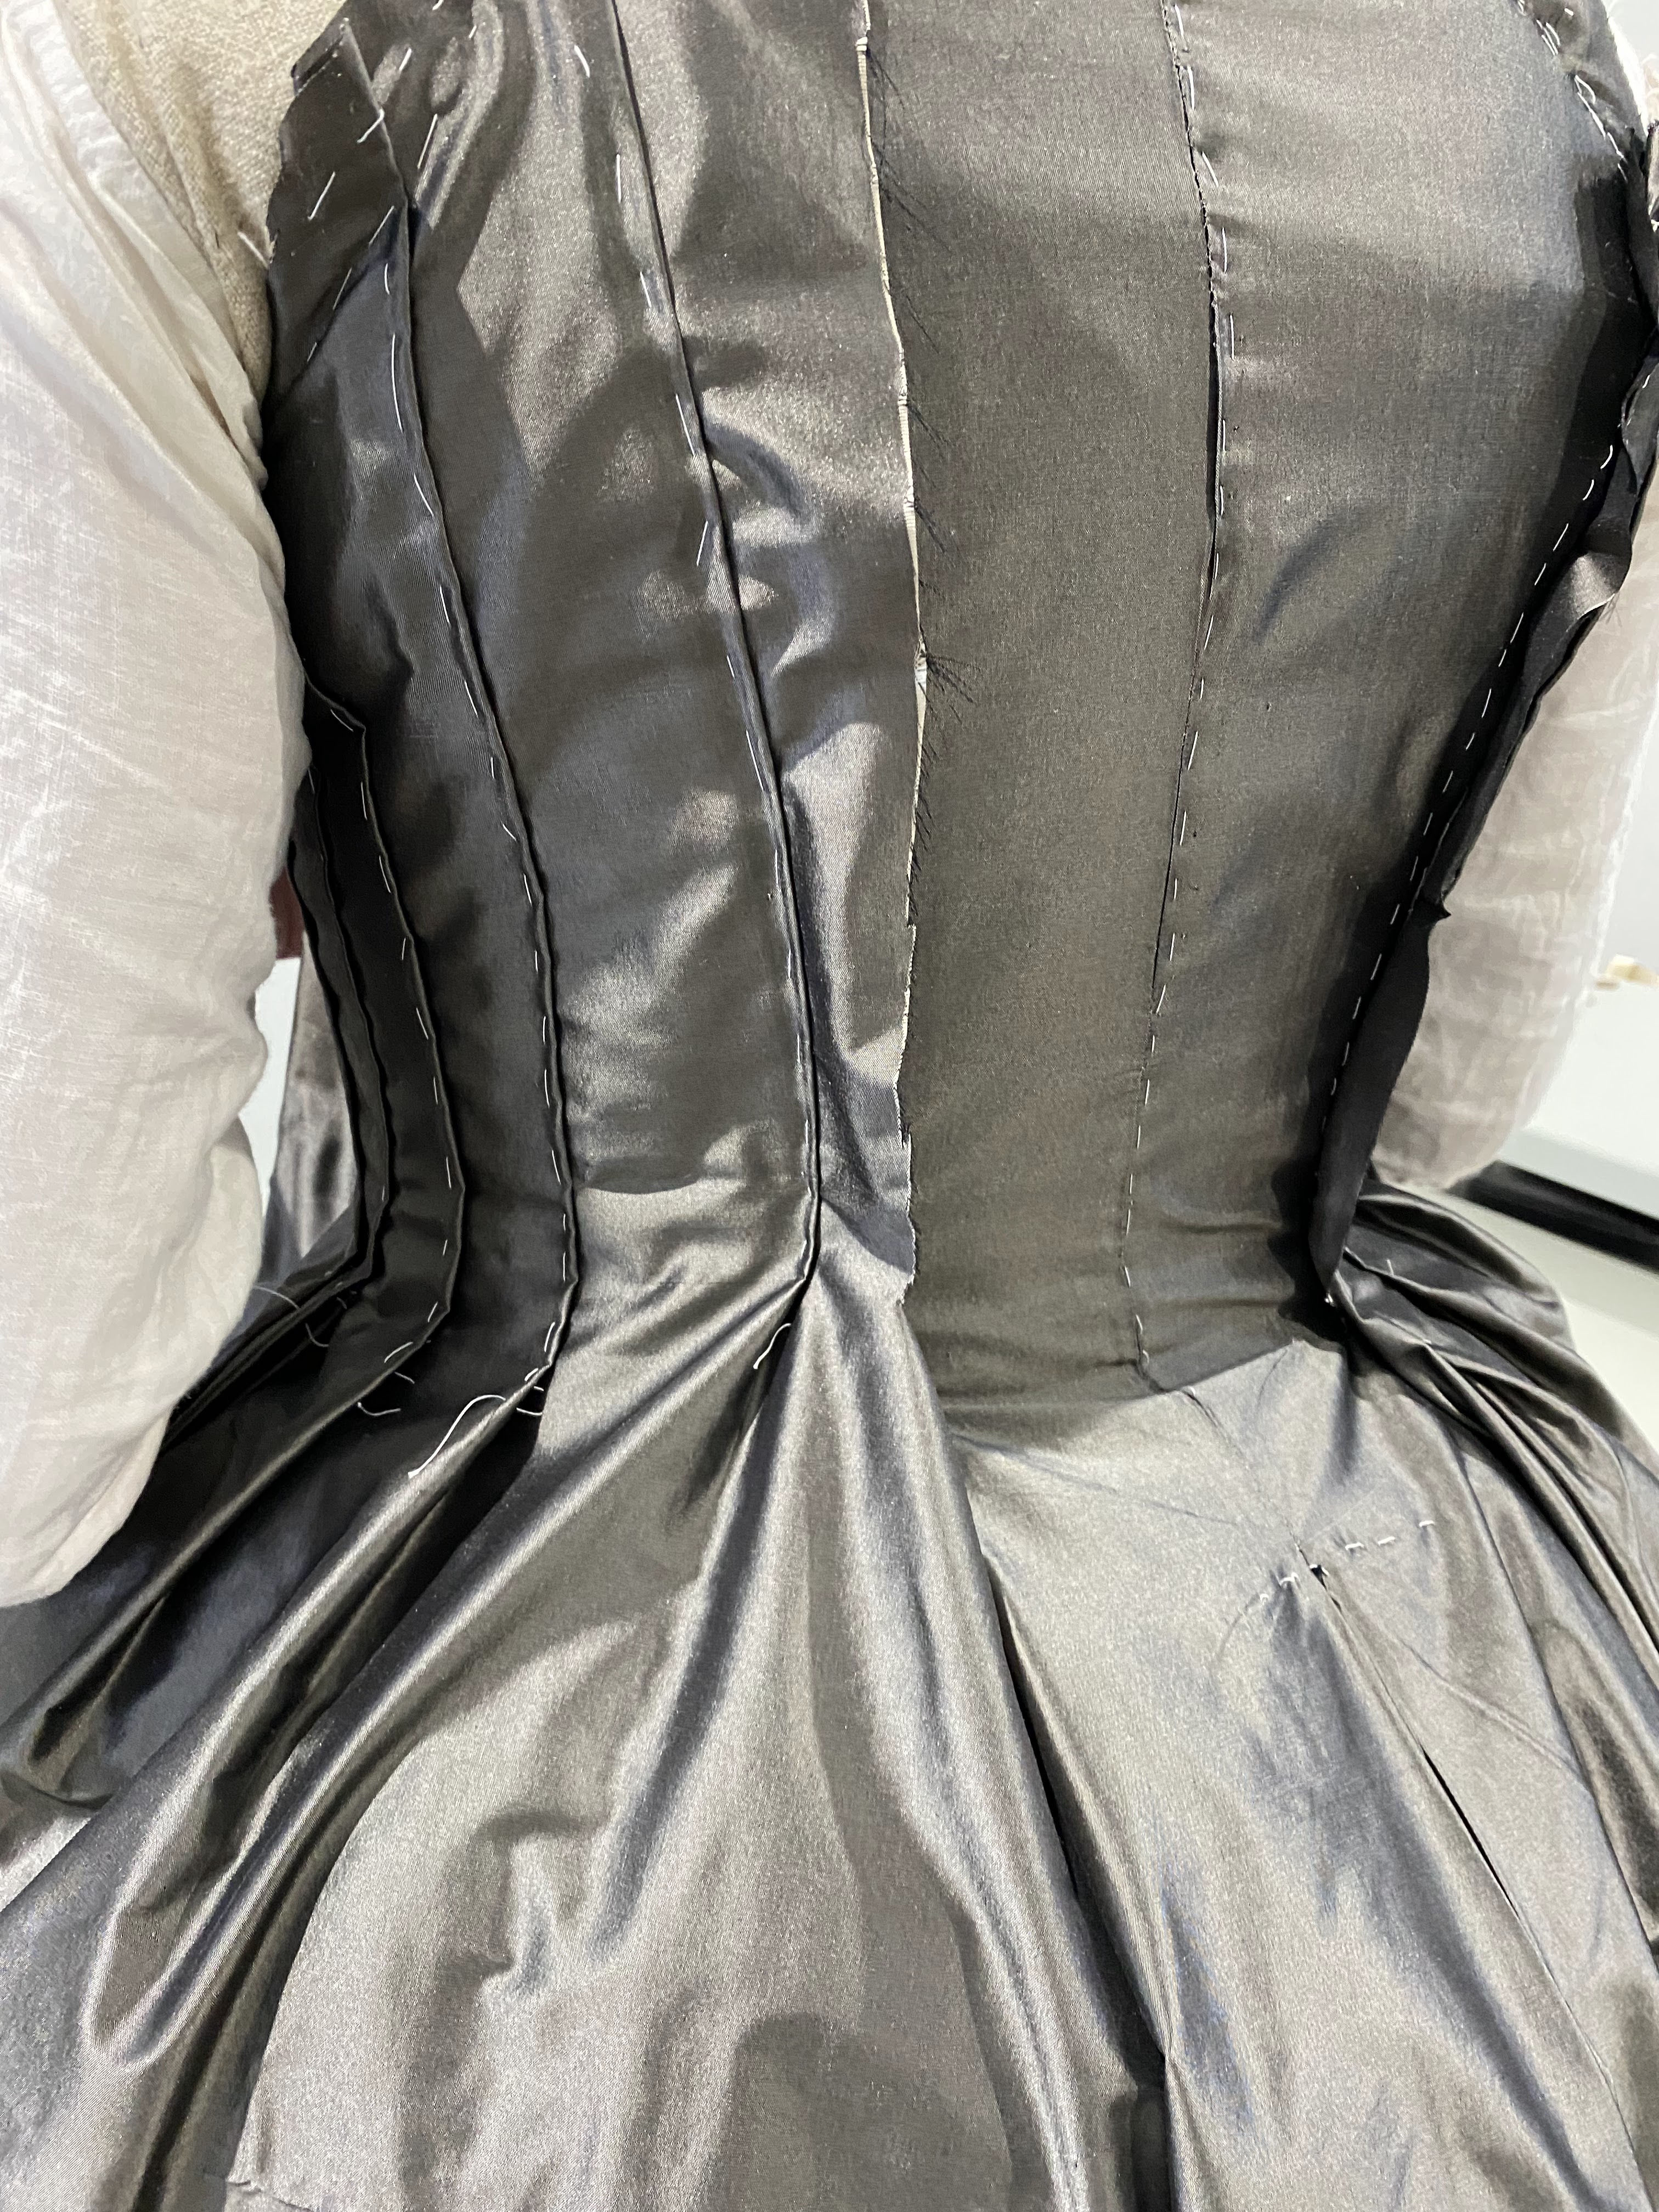
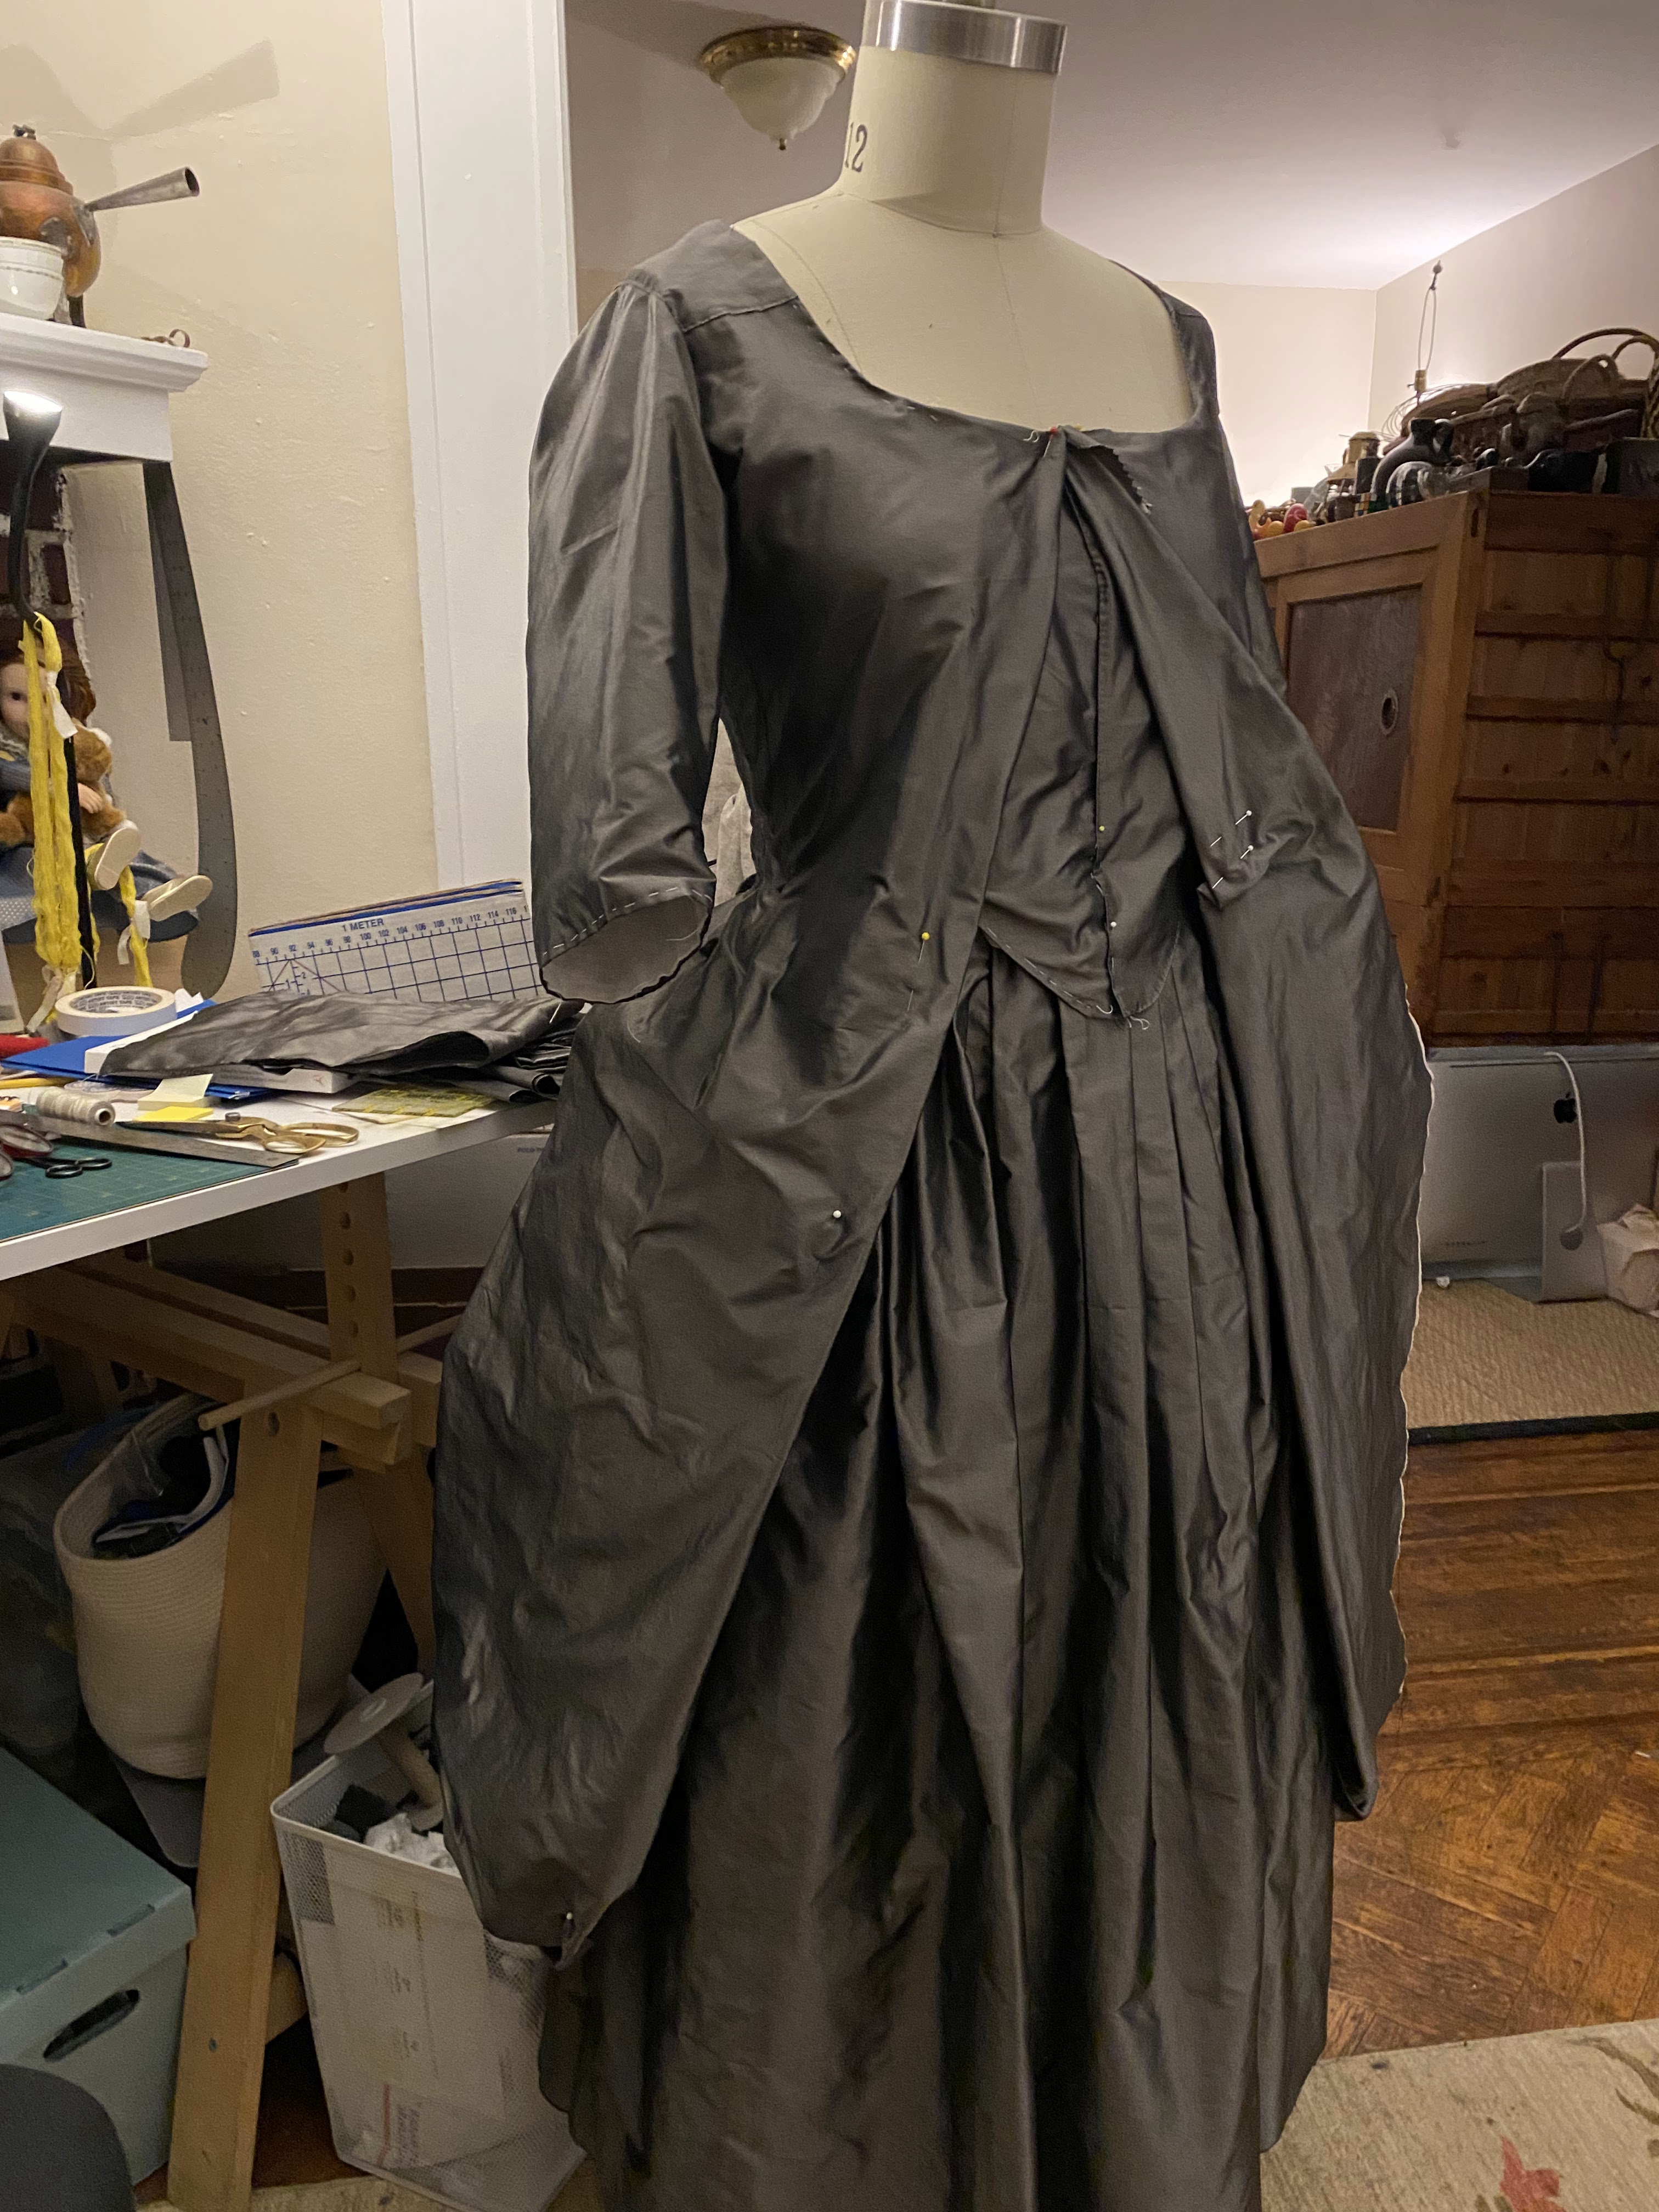
The back was simple enough, with a straightforward center seam and inverted box pleats; with that and the lining/front bodice pieces as a foundation, the fronts were pleated to fit. Basting was key to keeping this all in place, and yes, I discovered just how asymmetrical I am. 

Stitching the side pleats was straightforward, and satisfying as the gown began to take the polonaise shape. Once the side bodice seams are set, the skirt seams can be stitched (you would’ve basted them already). Then you can start working on the buttons and cords that control the pouf of the skirts. 

Much of the shape is determined by the rump, which is essential for this fashionable profile. I used the Scroop Frances Rump largely because it is free and that was much faster than fiddling about patterning this myself. It’s stuffed with horsehair for upholstery, which adds more warmth than you’d expect as you work on this in August in the steamy mid-Atlantic. I also used my red silk quilt petticoat for shape, continuing the warmth theme, and the cat added her fur, just to make sure all the hair and warmth bases were covered.

The sleeves were made from the shape I’d gotten in that last pre-pandemic workshop, so they were pretty easy. Setting them was another matter; fortunately, I had help. The construction from here on is standard 18th-century gown making, with a should strap piece and a binding piece for the back. Cutting the skirts seemed beyond me, so I diverted into a fancy apron.
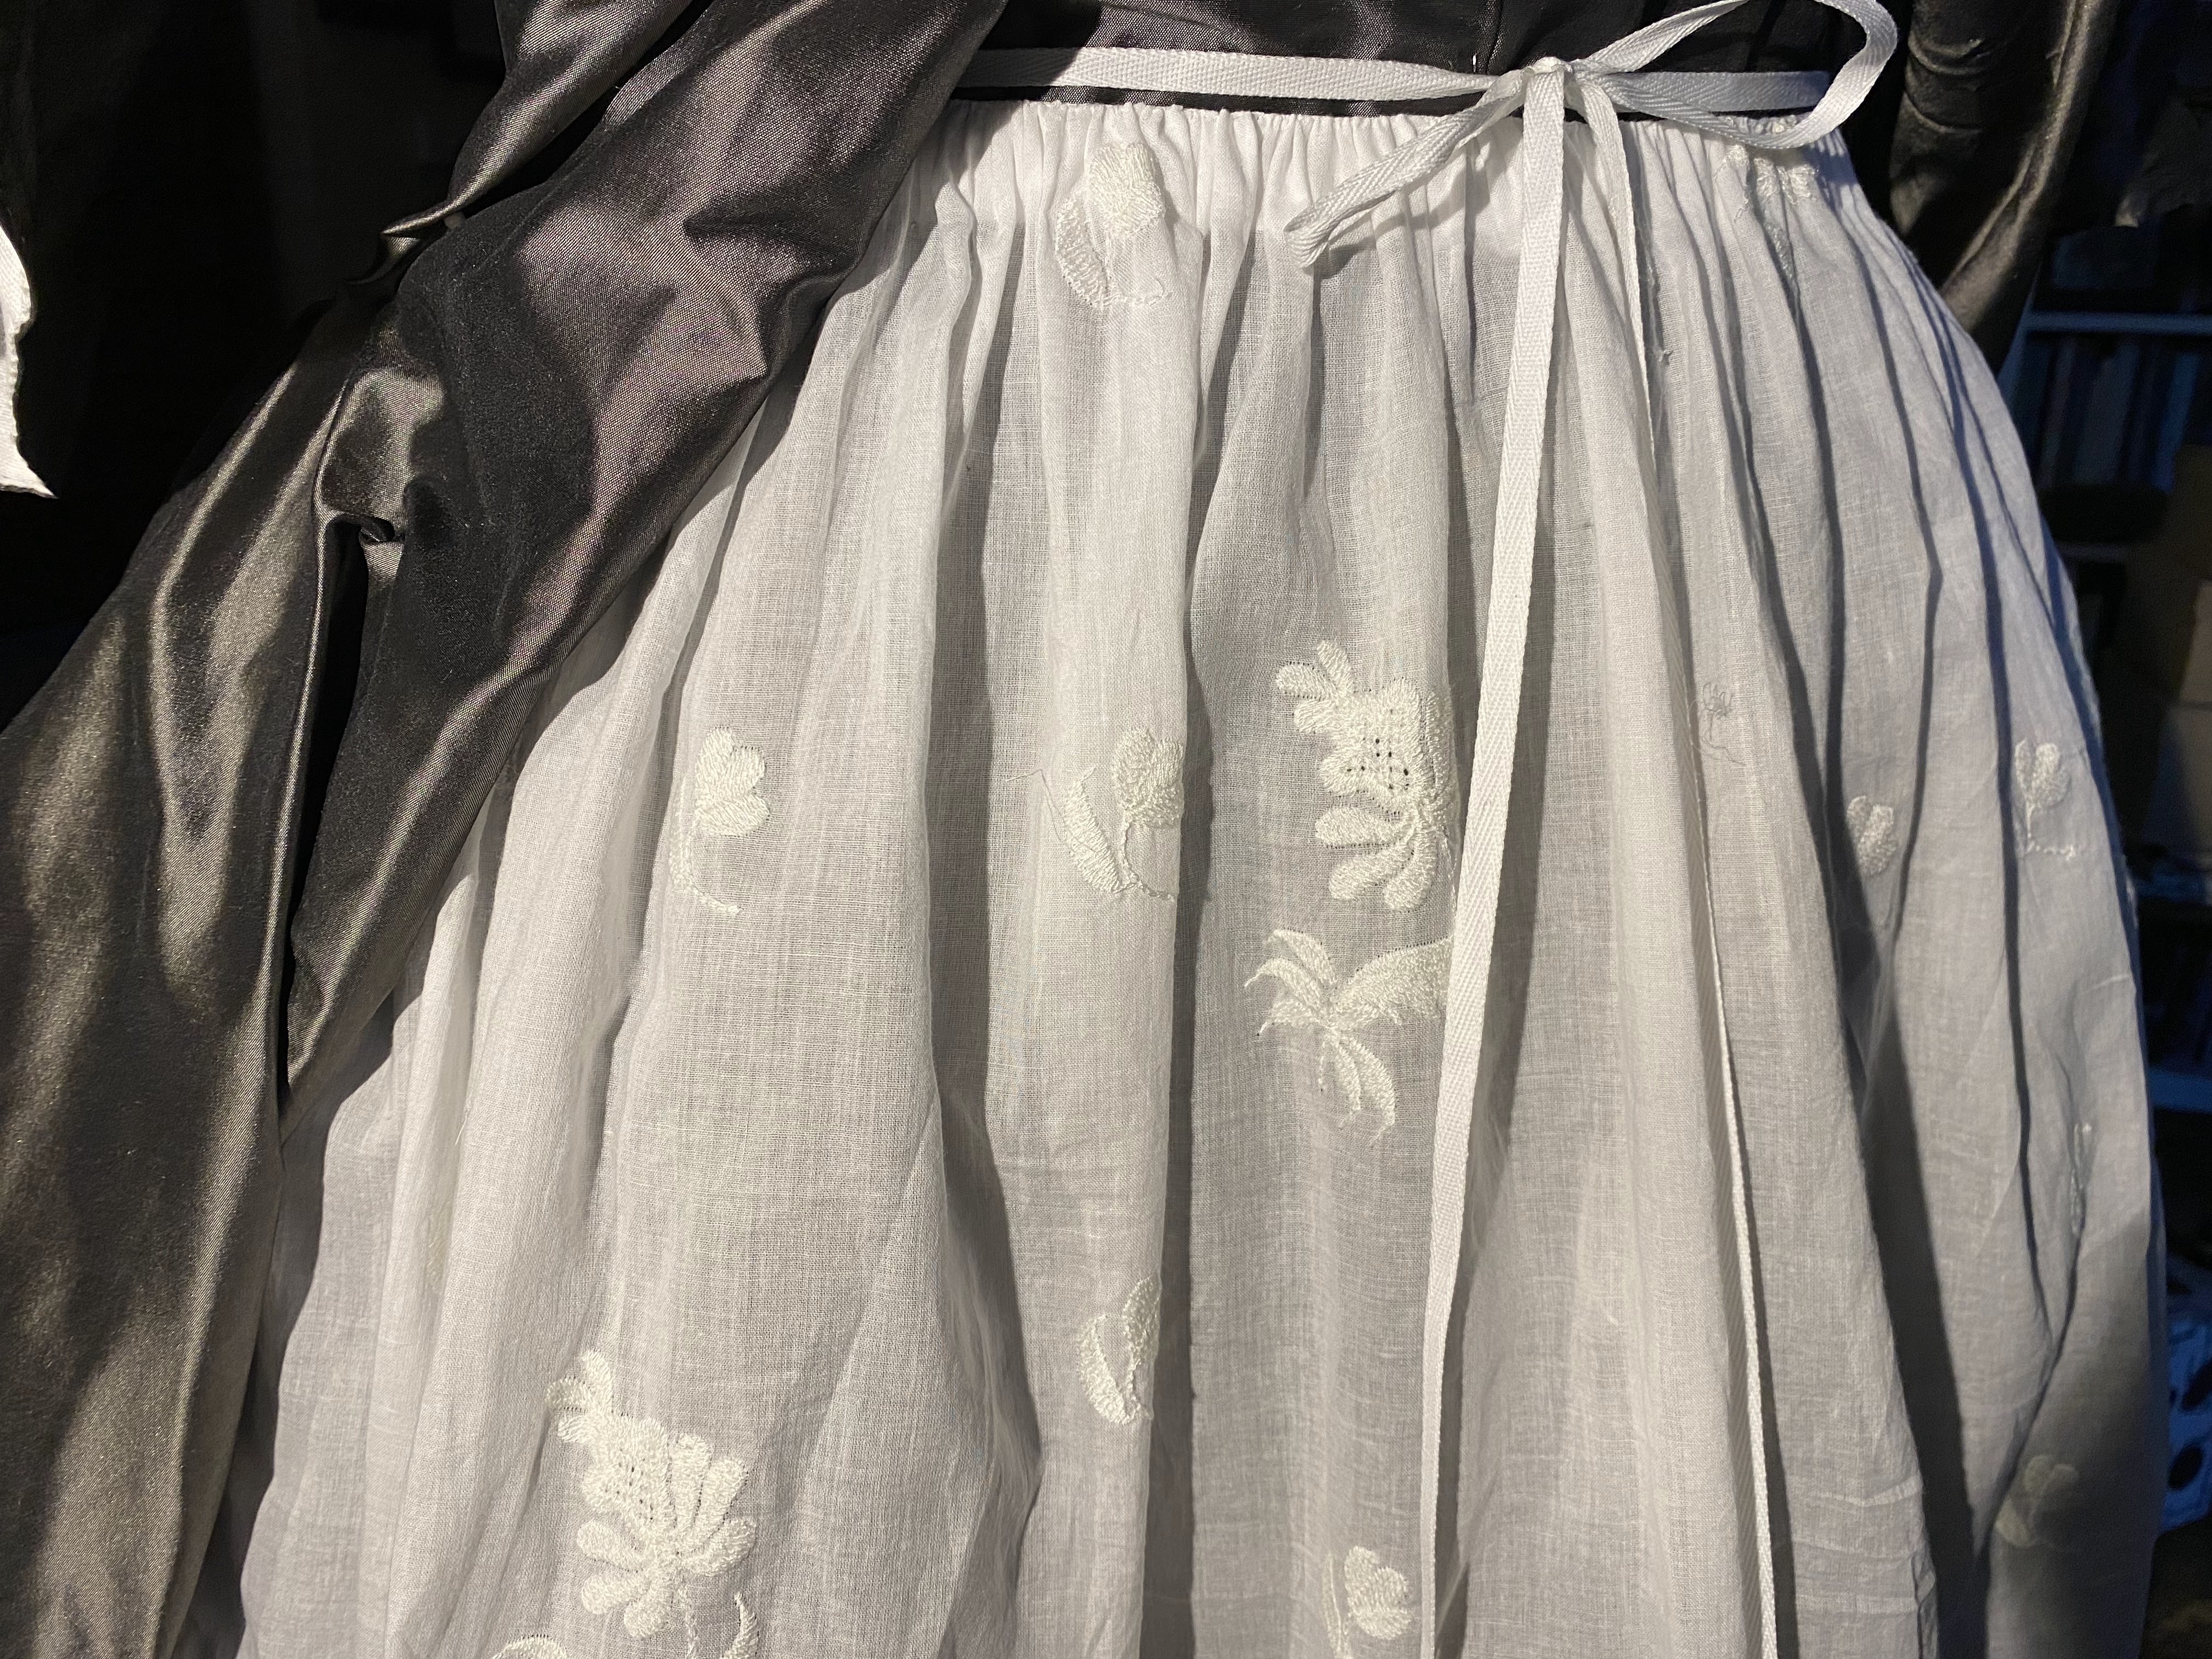
A Diversion

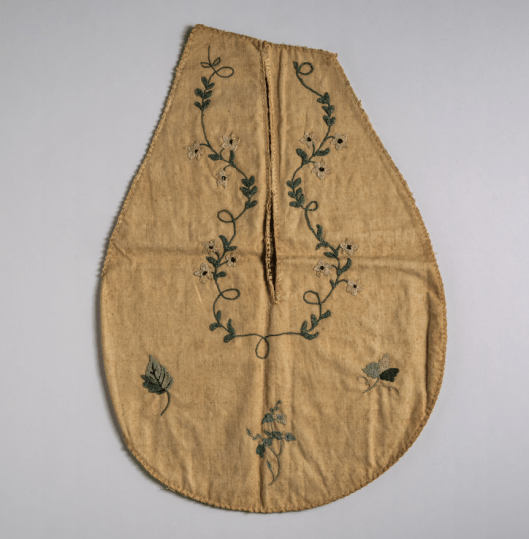
Sprigged muslin or lawn was a common apron fabric for the decorative aprons worn by the better sorts and seemed appropriate to my milliner. She needed to be fancy but practical since I was imagining this ensemble as comfortable but fashionable workwear. Is there a 21st-century analog? The 20th-century analog for polonaises might be the velour Juicy Couture tracksuits a certain kind of upper-middle-class woman wore to go shopping with friends on a Saturday: expensive, trendy, and comfortable.

I imagined Ann Pearson Sparks projecting her currency in fashion trends by wearing this style while wearing an apron as she trimmed bonnets. That’s a fantasy as far as it goes since I have no immediate evidence of Ann’s clothing, only educated guesses based on readings in costume history and Philadelphia in the 1770s.  The apron fabric is a reproduction from Burnley & Trowbridge, trimmed with a plain cotton lawn, also from B&T.

That brought me to October, a full six weeks after I started this project. 

Cutting the fronts

I knew I’d initially cut the fronts too long, longer than a fashionable proportion, and I knew, too, that I had to get trimmin’ because this gown had to be wearable in four weeks. (Admittedly, I took another workshop along the way because a spot opened up and I grabbed it.) I started by pinning the fronts to gauge the length I wanted, and then there was nothing to do but trim. The change (improvement) was immediately apparent.

Trim it!

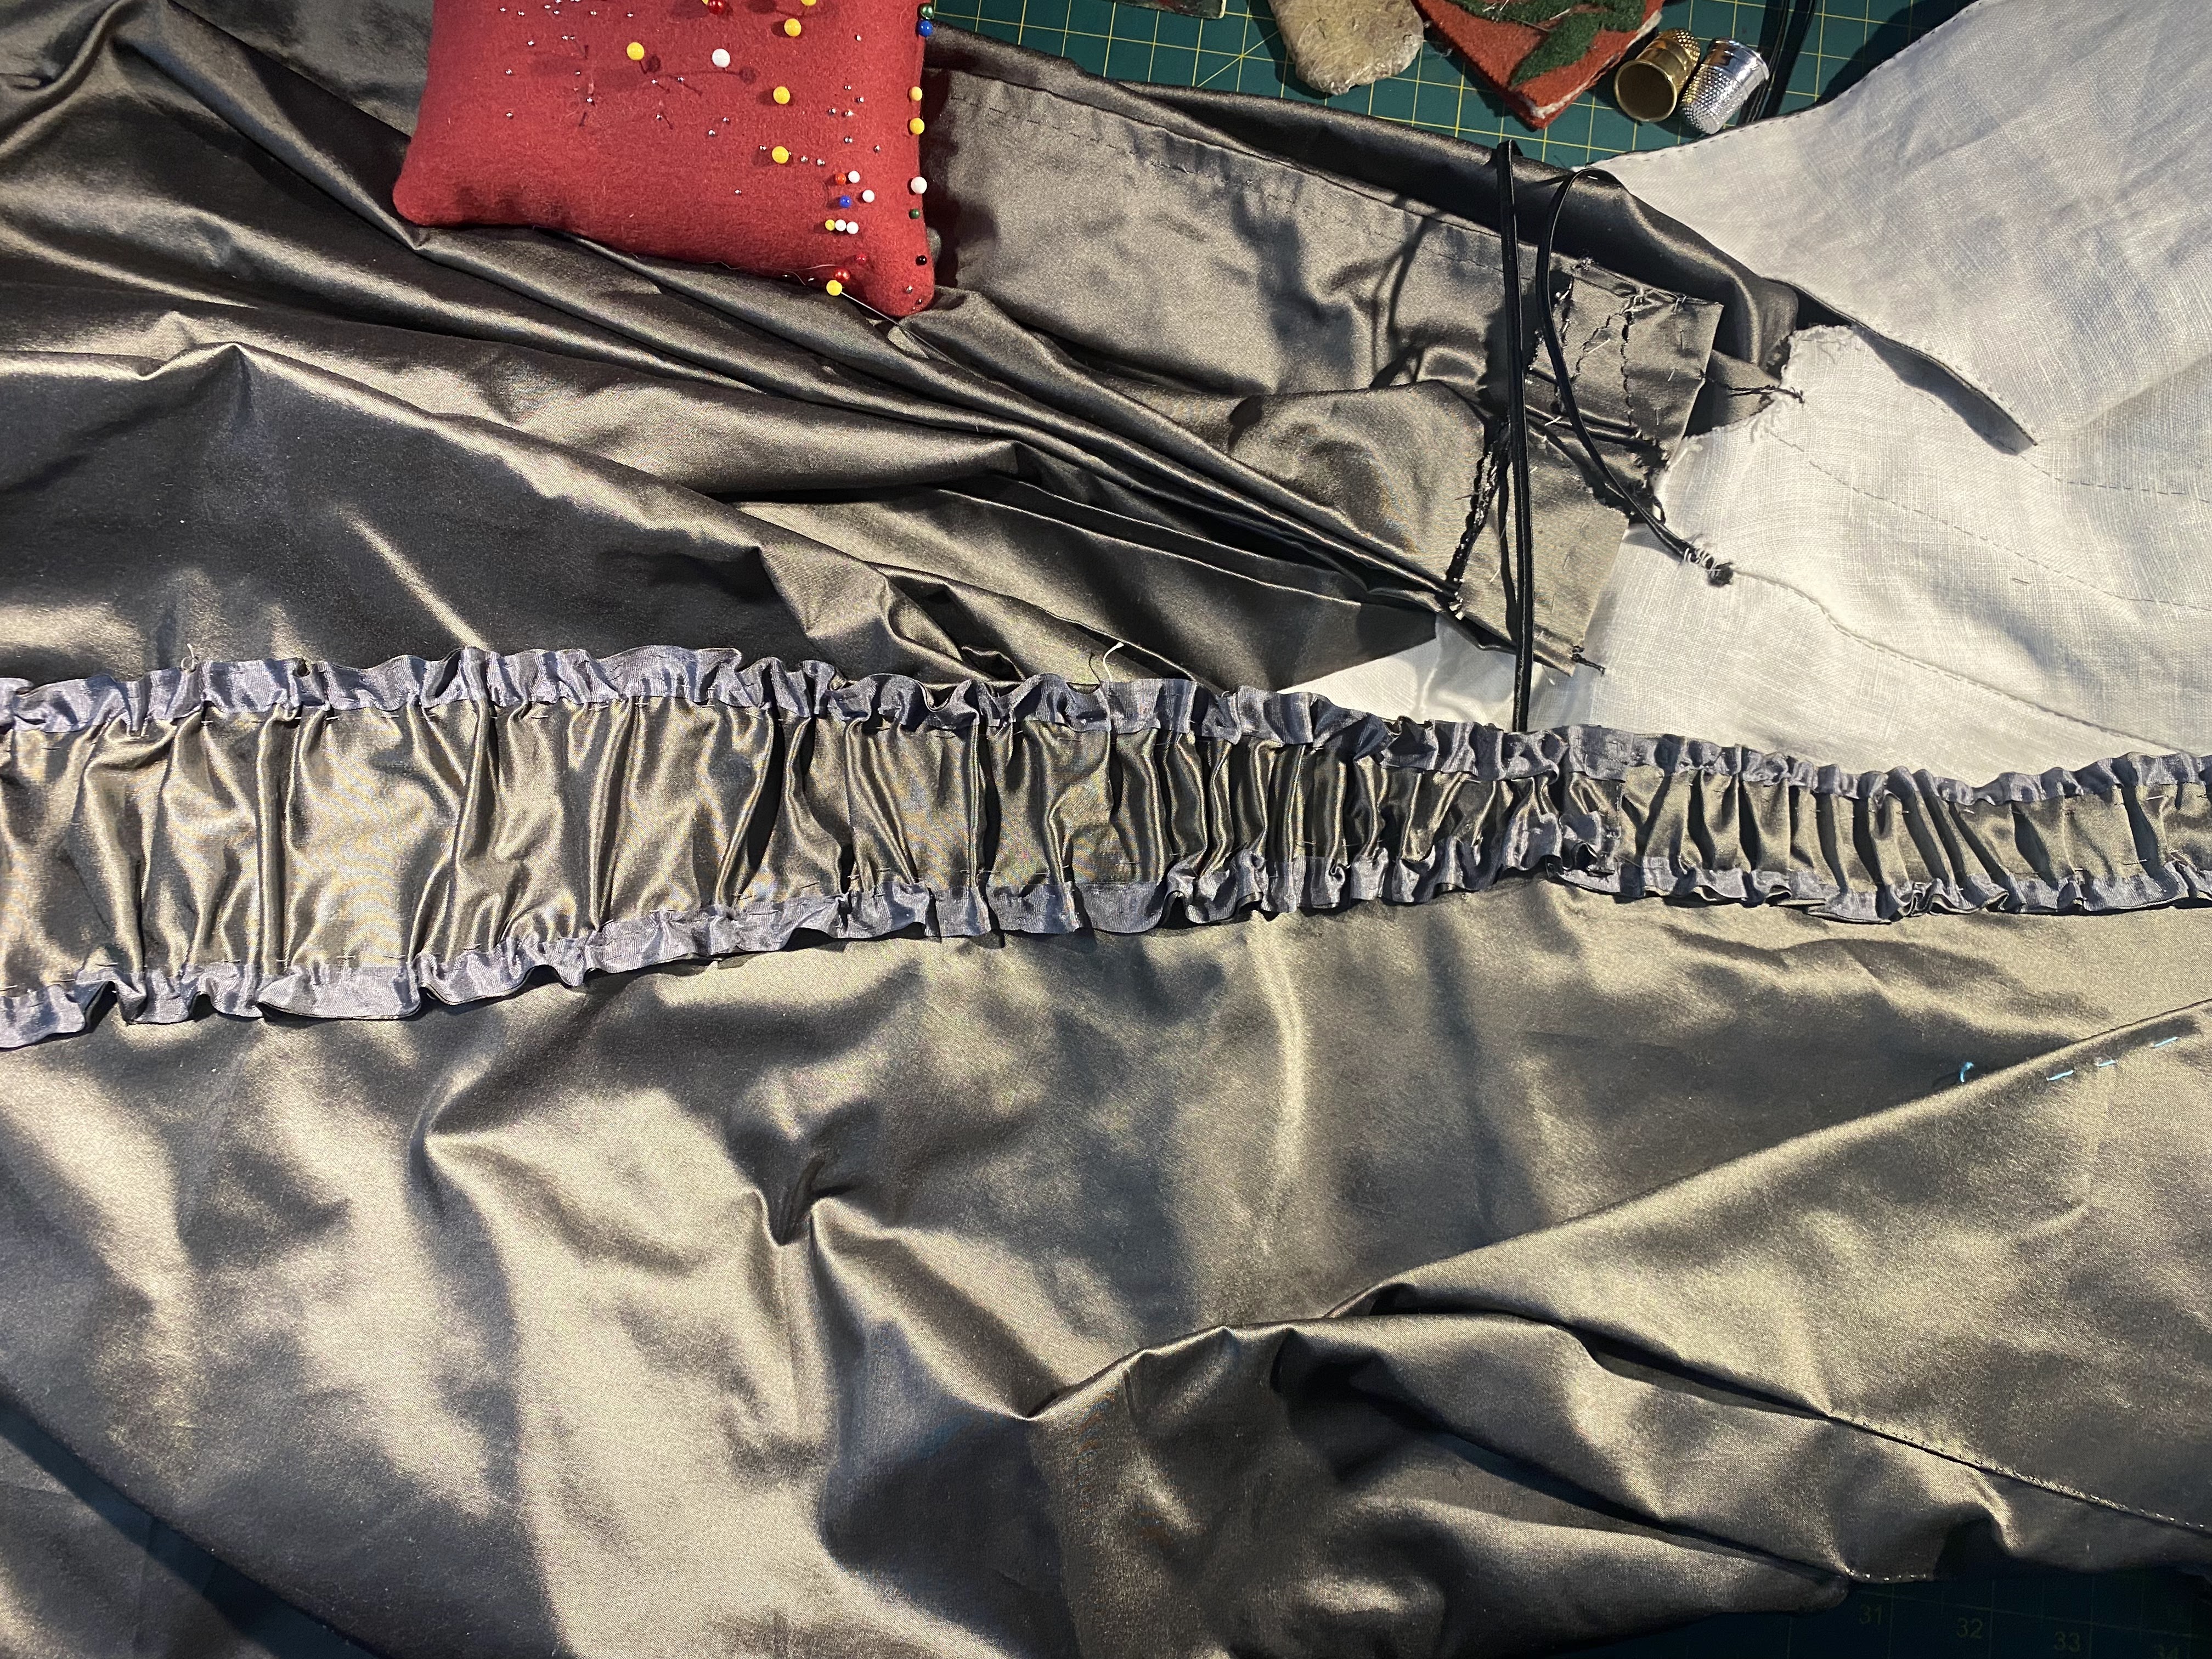
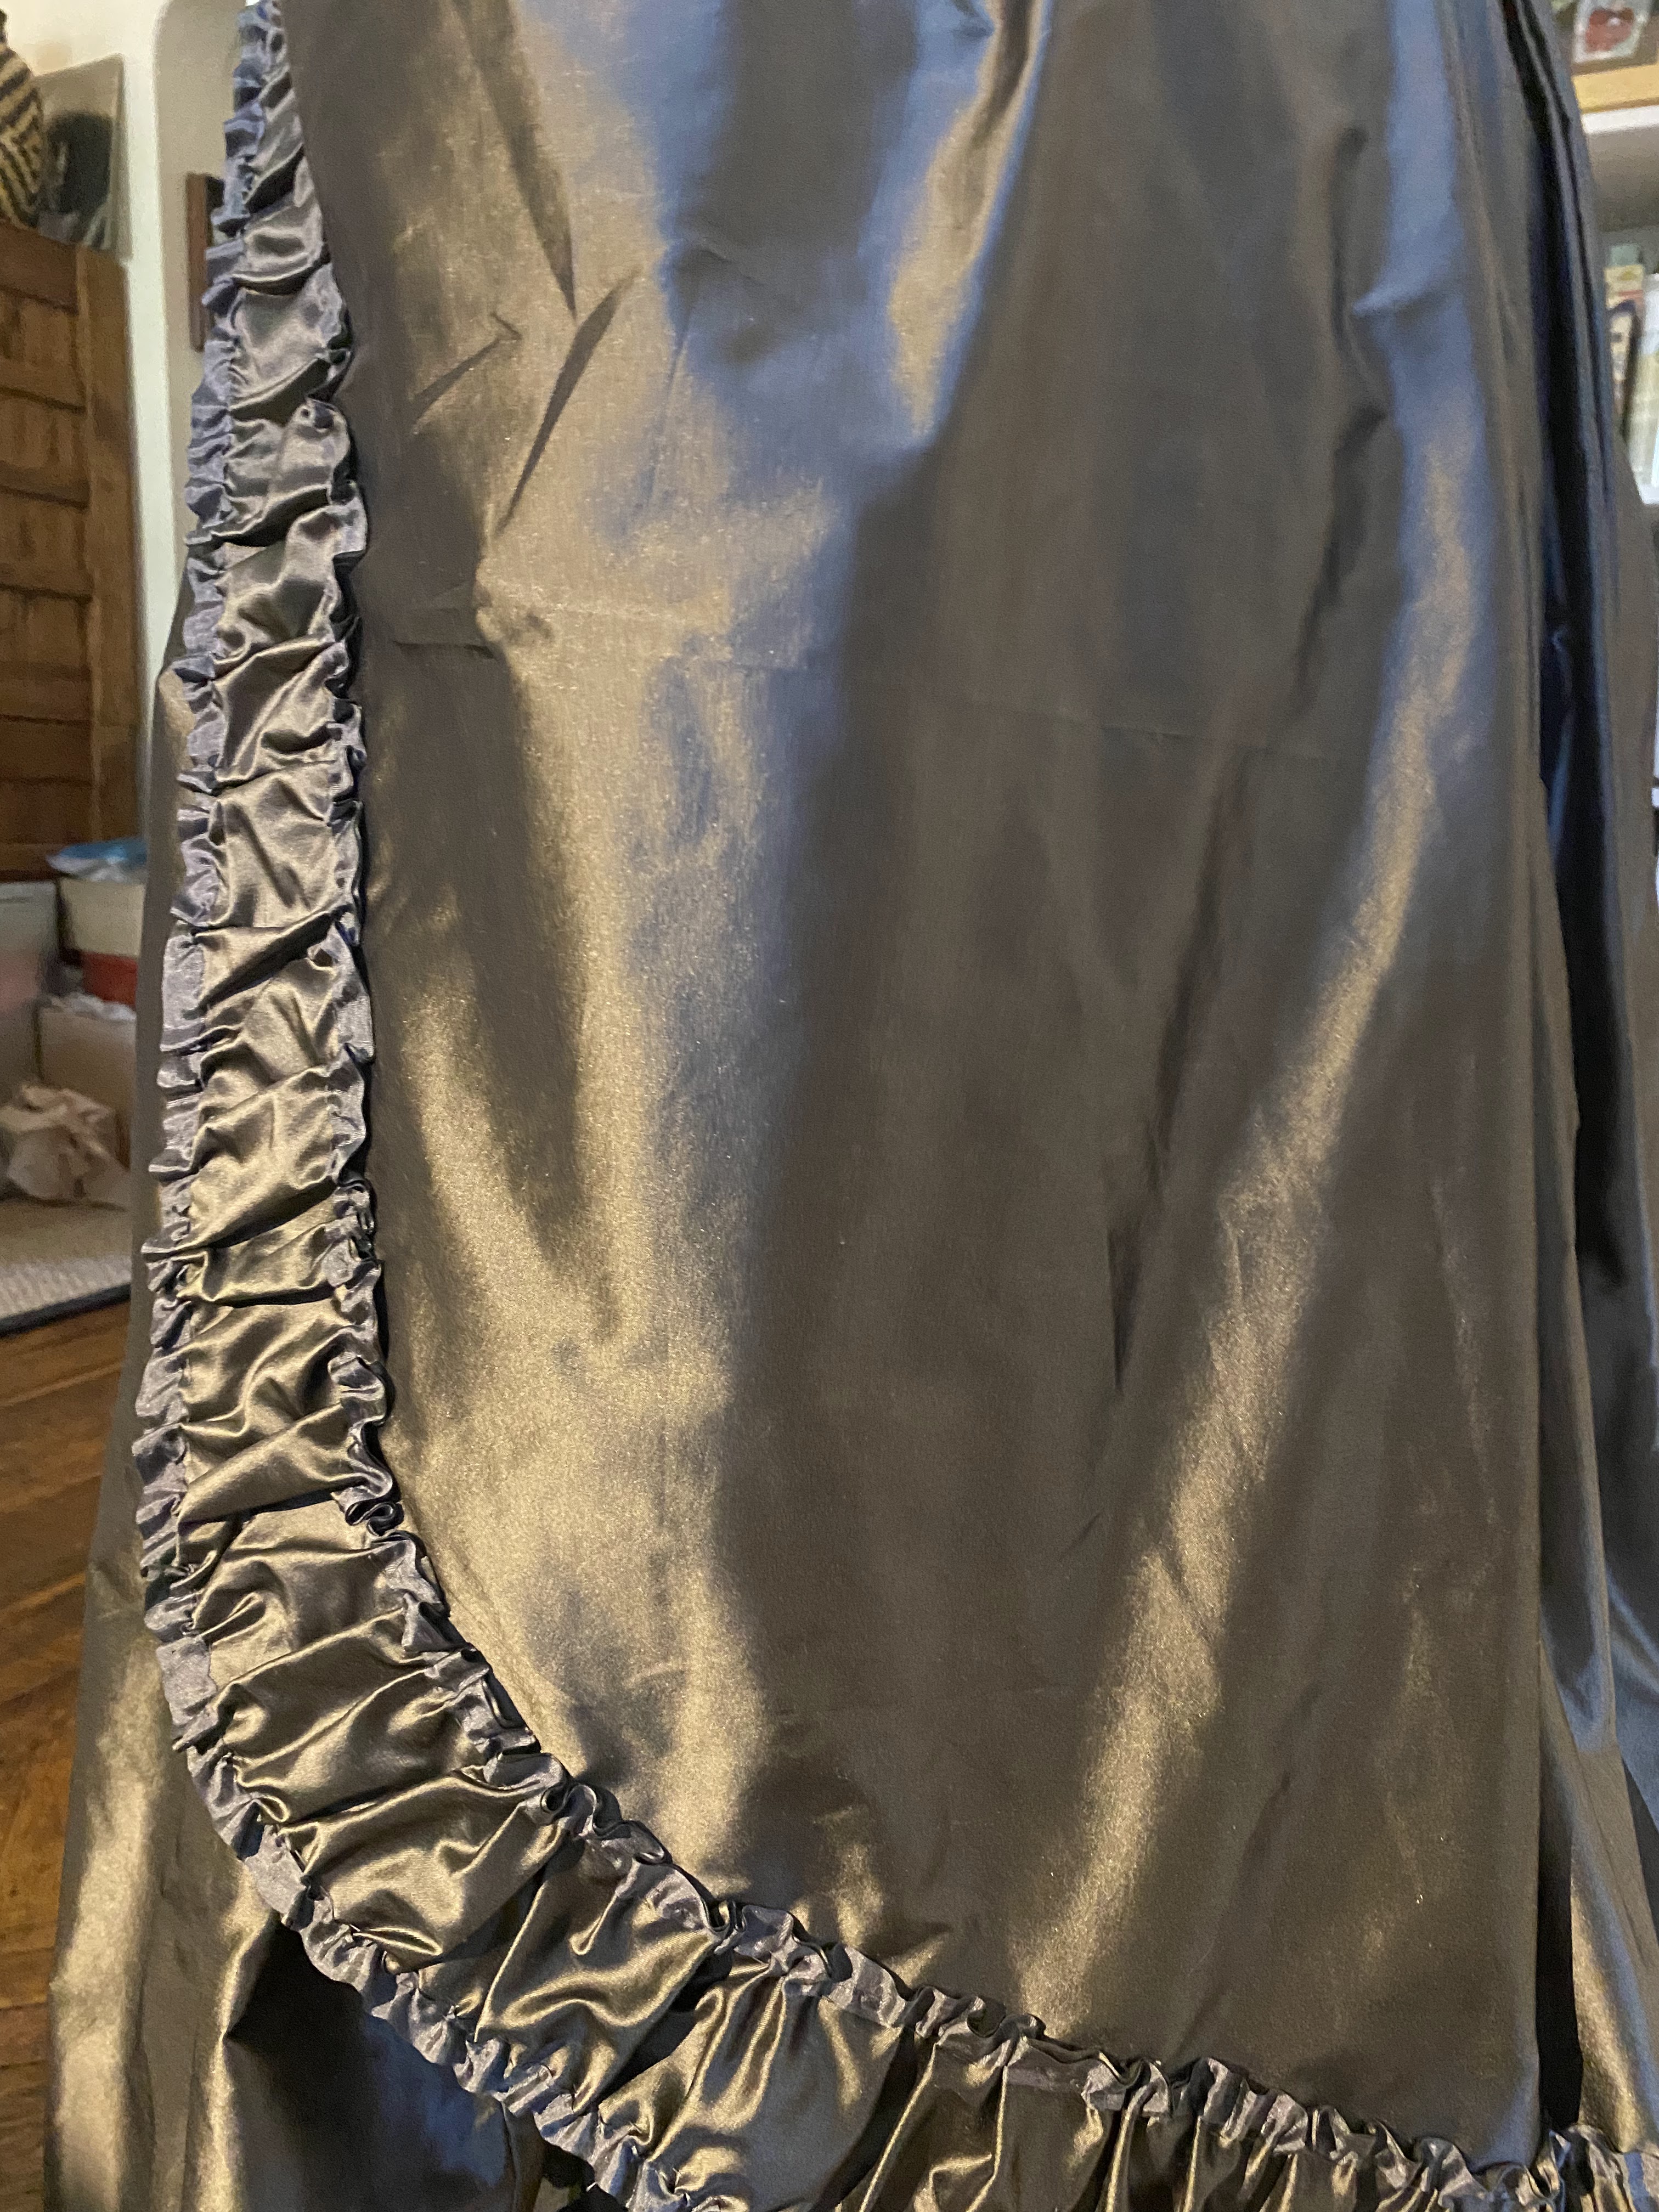
Trimming the fronts also gave me the fabric I needed to trim the gown. I’d decided on self-trim because as much as I love how gauze looks, the hemming seemed insurmountable. My first impulse was to pink the edges and gather the trim. This failed because I could not get sharp pinking irons in the shape I wanted, and my assistant’s tests with pinking shears didn’t look right, somehow. Pinking was abandoned as too much work for the results, so I bought some plain weave silk ribbon, and set about binding the edges. 

I needed two widths of ribbon because the trim was scaled, from two inches at the neck and upper bodice opening to four (?) inches at the gown hem, with a full eight inches of ruffle on the petticoat. After starting the trim on October 8, I finished it on November 2. Three and a half weeks, while working full-time and undergoing an outpatient procedure at the end of October. (Yes, I had surgery the Monday before a two-day event, worked full-time, and went to a workshop while addressing debilitating anemia. I am not the most sensible human around.)

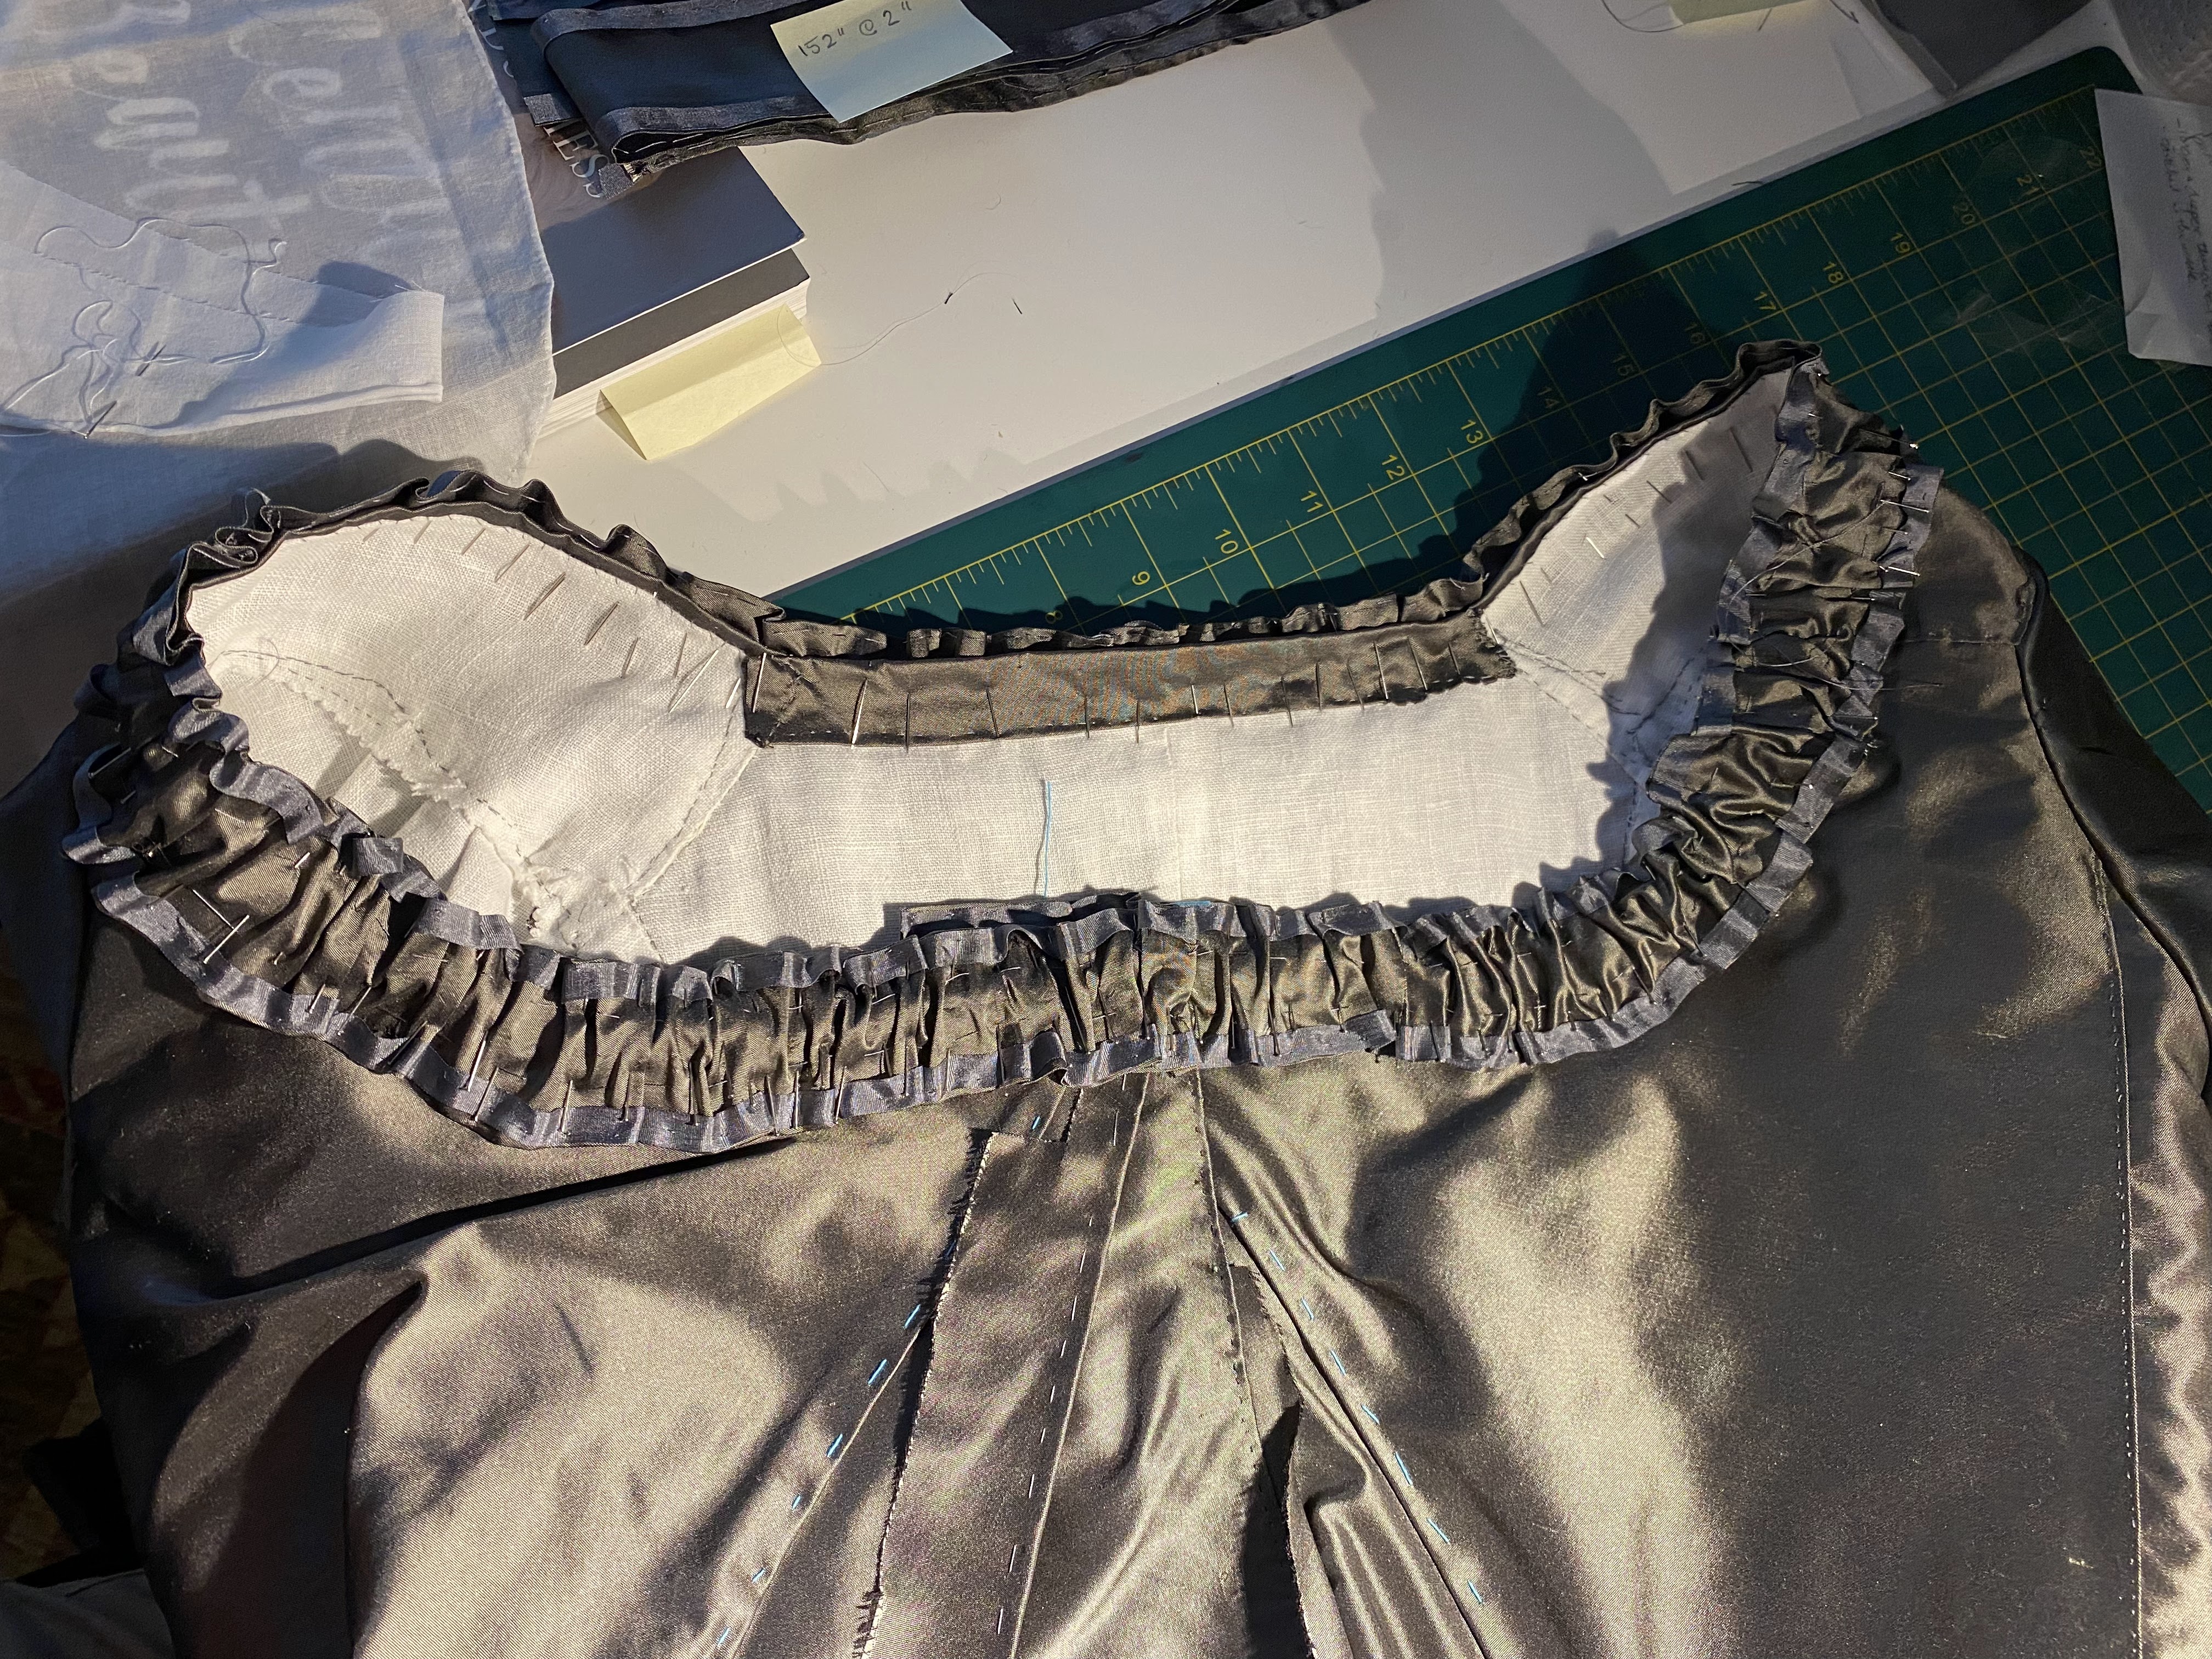
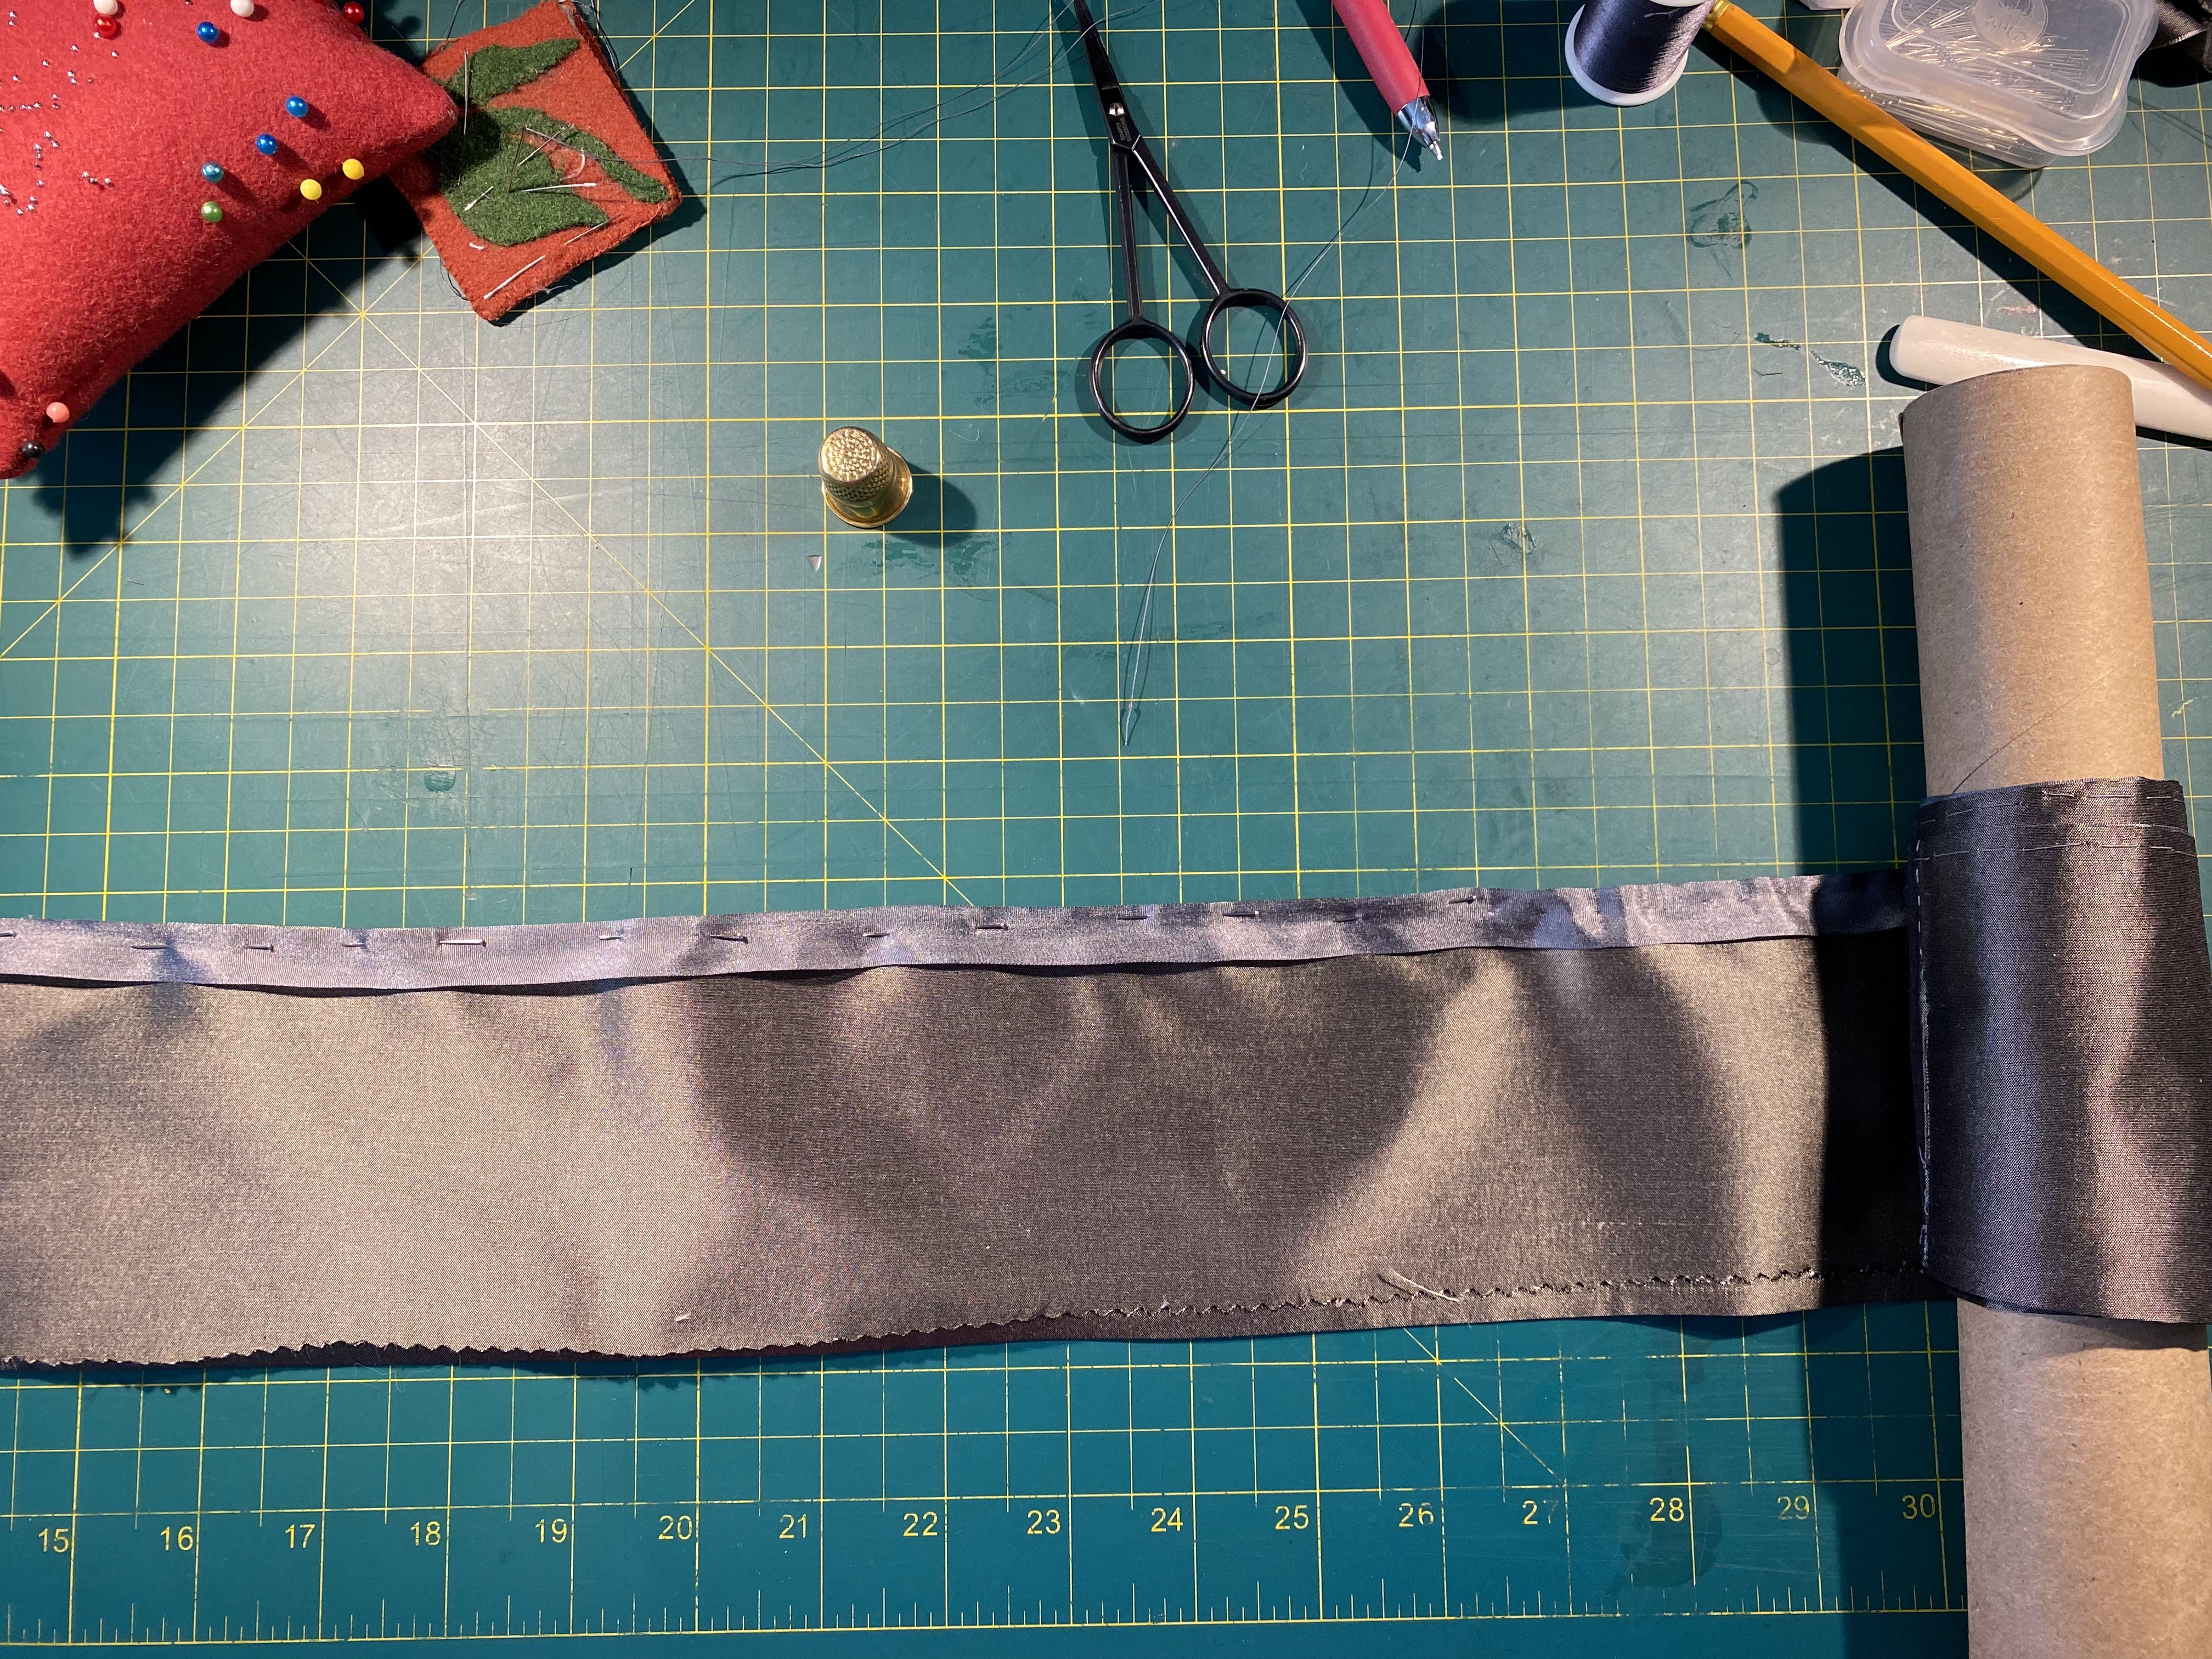
To manage the trim– there were yards and yards of it– I rolled it around empty toilet paper and paper towel tubes. Judge not, this made the wrangling easier. The ribbon was stitched on with silk thread using a running stitch, and the same stitch was used to attach it to the gown.

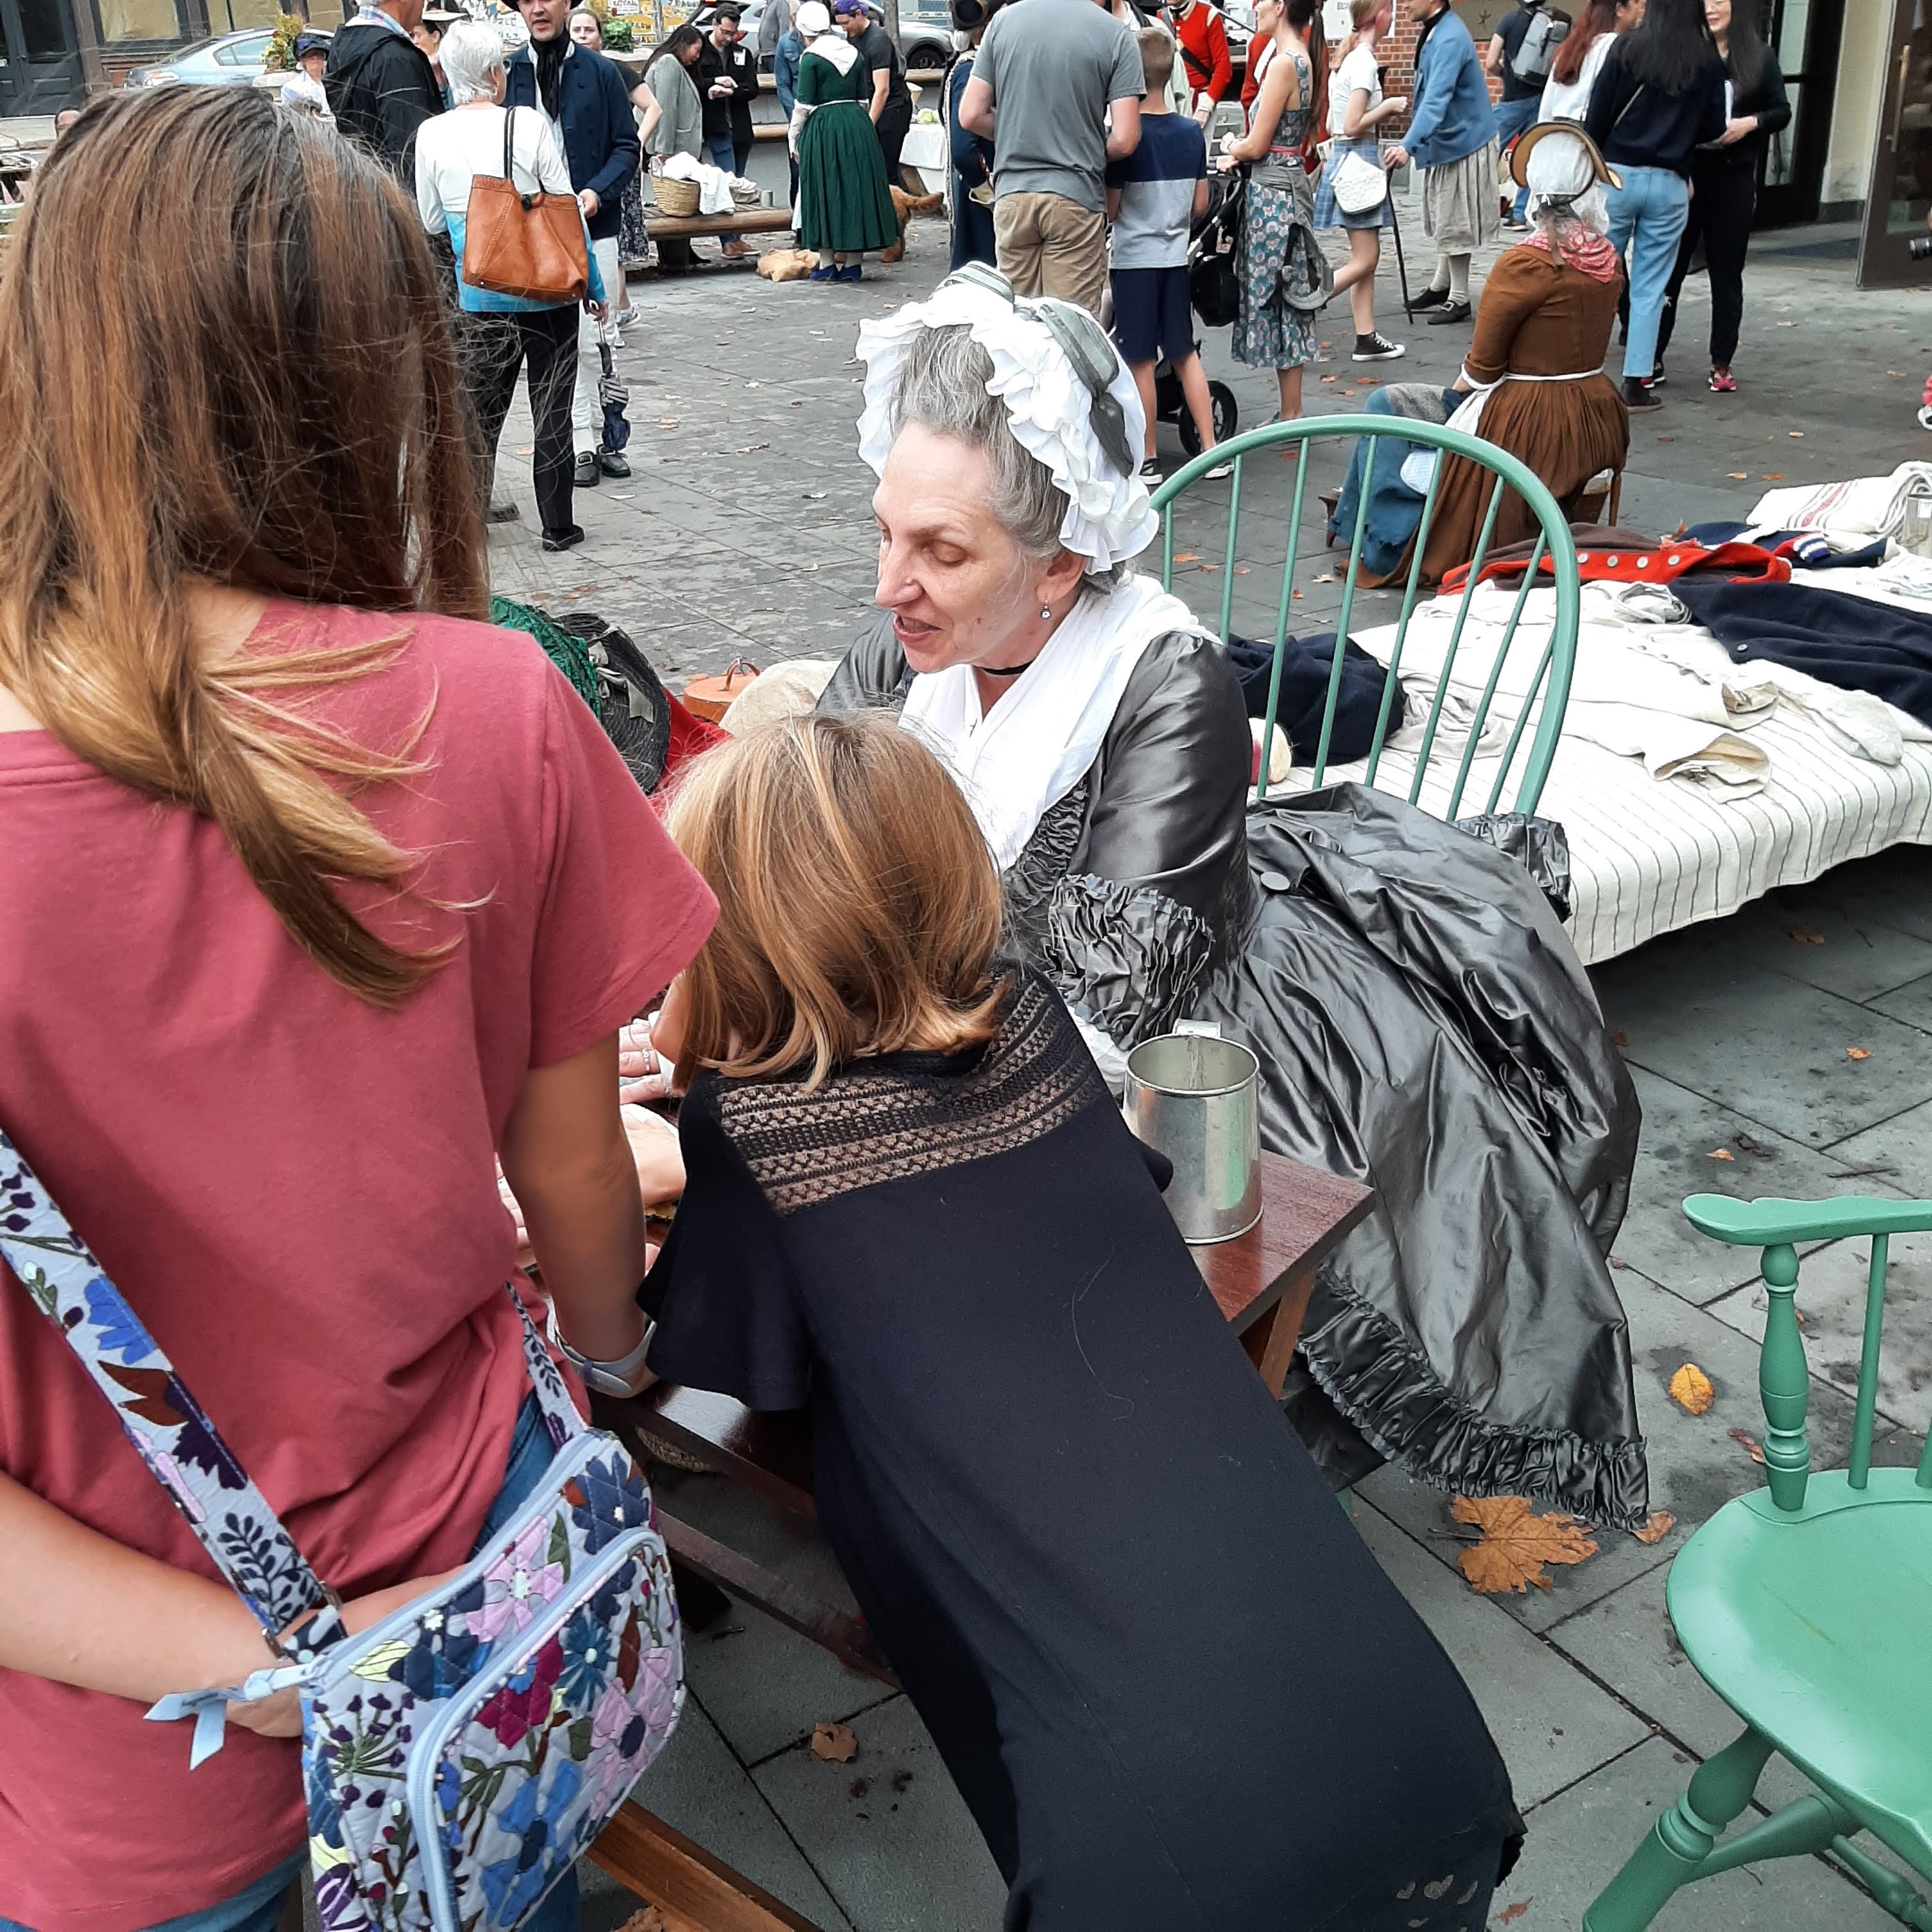
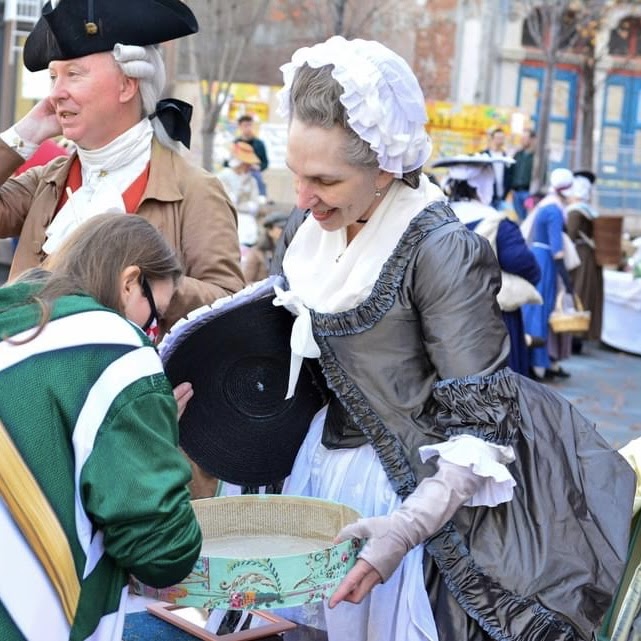
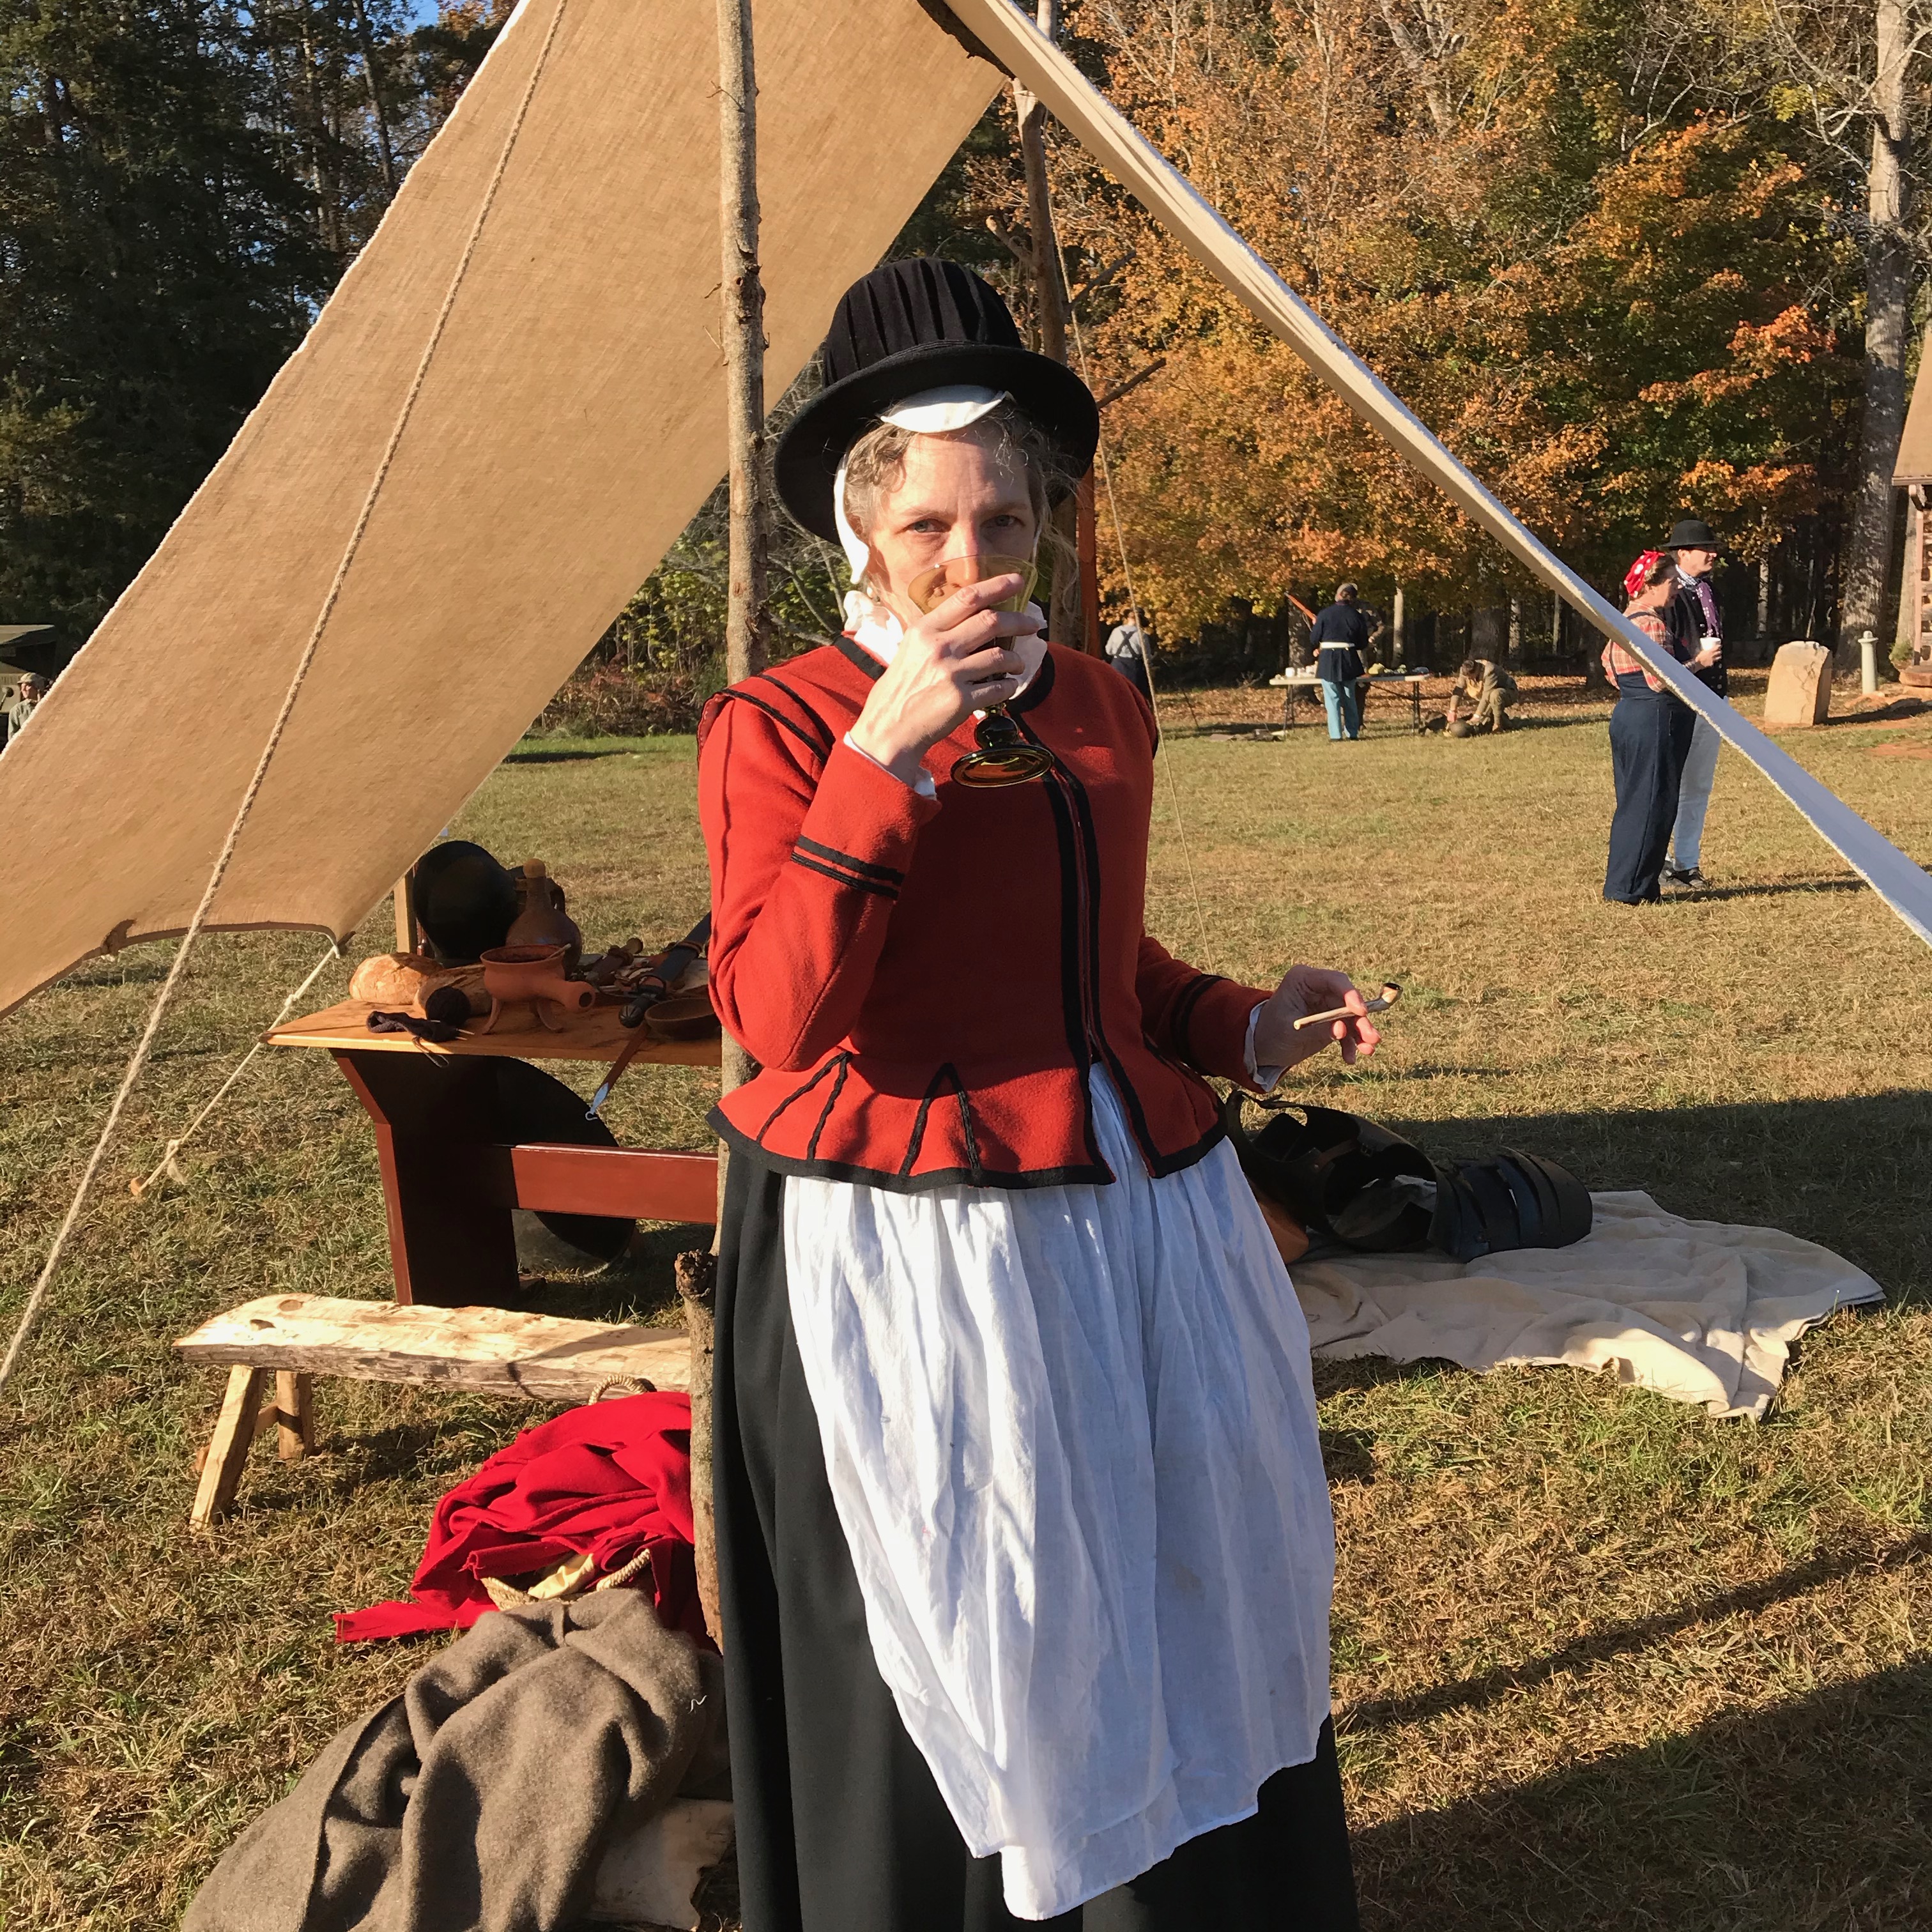
In the end, it’s probably not as complicated as I thought it was (though I am hesitating before I lay out and cut another one). It is certainly a fun and comfortable gown to wear, and I absolutely love it. It’s delightful to see the skirts behaving the way they’re portrayed in period art, puffing up and filling a chair, thanks both to the rump and the fullness of the skirts.

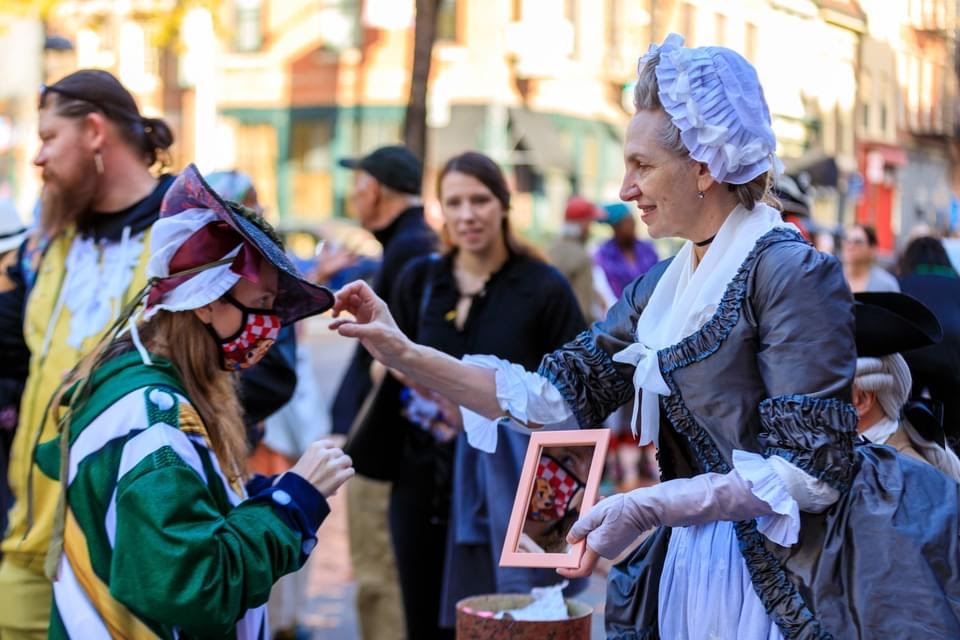
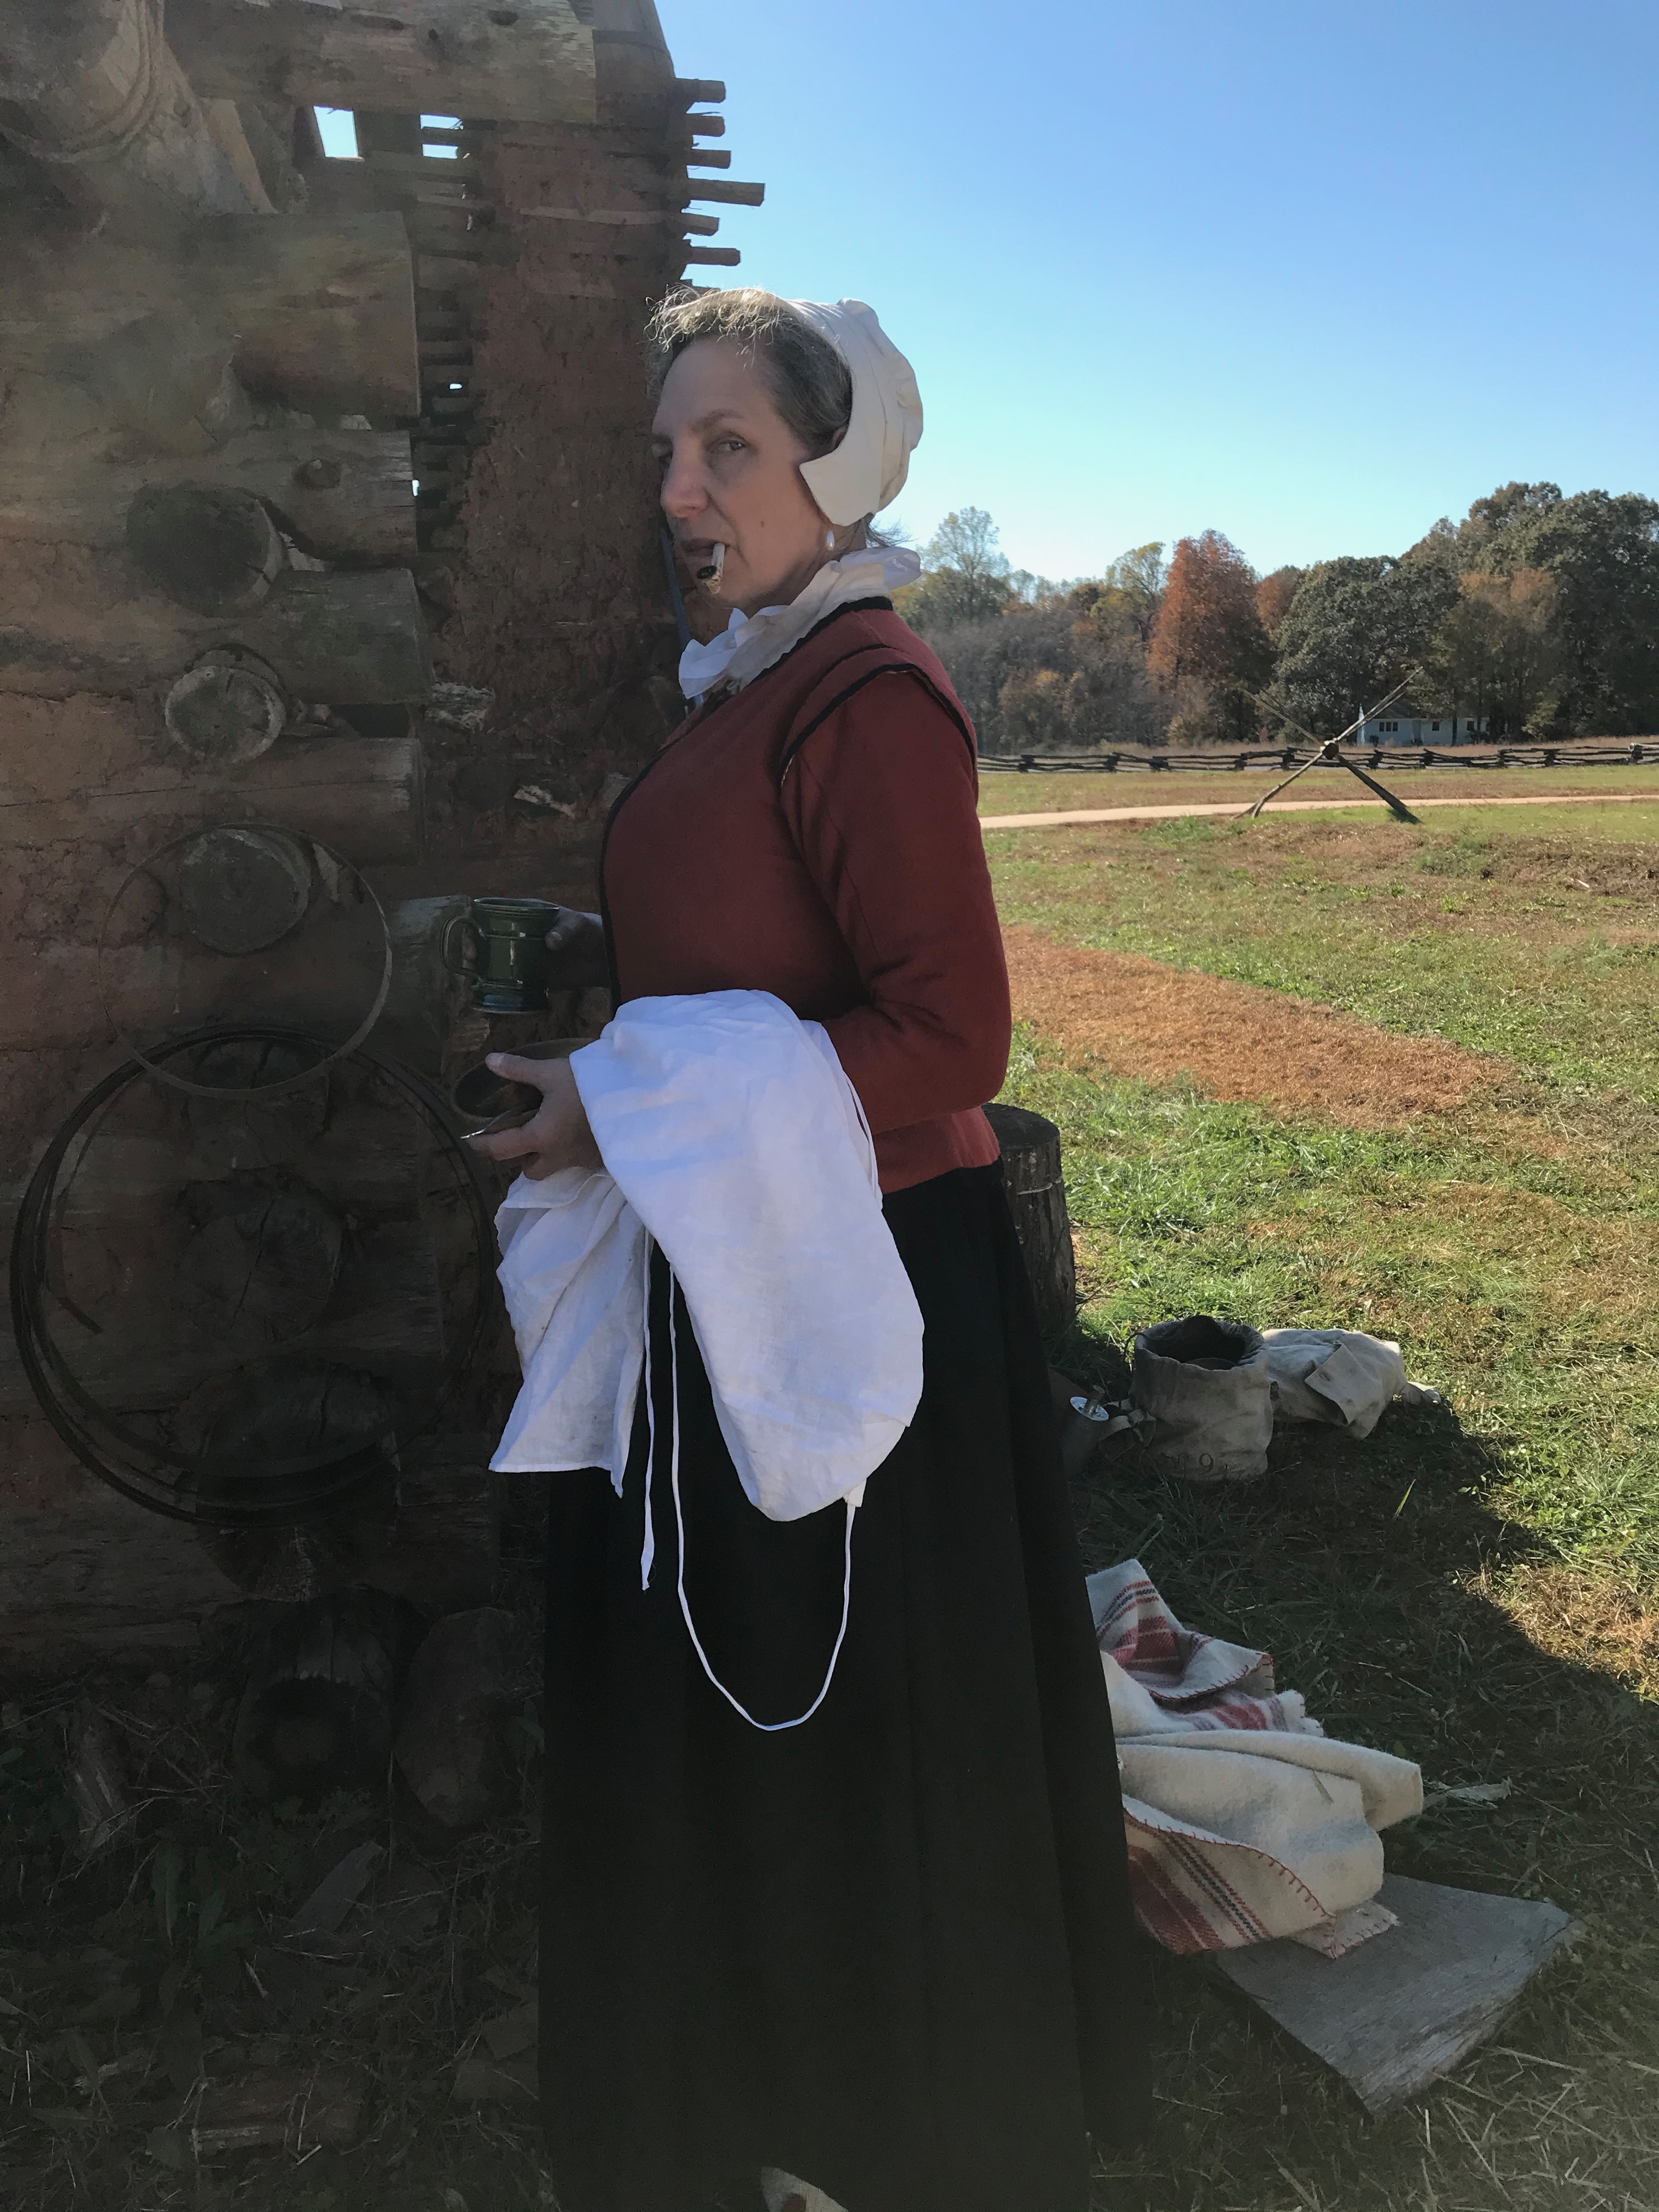
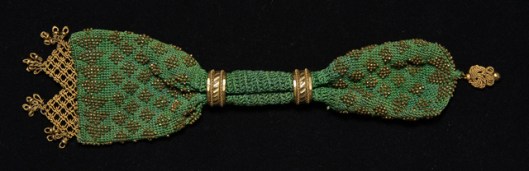
I accessorized the gown with a silk handkerchief, a cotton gauze cap, and silk mitts as well as the sprigged apron. The handkerchief is pinned closed with a fouled anchor stick pin, which, together with the cap trimming, emulate a Charles Willson Peale portrait at the Met. The hair is as high a roll as I can manage, over a homemade cushion, with hair extensions for fullness and buckles (side curls). High rolls and powdered hair were the very thing in 1777 Philadelphia, so I knew I had to manage it somehow. The Cadwaladers once purchased 12 pounds of hair powder from Ann Pearson’s sister Mary Symonds, so obviously, hair powder was required. While 12 pounds initially seemed excessive, by the time I’d done my hair twice, 12 pounds seemed like it could go pretty fast.

Bonnet UnBoxing

I’m really looking forward to recreating this (and to making a custom stand for it). It reminds me of the lovely brown bonnet sold by Augusta Auctions ten years ago. Poking around in fashion plates, I’d be comfortable putting a date range of 1825-1835 on this, with a likely date of ca. 1828. The two-part construction, the exuberance of the caned brim, and the color suggest to me that this is pre-1837 (when the effects of the economic crash can be seen almost immediately in smaller sleeves and tighter bonnets). Still, combing through fashion plates is never dull and I look forward to learning more in the year ahead.

Lost Colonist

I still have a copy (or two) somewhere in storage.

In which we experience a return to the costuming portion of this blog

When I was six, I had the coloring book paper dolls of Queen Elizabeth I and Henry VIII and His Wives. I probably requested (demanded) these after watching the BBC series The Six Wives of Henry VIII on Masterpiece Theatre. I recall being curling up in a chair under a quilt with my favorite stuffed dog as the drama played out on the television my grandmother had given us. Perhaps I had a fever: some of what I recall is a little hallucinatory, but I was thoroughly entranced. I have waited a long time to construct my own Tudor/Elizabethan wardrobe.

The annual Fort Dobbs Military TImeline event has recently featured a soldier of the second Roanoke expedition in his armor and helmet. In 2017, I thought hard about joining this enterprise and even bought wool for the effort–in fact, I got as far as cutting out a smock–but life intervened, and I taught workshops instead. This year, I had my chance: a free weekend, and just enough time (five weeks) to pull it all together. Reader: this is madness.

One source of inspiration: Color sketch of three London gentlewomen and a countrywoman come to market, from the manuscript Corte Beschryuinghe van Engheland, Schotland, ende Irland, c.1574. British Library

I flirted with long Tudor dresses. I flirted with a doublet. I knew that no matter what, I was building this on the foundation of a smock and kirtle (bodied petticoat) worn with stockings and shoes. Thanks to the Couture Courtesan and the Tudor Tailor, I knew bodies were not required for the class level and time period I was representing. (The fleshy cargo may have other needs, containment-wise). I knew I needed a partlet and ruff, and a coif, and I wanted a hat. All of this seemed achievable in five weeks. Mind you, in this same period, I also: started a business, started a short-term contract forensic collections management project, attended a workshop, draped and fitted clients, and dealt with a couple chronic health issues. It’s not a surprise, then, that I fell a little short of my goals.

Forthwith, the parts:

Smock

Two kinds of linen, and quite a different shape from an 18th century shift (though related)

I used the Elizabethan smock generator and, in 2017, pulled threads to get most of the shapes I needed. The very top of the smock is made of vintage linen that was lingering in Drunk Tailor’s stash, and I no longer recall where the body and sleeve linen came from. The instructions were just general enough that I was glad to have made several shifts and shirts already. It held up well, though Smock 2.0, should it occur, will likely be the one in the Tudor Tailor, just for varieties’ sake (and I now work with someone who does blackwork, so, you know, I could upgrade.)

Kirtle

The kirtle needs some additional engineering to accommodate my corporeal presence in a way I like and that holds a more correct shape. I used buckram, pad stitching, and boning on the front but not only is the fit just enough off, I think that front-lacing is the way to madness for me. Off the fronts will come at some point in 2020, to be replaced with a new system. I’m very happy with the salmon-pink wool I found at Osgood’s in 2017, and luckily bought enough to be able to re-engineer the bodice in the same fabric.

The comforts of the colony and home, combined.

I was reasonably pleased working with the Tudor Tailor pattern, but despite previously fitting bodices and stays, there are things I would do differently. For one, I’d mock up the bodice in pasteboard instead of muslin to get a better sense of how the buckram and boning might behave. For another, I’d solicit much more assistance from another human to ensure my “handedness” didn’t alter fit, as I think it may have. More time and tweaks will definitely help.

Petticoat

This is almost “don’t ask” territory. I borrowed the notion of making and wearing a separate petticoat from the late Elizabethan woman’s doublet entry in The Tudor Tailor. I had this notion of a doublet and petticoat in black that I couldn’t quite shake, but I did not manage the doublet. The petticoat is made of plain weave black wool from the remnant table at Fabric Place Basement and probably set me back all of $12.

Basic. Gets the job done.

Drunk Tailor and I kicked the notion of authenticity versus warmth back and forth quite a bit until I convinced him that he did not want to hear me complaining of cold in Statesville. The waistband is shaped, but because these skirts are longer than my 18th-century petticoats, my yardage calculations were slightly off, and the front waistband is plain weave brown wool. You’ll never see it, so it really doesn’t matter.

And yes: it was a two-petticoat weekend.

Waistcoat

Dat wool tho…. I bought a yard each of the olive and madder plush wool from Burnley and Trowbridge after falling in love with both color and hand. I started with the madder, knowing it would contrast well with black wool tape.

Cutting out was a challenge, but after looking at period manuals and spending some time with pieces and fabric, I managed a layout that got me all the pieces without piecing, and small bits of cabbage leftover: judiciously laid out, you can use $30/yard wool for your projects. The results justify the investment of money and time.

I had to tweak the fit on the muslin twice, and I think it would benefit from another round of fitting, as the back is a little looser than I care for. The front fits well enough, though the gap was smaller on the first day before the kirtle had stretched. The struggle is real when you are containing a curvaceous figure. Boning is likely the answer (or at least it is when your mind is tuned to 18th-century aesthetics and means).

At the 18th century winter cabin, with the ersatz ruff and repurposed apron. Needs must.

That Crazy Coif

Scaled up from the Tudor Tailor, I know this pattern needs to be scaled down for my tiny skull. Will I make another? I might try another shape instead, this being exceedingly fiddly. By Sunday, I was pinning the two pieces to each other and the whole to my hair (which is how I keep 18th century caps in place).

Accessories

The absolutely swoony hat is by M. Brenckle, Hatter. I don’t know that I have fully figured out how to wear it with my questionable coif and hair, but it is without a doubt the jauntiest-yet-sober item I’ve ever worn on my head. That will help inspire me to re-do the coif and figure out what to do with my hair.

This view of the theoretical jacket reminds me of Lautrec.

Standing in for a ruff and partlet is a 19th-century chemisette made ages ago by Mimic of Modes. Desperate times call for desperate measures: Drunk Tailor tried to order me one but the Etsy seller went to ground, and his own project needed finishing so he couldn’t take on a ruff. With thorough instructions readily available and vintage linen to hand, a ruff seems like an achievable item, in time. (Yes, he finally got a new version of the document-based Carolina jacket finished!)

A Very Short List of Sources and Inspiration

Arnold, Janet. 1984. Patterns of fashion.

Arnold, Janet. 2014. Patterns of fashion 3, 3. Patterns of Fashion.

Mikhaila, Ninya, and Jane Malcolm-Davies. 2015. The Tudor tailor: reconstructing 16th-century dress. Hollywood, Calif: Costume and Fashion Press.

Couture Courtesan: Late 16th-Early 17th Century Waistcoat

Wasted Weeds

Bag and Baggage

Shopping with a basket at Fort Fred. (photo by Denise Wolff)

The subject of carrying things at living history events never seems fully resolved. There were the fireworks I like to call Basketgate, and in the four years since, more women have been carrying frails than firm-sided baskets. But here’s the thing: baskets were not used as purses. They were used for shopping, and for babies (thanks, Ruth!), not for toting about one’s personal effects. That’s what pockets were, and remain, for.

Pocket, silk on linen, ca. 1780. Martha Elizabeth Spach (probably). MESDA 2400.

18th century women were not cursed with the tiny pockets of today’s fashionable jeans. No, they had voluminous pockets capable of holding a vast array of items: pocket journals, purses (like our wallets), game tokens, an orange, keys, and almost anything else you can think of. The pocket shown in the image is 15″ long by 11″ wide, which is a fairly typical size, though some were even larger. When I made these, I described them as “large enough for a puppy,” and Facebook wouldn’t let me post them. There is now a full-length book on The Pocket and I look forward to reading it next year, when my ILL will finally request it ($50 being too dear for my budget). In the meantime, the Victoria and Albert Museum will get you started if pockets are new to you.

So, baskets for shopping and pockets for personal things. What else might you use to convey something from one place to another?

Paul Sandby RA, 1731–1809, British, London Cries: A Man with a Bundle, Old Clothes, undated, Watercolor on medium, cream, slightly textured laid paper, Yale Center for British Art, Paul Mellon Collection

A wallet, of the kind reenactors call a “market wallet,” though that was not the period term. You can read about these in an article by Charles LeCount. The man in the watercolor has a very full wallet over his shoulder, demonstrating the larger end of the wallet spectrum.

And to carry your money in? A purse or pocketbook, sometimes in leather, sometimes in flame stitch, and sometimes in silk.

Which one you choose depends on who you portray, and where. Silk wallets or pocketbooks belong to a particular class and the ones in museum collections are often from France. Flamestitch wallets are reasonably common in North America among people with the time to make them. The really neat thing about these is that the patterns show regional differences, so you can tailor your choice to your place. (I lack the patience, skill, or time to really make headway on mine, but in addition to a wonderful custom pattern, I found kits here.) I have a leather one I love, made by this fellow craftsperson and friend.

Miser’s purse, early 1800s, maker unknown. Purchased 2002. CC BY-NC-ND 4.0. Te Papa (GH009865)

Your coins? A purse. (we call these miser’s purses, though long purse or ring purse might also be used. The forms originates in the 17th century, and although it is most popular in the 19th century, it does appear in the 18th century. It’s just not common, so no, not everyone should have one. A simple bag will do for those with coins they wish to keep wrangled.

Servant Returning from the Market, 1739, Jean-Baptiste-Simeon Chardin. Louvre Museum,
MI 720

A bag, a pillow case, or even a tied cloth, as seen in the painting by Chardin.

There are lots of options for carrying chattel, lumber, and personal items, and most leave your hands free. But for women, the first place to start is tie-on pockets, and for men, the pockets in your coat. After all, the pocket bags in a typical Henry Cooke frock coat will hold a six pack between them. 

If you like this content, please consider supporting me by making a pledge to my Kickstarter.